How to Build Concrete Tilapia Ponds: Step-by-Step Guide
Posted on: 2025-11-16
By: Yomi Adisa
Table of Contents
You've built your tilapia ponds, stocked them with healthy fingerlings, and started feeding regularly—yet your fish keep dying unexpectedly. The water looks clear, the fish seemed fine yesterday, but this morning you're pulling dead tilapia from the surface. This heartbreaking scenario plays out on farms across Africa, often leaving farmers confused and financially devastated.
Disease outbreaks can wipe out entire tilapia stocks within days, whether you're raising Nile tilapia or Blue tilapia. Many farmers only recognise problems when fish start dying, but by then it's often too late. Understanding how to prevent, identify, and treat common tilapia diseases is essential for protecting your investment and ensuring consistent harvests.
This comprehensive guide will teach you to recognise the early warning signs of disease, implement prevention strategies that keep your fish healthy, and respond quickly when problems arise. You'll learn about the most common diseases affecting tilapia in African farming conditions and discover practical treatment methods that actually work in small-scale operations.
🎯 What You'll Learn
- How to select the ideal site for constructing concrete tilapia ponds.
- Step-by-step construction techniques to ensure durability and efficiency.
- Effective water quality management practices to maintain healthy tilapia stocks.
Planning and Site Selection for Concrete Tilapia Ponds
You can build the most perfectly constructed concrete pond, but if you choose the wrong location, your tilapia will struggle to thrive. Site selection determines everything from water temperature stability to construction costs, and mistakes here cost thousands of shillings to fix later. Many farmers rush into construction without proper planning, only to discover their chosen spot floods during rains or lacks adequate sunlight for optimal fish growth.
Concrete ponds require more careful site preparation than earthen ponds because you cannot easily relocate them once built. Unlike earthen ponds that work with natural contours, concrete structures need level ground, proper drainage, and stable soil conditions. The investment in concrete—typically KES 150,000-300,000 for a 10m x 5m pond—demands thorough planning to ensure long-term success.
Proper site selection involves three critical assessments: evaluating your land and soil quality, choosing optimal positioning for sunlight and drainage, and understanding local climate patterns. Each factor directly impacts your tilapia's health, growth rates, and your operational costs throughout the pond's lifetime.
Assessing Land Availability and Soil Quality
You need at least 100 square metres of accessible land for a productive tilapia operation, allowing space for the pond, walkways, and equipment storage. Measure your available area carefully—a 10m x 5m pond requires additional 3-4 metres on all sides for construction access and maintenance. If you're planning multiple ponds, allow 2 metres between structures for netting and harvesting equipment.
Soil testing reveals whether your ground can support a concrete structure without shifting or cracking. Clay soils found across Nigeria and Uganda provide excellent stability for concrete ponds, whilst sandy soils may require additional foundation work. You can test soil composition yourself by digging a 1-metre test hole and examining the layers, or send samples to agricultural extension offices in major cities like Nairobi or Accra for professional analysis costing around KES 2,000-5,000.
Check soil pH using a simple testing kit from agricultural suppliers—ideal levels range between 6.5-8.5 for tilapia farming. Acidic soils below pH 6.0 may leach harmful compounds into your water, whilst highly alkaline soils above pH 9.0 can cause concrete deterioration over time. Nile tilapia (Oreochromis niloticus) are particularly sensitive to pH fluctuations, so stable soil conditions prevent long-term water quality problems.
Choosing the Right Location for Optimal Sunlight and Drainage
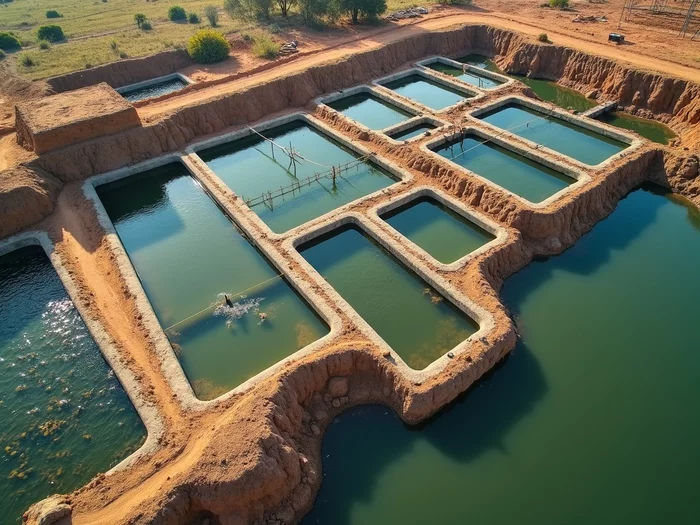
Position your concrete pond to receive 6-8 hours of direct sunlight daily, as sunlight drives photosynthesis in beneficial algae and maintains stable water temperatures. Orient the longer sides of rectangular ponds north-south to maximise sun exposure throughout the day. Avoid areas shaded by buildings, large trees, or hills, especially during morning hours when sunlight helps warm water after cool nights.
Drainage becomes critical during heavy rains common across East Africa—you need natural slope away from your pond to prevent flooding and contamination. Choose elevated ground at least 1 metre above surrounding areas, ensuring surface water flows away from your structure. In regions like Uganda where annual rainfall exceeds 1,200mm, poor drainage can flood ponds and stress fish through rapid temperature and pH changes.
Locate your pond within 50 metres of a reliable water source for easy filling and regular water changes. Borehole water works excellently in arid regions like northern Kenya, whilst river access suits farmers in areas with clean flowing water. Blue tilapia (Oreochromis aureus) tolerate varying water conditions better than Nile tilapia, but both species perform best with consistent, clean water supplies.
Understanding Local Climate and Water Source Considerations
Research your area's temperature patterns because tilapia growth rates depend heavily on consistent warmth—optimal range is 25-32°C for both Nile and Blue tilapia. In highland areas above 1,500 metres elevation, like parts of Kenya and Ethiopia, you may need greenhouse covers or deeper ponds to maintain adequate temperatures year-round. Monitor seasonal temperature variations using a simple thermometer for at least one month before construction.
Test your intended water source for contaminants, pH levels, and mineral content that could harm fish or affect concrete durability. Well water in coastal areas may contain high salt levels unsuitable for freshwater tilapia, whilst river water might carry agricultural runoff with harmful chemicals. Contact local water testing laboratories—most charge KES 3,000-8,000 for comprehensive analysis including pH, dissolved oxygen, ammonia, and heavy metals.
Plan for seasonal water availability, especially in semi-arid regions where water sources may reduce during dry seasons. Calculate your pond's water requirements—a 50 cubic metre pond needs approximately 5-10% water replacement weekly, totalling 2,500-5,000 litres per week. Nile tilapia require more stable conditions than Blue tilapia, so reliable water access becomes even more critical for this popular species across African farms.
Step-by-Step Construction of Concrete Tilapia Ponds
You've selected the perfect site and tested your soil—now comes the critical construction phase that determines whether your tilapia pond succeeds or fails. Poor construction techniques cause 60% of concrete pond failures within the first two years, leading to costly repairs and fish losses that devastate farm budgets. Many farmers rush through construction to save time, only to discover cracks, leaks, and structural problems that require complete rebuilding.
Concrete pond construction requires precise techniques and quality materials to create a durable structure that lasts 15-20 years. Unlike earthen ponds that can be modified easily, concrete mistakes become permanent and expensive to fix. The construction process involves four critical stages: proper excavation and site preparation, professional-grade formwork and concrete pouring, installing efficient drainage systems, and applying waterproofing treatments that prevent leaks.
Each construction step directly impacts your tilapia's health and growth rates. Rough surfaces injure fish and harbour harmful bacteria, whilst poor drainage creates stagnant areas that reduce oxygen levels. Following proven construction methods ensures your Nile tilapia and Blue tilapia thrive in a stable, healthy environment that maximises your investment returns.
Site Preparation and Excavation Techniques
Clear all vegetation, rocks, and debris from your construction area, extending 3 metres beyond your planned pond dimensions for equipment access and material storage. Remove tree roots completely—even small roots left in soil can grow and crack concrete foundations years later. Mark your pond outline using wooden stakes and string, double-checking measurements because excavation mistakes cost thousands of shillings to correct.
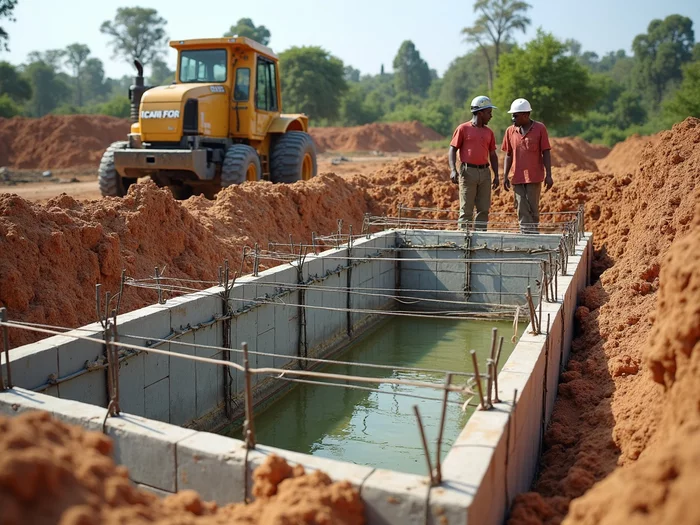
Excavate to 2.2 metres depth for a finished pond depth of 1.8-2.0 metres, allowing 20cm for concrete base and gravel foundation. Create sloped sides at a 1:3 ratio (1 metre horizontal for every 3 metres vertical) to prevent soil collapse and facilitate fish movement. In clay soils common across Uganda and Nigeria, you can achieve steeper slopes, whilst sandy soils require gentler gradients for stability.
Level the pond bottom using a spirit level and wooden boards, ensuring proper drainage towards your outlet point. Compact the excavated base using a hand tamper or mechanical compactor, creating a firm foundation that prevents settling. Install a 10cm layer of graded gravel as drainage base—this prevents groundwater pressure from cracking your concrete floor during wet seasons experienced across East Africa.
💡 Pro Tip: Excavation Cost Savings
Hire local excavation teams during dry seasons when labour costs drop 30-40%. In Tanzania and Kenya, community groups often provide excavation services at KES 500-800 per cubic metre, significantly cheaper than machine hire at KES 1,500-2,500 per cubic metre.
Formwork and Concrete Pouring Methods
Construct formwork using 25mm thick timber boards or steel panels, ensuring they're perfectly vertical and properly braced to withstand concrete pressure. Build formwork 10cm higher than your planned wall height to allow for concrete settling and finishing. Use high-quality timber like eucalyptus or pine available in Ghana and Zambia—poor formwork creates uneven surfaces that stress tilapia and harbour disease-causing bacteria.
Mix concrete using a 1:2:4 ratio (1 part cement, 2 parts sand, 4 parts gravel) with clean water—never use salty or contaminated water that weakens concrete strength. Pour concrete in continuous sections to avoid cold joints that create weak points and potential leaks. Work quickly but carefully, using vibrators or rods to eliminate air pockets that reduce concrete strength by up to 25%.
Cure concrete for minimum 28 days before removing formwork, covering with wet sacking or plastic sheeting to retain moisture. In hot climates like northern Kenya and Egypt, spray concrete surfaces twice daily to prevent rapid drying that causes cracks. Proper curing increases concrete strength by 50% compared to poorly cured structures, ensuring your pond withstands years of water pressure and temperature changes.
Installing Drainage and Water Management Systems
Install inlet pipes at the shallow end and outlet pipes at the deepest point to create efficient water flow that carries waste away from feeding areas. Use 100mm diameter PVC pipes for main inlets and outlets, positioning them 15cm above the pond bottom to prevent sediment blockage. Install gate valves on all pipes to control water flow during cleaning and harvesting operations.
Create a bottom drain system using perforated pipes covered with gravel, allowing you to remove settled waste without emptying the entire pond. Position drainage pipes in a herringbone pattern across the pond floor, connecting to a central collection point near your main outlet. This system proves essential in intensive tilapia farming where waste accumulation can quickly degrade water quality.
Install overflow pipes 5cm below your desired water level to prevent flooding during heavy rains common across tropical Africa. Connect overflow systems to existing drainage or construct settling ponds to treat discharged water before it enters natural waterways. Blue tilapia tolerate water level fluctuations better than Nile tilapia, but both species benefit from stable water management systems that maintain consistent conditions.
Waterproofing and Finishing Touches
Apply waterproofing sealant designed for aquaculture use, avoiding products containing toxic chemicals that harm fish. Use cement-based waterproofing compounds available from suppliers in major cities like Nairobi and Accra, applying two coats with 24-hour drying time between applications. Test waterproofing by filling a small section and checking for leaks before completing the entire pond surface.
Smooth all concrete surfaces using steel trowels, eliminating sharp edges and rough patches that injure tilapia during normal swimming behaviour. Round all corners with a 10cm radius to prevent fish from getting trapped and to facilitate cleaning operations. Create non-slip walkways around pond edges using textured concrete or anti-slip strips for safe access during feeding and maintenance.
Install access ladders or steps at one end of the pond for maintenance and emergency fish rescue operations. Build equipment storage areas adjacent to your pond for nets, feeding equipment, and water testing supplies. Allow concrete to cure completely and rinse thoroughly before introducing water—residual lime in fresh concrete can raise pH levels above 9.0, which stresses both Nile and Blue tilapia species significantly.
Designing Efficient Pond Systems
You've completed the basic construction, but your pond's design determines whether your tilapia thrive or merely survive. Poor system design causes 40% of production failures in concrete ponds, leading to stunted growth, disease outbreaks, and disappointing harvests that crush farming dreams. Many farmers focus solely on construction quality whilst ignoring critical design elements like water circulation, aeration, and filtration that directly impact fish health and growth rates.
Efficient pond systems create optimal environments where Nile tilapia and Blue tilapia can reach market size quickly and consistently. Unlike earthen ponds that rely on natural processes, concrete systems require engineered solutions for water movement, oxygen supply, and waste removal. The right design maximises your stocking density whilst maintaining excellent water quality, dramatically increasing your profit per square metre of pond space.
System design involves three key decisions that affect your operation's success: choosing the optimal pond shape for your space and management style, installing appropriate aeration systems that maintain healthy oxygen levels, and implementing effective filtration methods that keep water clean. Each choice impacts your daily workload, operational costs, and ultimately your tilapia's performance and profitability.
Choosing Between Circular and Rectangular Pond Shapes
Rectangular ponds offer superior management advantages for most African tilapia farmers, providing easier access for feeding, netting, and harvesting operations. You can walk along straight edges to distribute feed evenly and use seine nets effectively during harvest time. Rectangular designs also maximise space utilisation in limited areas—a 10m x 5m rectangular pond provides 50 square metres of growing space, whilst a circular pond with equivalent area requires more total land due to access requirements around the perimeter.
Circular ponds create better water circulation patterns that prevent dead zones where waste accumulates and oxygen levels drop. The curved walls encourage continuous water movement that distributes nutrients evenly and reduces disease-causing bacteria buildup. However, circular construction costs 20-30% more than rectangular designs due to complex formwork requirements, making them less suitable for farmers with limited budgets in countries like Uganda and Tanzania.
Consider your management style when choosing pond shape—if you plan intensive feeding and frequent harvesting, rectangular ponds suit your needs better. For extensive systems with lower stocking densities, circular ponds may justify their higher construction costs through improved water quality. Nile tilapia adapt well to either shape, whilst Blue tilapia show slightly better growth rates in circular ponds due to their preference for well-circulated water.
Setting Up Aeration Systems: DIY and Solar Options
Install aeration systems before stocking fish because oxygen levels determine your maximum stocking density and growth rates. Aim for dissolved oxygen levels above 5 mg/L throughout your pond—insufficient oxygen stunts growth and increases disease susceptibility in both Nile and Blue tilapia. A simple venturi system using your water pump can provide adequate aeration for ponds up to 100 square metres, costing only KES 5,000-8,000 for materials available in Nairobi and Kampala.
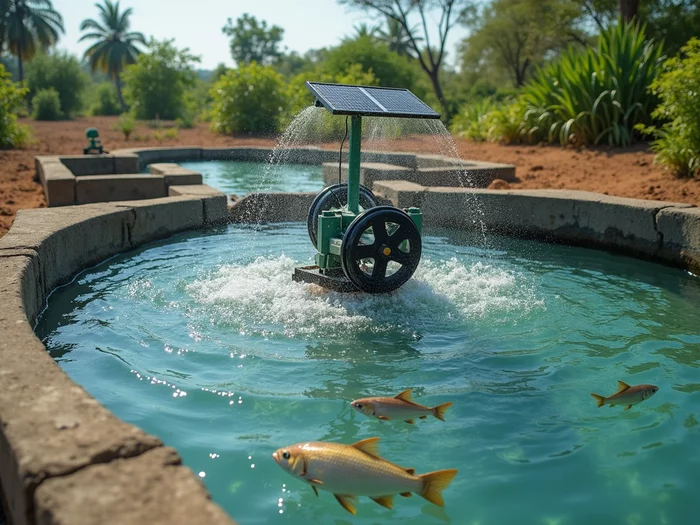
Solar-powered paddle wheel aerators offer excellent solutions for areas with unreliable electricity supply, common across rural Africa. These systems cost KES 25,000-45,000 initially but eliminate ongoing electricity costs whilst providing consistent aeration during daylight hours when fish are most active. Position paddle wheels at pond corners to create circular water flow patterns that distribute oxygen evenly and prevent stagnant areas where harmful gases accumulate.
Build DIY diffuser systems using perforated PVC pipes connected to small air pumps powered by solar panels or car batteries. Place diffusers 30cm above the pond bottom to create gentle bubbling that doesn't disturb fish but maintains oxygen levels effectively. In Ghana and Nigeria, farmers successfully use motorcycle inner tubes with small holes as affordable diffusers, costing under KES 2,000 per system whilst providing adequate aeration for 25-30 square metre ponds.
💡 Pro Tip: Solar Aeration Timing
Run solar aerators during peak sunlight hours (10am-4pm) when photosynthesis by algae consumes oxygen. This prevents dangerous oxygen depletion that kills tilapia during hot afternoons, especially critical in equatorial regions like Kenya and Uganda.
Effective Filtration Techniques for Clean Water
Implement biological filtration using beneficial bacteria that convert harmful ammonia from fish waste into less toxic compounds. Create biofilter chambers using plastic media or gravel beds where beneficial bacteria colonise and process waste continuously. Position biofilters so water flows through them before returning to your main pond, ensuring all water receives treatment. A biofilter sized at 10-15% of your pond volume handles waste from normal stocking densities of 2-3 fish per square metre.
Mechanical filtration removes solid waste particles before they decompose and pollute your water. Install simple settling tanks where water flows slowly, allowing heavy particles to sink whilst clean water overflows back to your pond. Use locally available materials like concrete rings or large plastic drums to create settling chambers costing KES 3,000-6,000. Clean settling tanks weekly by removing accumulated sludge, which makes excellent fertiliser for vegetable gardens.
Natural filtration using aquatic plants provides cost-effective water treatment whilst producing additional income from vegetable sales. Plant water spinach (kangkung) or water lettuce in shallow areas or separate growing beds connected to your pond system. These plants absorb nutrients from fish waste, preventing algae blooms whilst growing rapidly in Africa's warm climate. Harvest vegetables weekly for family consumption or local market sales, generating KES 2,000-5,000 monthly additional income from a well-managed system.
Water Quality Management in Concrete Ponds
You can build the perfect concrete pond and stock it with healthy fingerlings, but poor water quality will kill your tilapia faster than any disease. Water quality problems cause 70% of fish deaths in concrete pond systems, often developing gradually until sudden crashes wipe out entire stocks overnight. Many farmers only test water after fish start dying, but by then the damage is irreversible and expensive restocking becomes necessary.
Concrete ponds require more active water management than earthen ponds because they lack natural buffering systems found in soil-based environments. Without proper monitoring and treatment, pH swings, ammonia buildup, and oxygen depletion can stress fish and trigger disease outbreaks that devastate your investment. Successful tilapia farmers test water weekly and maintain optimal conditions that promote rapid growth and prevent health problems.
Effective water management involves understanding traditional and modern treatment methods, monitoring key parameters that affect fish health, and recognising common problems before they become critical. Mastering these skills protects your investment and ensures consistent harvests that generate reliable income from your tilapia farming operation.
Traditional vs. Chemical Water Treatment Methods
Agricultural lime provides the most cost-effective treatment for pH problems common in concrete ponds, especially when using borehole water with low alkalinity. Apply 100-200 kg of lime per hectare to raise pH gradually—never add more than 50 kg at once to avoid shocking your fish. Lime costs KES 15-25 per kg across East Africa and also provides calcium that strengthens tilapia bones and improves growth rates. Test pH 24 hours after lime application to ensure levels remain between 7.0-8.5 for optimal fish health.
Salt treatments effectively control external parasites and bacterial infections without expensive medications unavailable in rural areas. Use non-iodised cooking salt at 1-3 kg per 1,000 litres for short-term treatments lasting 10-15 minutes, or 0.1-0.3% salt concentration for longer bath treatments. Salt costs KES 80-120 per kg but treats multiple fish health problems safely when used correctly. Both Nile and Blue tilapia tolerate salt treatments well, though reduce concentrations by half for fingerlings under 50 grams.
Chemical treatments like copper sulphate and potassium permanganate provide powerful solutions for severe algae blooms and disease outbreaks, but require precise dosing to avoid fish kills. Use copper sulphate at 0.5-1.0 mg/L to control algae, testing water hardness first because soft water increases toxicity risks. Purchase chemicals only from reputable aquaculture suppliers in major cities like Nairobi or Accra, as agricultural-grade products may contain harmful impurities that poison fish.
Monitoring Water Quality Parameters for Healthy Fish
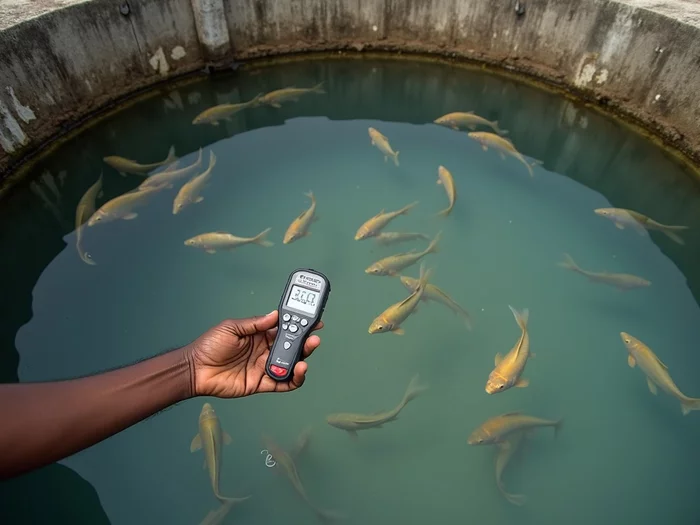
Test pH weekly using simple test strips costing KES 200-500 for 50 tests, maintaining levels between 6.5-8.5 for optimal tilapia health. pH below 6.0 stresses fish and reduces feeding activity, whilst levels above 9.0 can cause gill damage and death. Record pH readings in a logbook to identify patterns—concrete ponds often show pH increases during sunny days due to algae photosynthesis, requiring lime additions to maintain stability.
Monitor dissolved oxygen levels daily during hot weather using electronic metres (KES 8,000-15,000) or chemical test kits (KES 1,500-3,000). Maintain oxygen above 5 mg/L at all times—levels below 3 mg/L cause fish to gasp at the surface and stop feeding. Check oxygen early morning when levels are lowest, especially during cloudy weather when algae consume oxygen instead of producing it through photosynthesis.
Test ammonia levels weekly because fish waste produces toxic ammonia that accumulates in concrete ponds without soil bacteria to process it naturally. Use ammonia test kits costing KES 800-1,500 to maintain levels below 0.02 mg/L—higher concentrations damage fish gills and increase disease susceptibility. Nile tilapia show ammonia stress by swimming erratically and refusing food, whilst Blue tilapia tolerate slightly higher levels but still suffer reduced growth rates.
Common Water Issues and Their Solutions
Algae blooms turn water green and create dangerous oxygen swings that stress tilapia, especially common during hot weather with excessive feeding. Reduce feeding by 50% immediately when algae appears, and increase water exchange to 20-30% daily until water clears. Install shade cloth over 30-40% of pond surface to reduce sunlight that fuels algae growth, or plant trees on the south side of ponds to provide natural shading during peak sun hours.
Low oxygen emergencies require immediate action to prevent fish kills—increase aeration, reduce feeding to zero, and exchange 25-50% of pond water with fresh, well-oxygenated water. Emergency aeration using buckets to splash water or portable pumps can save fish during power outages common across Africa. Keep backup aeration equipment ready, especially during hot seasons when oxygen problems develop rapidly in concrete ponds.
pH crashes below 6.0 often occur during heavy rains that dilute pond water, causing fish to become lethargic and stop feeding. Add agricultural lime gradually at 20-30 kg per 1,000 cubic metres of water, testing pH every 6 hours until levels stabilise above 7.0. Prevent pH crashes by covering ponds partially during rainy seasons or installing gutters to divert rainwater away from pond surfaces, especially important in high-rainfall areas like Uganda and western Kenya.
⚠️ Warning: Chemical Treatment Overdose
Never exceed recommended chemical dosages—overdosing copper sulphate or potassium permanganate kills fish faster than the problems you're trying to solve. Always calculate pond volume accurately and measure chemicals precisely using scales, not estimates.
Maintenance and Management of Concrete Tilapia Ponds
You've invested thousands of shillings building your concrete tilapia pond, but without proper maintenance, even the best construction deteriorates rapidly and becomes a financial disaster. Poor maintenance causes 50% of concrete pond failures within five years, leading to expensive repairs that often cost more than original construction. Many farmers neglect routine upkeep until major problems develop, then face emergency repairs during critical growing seasons when fish are most vulnerable.
Concrete ponds require systematic maintenance to preserve structural integrity and create optimal growing conditions for your tilapia. Unlike earthen ponds that self-regulate through natural processes, concrete systems depend entirely on your management skills to maintain water quality, prevent disease outbreaks, and ensure consistent production. Regular maintenance protects your investment whilst maximising fish growth rates and survival percentages that determine your profitability.
Successful pond management involves four critical areas: establishing routine maintenance schedules that prevent problems before they develop, implementing biosecurity measures that protect fish health, mastering breeding techniques that provide continuous fingerling supplies, and understanding scaling strategies that grow your operation profitably. Each aspect requires specific knowledge and consistent application to achieve long-term success.
Routine Maintenance Tasks for Longevity
Inspect pond walls monthly for cracks, chips, or signs of deterioration that allow water seepage and weaken structural integrity. Small cracks under 2mm wide can be sealed using waterproof cement paste, whilst larger damage requires professional repair to prevent complete wall failure. Check corners and joints particularly carefully, as these areas experience the most stress and often show the first signs of problems that could cost KES 50,000-100,000 to repair if ignored.
Clean pond surfaces every three months by draining water to 30cm depth and scrubbing walls with stiff brushes to remove algae buildup and organic matter. Use diluted bleach solution (1:10 ratio) to disinfect surfaces, then rinse thoroughly before refilling. This cleaning prevents harmful bacteria accumulation and maintains smooth surfaces that don't injure fish during normal swimming behaviour. Schedule cleaning during cooler months to reduce stress on your tilapia stock.
Maintain drainage and filtration systems by clearing blocked pipes, cleaning settling tanks, and replacing worn components before they fail completely. Check valve operations monthly and lubricate moving parts using food-grade lubricants safe for aquaculture use. Replace PVC pipes every 5-7 years or when cracks appear, as pipe failures can drain entire ponds overnight and kill fish through rapid environmental changes. Keep spare pipes, valves, and fittings available for emergency repairs.
Disease Prevention Strategies and Biosecurity Measures
Quarantine all new fish in separate holding tanks for 14 days before introducing them to your main pond, preventing disease transmission that can wipe out established stocks. Use plastic tanks or small concrete pools for quarantine, treating new arrivals with salt baths (3% solution for 10 minutes) to eliminate external parasites. This simple precaution prevents disease outbreaks that cost Kenyan farmers an average of KES 75,000 per incident in lost fish and treatment expenses.
Disinfect all equipment including nets, buckets, and feeding tools between pond visits using diluted bleach or potassium permanganate solutions. Never share equipment between sick and healthy fish without proper disinfection, as this spreads diseases rapidly through your operation. Maintain separate equipment sets for different ponds when possible, especially if you're raising both Nile and Blue tilapia species that may carry different pathogens.
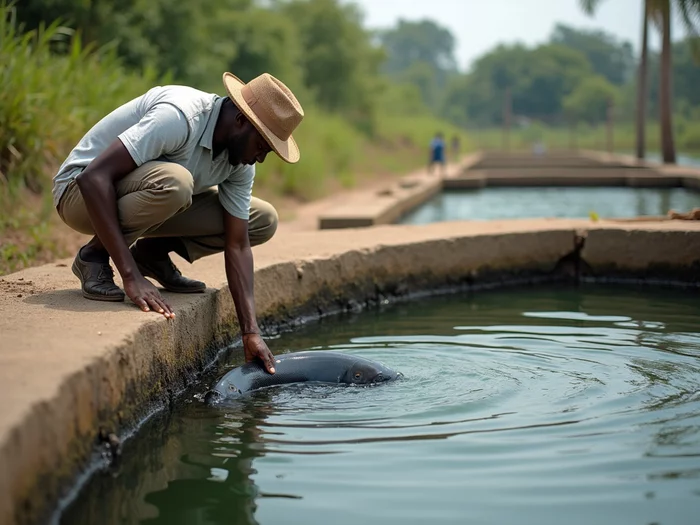
Monitor fish behaviour daily during feeding times, watching for signs of disease like erratic swimming, loss of appetite, or visible lesions on skin and fins. Healthy tilapia feed aggressively and swim actively throughout the pond, whilst sick fish often isolate themselves in corners or near the surface. Remove dead fish immediately and dispose of them away from water sources to prevent bacterial contamination that affects surviving fish and neighbouring farms.
Breeding and Spawning Techniques in Concrete Systems
Select breeding stock from your fastest-growing fish, choosing males and females in 3:1 ratios for optimal spawning success in concrete ponds. Nile tilapia reach sexual maturity at 4-6 months when they weigh 100-150 grams, whilst Blue tilapia mature slightly later at 6-8 months. Maintain breeding stock in separate ponds with water temperatures between 28-30°C and provide shallow areas with sandy bottoms where females can construct nests for spawning.
Create spawning substrates using clay pots, concrete blocks, or shallow depressions in pond corners where breeding pairs can establish territories. Female tilapia carry fertilised eggs in their mouths for 10-14 days before releasing free-swimming fry, requiring calm water conditions during this critical period. Avoid disturbing breeding areas and reduce feeding during spawning seasons to prevent stress that causes females to abandon their broods.
Harvest fry when they reach 2-3cm length using fine mesh nets, transferring them to nursery ponds with water temperatures 2-3°C warmer than main ponds to accelerate growth. Feed fry with commercial starter feeds containing 40-45% protein, or prepare homemade feeds using fish meal and maize flour available throughout Africa. Proper fry management produces 500-1,000 fingerlings per breeding female annually, providing continuous restocking for your growing operation or additional income through fingerling sales.
Scaling Up: Transitioning from Backyard to Commercial Production
Expand production gradually by adding one pond at a time, allowing you to master management techniques before investing in larger operations that require more complex systems. Start with 2-3 ponds of 50-100 square metres each before considering commercial-scale operations exceeding 1,000 square metres total pond area. This approach prevents overwhelming management challenges whilst building the experience and capital needed for successful scaling.
Develop reliable markets before expanding production, as commercial quantities require consistent buyers who pay fair prices for your tilapia. Contact restaurants, hotels, and fish traders in nearby cities to establish purchasing agreements that guarantee sales for your increased production. In countries like Ghana and Nigeria, commercial tilapia farmers typically secure contracts for 70-80% of their production before expanding beyond backyard scales.
Invest in labour-saving equipment like automatic feeders, water quality monitors, and mechanical aerators when managing more than 500 square metres of pond area. Calculate labour costs carefully—commercial operations require 1 full-time worker per 1,000 square metres of pond area, costing KES 15,000-25,000 monthly in wages across East Africa. Proper equipment reduces labour requirements whilst improving fish growth rates and survival percentages that determine commercial profitability.
Once your concrete pond system is established and producing consistently, you'll need to focus on optimal stocking densities that maximise production without compromising fish health. Understanding the relationship between pond capacity and fish numbers becomes crucial as you scale your operation. Additionally, implementing a structured feeding schedule ensures your fish receive proper nutrition at the right times, directly impacting growth rates and feed conversion efficiency.
As your tilapia approach market size, developing skills in harvesting techniques becomes essential for maintaining fish quality and maximising profits. Proper harvesting methods prevent stress and damage that reduce market value. Finally, understanding disease prevention strategies protects your investment by maintaining healthy fish populations that grow consistently and reach market size without losses.
The water quality management techniques you've learned for tilapia apply to other species as well, though with different optimal parameters. Many farmers diversify their operations by also raising catfish in concrete ponds, which can tolerate slightly different water conditions and provide additional income streams. When you master concrete pond construction and management for tilapia, you'll have the foundation skills needed for successful commercial fish farming operations that generate substantial profits.
| Step | Action | Key Details | Common Mistakes |
|---|---|---|---|
| 1 | Site Selection | Choose elevated ground with 6-8 hours of sunlight. | Ignoring drainage and sunlight needs. |
| 2 | Soil Testing | Ensure pH is between 6.5-8.5; test for contaminants. | Not testing soil or using unsuitable materials. |
| 3 | Excavation | Excavate to 2.2 metres depth for a 1.8-2.0 metre pond. | Improper depth leading to structural issues. |
| 4 | Concrete Pouring | Cure for at least 28 days; avoid cold joints. | Rushing the curing process. |
| 5 | Water Quality Management | Test pH weekly; maintain oxygen above 5 mg/L. | Neglecting regular water testing. |
| 6 | Disease Prevention | Quarantine new fish for 14 days. | Not isolating new stock from existing fish. |
Conclusion
Building concrete tilapia ponds requires careful planning, quality construction, and consistent management, but the investment pays dividends through higher production and easier maintenance. Focus on proper site selection, use quality materials during construction, and implement efficient water management systems from the start. These fundamentals determine whether your pond succeeds or becomes an expensive problem.
You now have the technical knowledge to construct and manage concrete ponds that support healthy tilapia growth. Start with one well-built pond to master the techniques before expanding your operation. Each pond you build will teach you something new, and your skills will improve with experience.
With your concrete pond foundation established, turn your attention to stocking strategies and feeding programmes that maximise your production potential. Proper pond construction creates the stable environment your Nile and Blue tilapia need to thrive, setting the stage for profitable harvests and sustainable farming success.
Frequently Asked Questions
What if my chosen pond site has very sandy soil?
If your site has sandy soil, you'll need to increase the foundation work to ensure stability for your concrete pond. Digging a deeper foundation (e.g., 30-40cm for the base) and adding a thicker layer of compacted gravel (15-20cm) can provide the necessary support. You might also consider reinforcing the concrete with steel mesh to prevent cracking over time, especially for Nile tilapia which prefer very stable environments.
How often should I perform a full pond clean-out, and how much water should I replace?
You should aim for a full pond clean-out, where you drain most of the water and scrub the walls, every 3-6 months depending on your stocking density and feeding rates. For routine water changes between clean-outs, replace 10-20% of your pond's water volume weekly to dilute waste and maintain good water quality, which is crucial for both Nile and Blue tilapia growth.
Can I use a natural pond (e.g., a small dam) as a source for filling my concrete tilapia ponds?
Yes, you can use water from a natural pond or dam, but it's crucial to test it thoroughly for contaminants, pathogens, and pH levels first. Natural water sources can introduce diseases or parasites into your concrete pond, so a simple filter to remove large debris and a 24-hour settling period in a holding tank can also be beneficial before adding it to your main tilapia pond.
Why is it important to cure concrete for 28 days, especially in hot climates?
Curing concrete for 28 days allows it to achieve its full strength and durability, preventing cracks and leaks that can lead to costly repairs later. In hot climates, rapid drying can cause the concrete to crack prematurely, so keeping it moist by spraying it twice daily or covering it with wet sacking is essential. This ensures your pond structure is robust enough to withstand water pressure and temperature fluctuations for many years, benefiting both Nile and Blue tilapia.
What's the best way to ensure my DIY aeration system provides enough oxygen for my tilapia?
To ensure your DIY aeration system is sufficient, regularly monitor dissolved oxygen (DO) levels using a test kit, aiming for above 5 mg/L. For a 25-30 square metre pond, a DIY diffuser system made from perforated PVC pipes connected to a small air pump (solar or battery-powered) should be adequate. Observe your fish behaviour; if they are gasping at the surface, you need to increase aeration immediately, especially for Nile tilapia which are more sensitive to low oxygen.


Yomi Adisa Lead Researcher
Yomi Adisa is the lead researcher at Fish Farming Business, where he studies what makes aquaculture ventures profitable across Africa. His research focuses on market patterns, buyer preferences, and the business decisions that determine success or failure in fish farming.