How to Convert Your Backyard into a Productive Tilapia Farm
Posted on: 2025-11-23
By: Yomi Adisa
Table of Contents
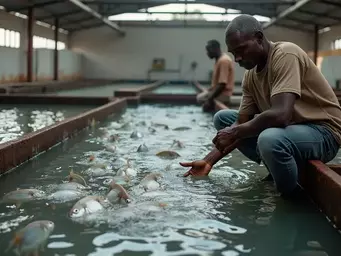
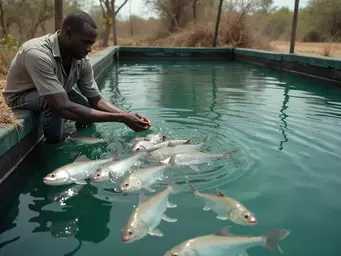
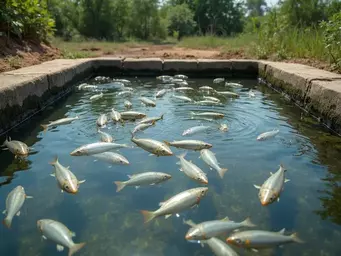
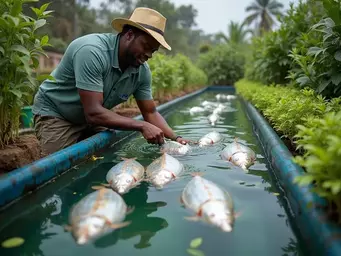
You've built your tilapia ponds, stocked them with healthy fingerlings, and started feeding regularly—yet your fish keep dying unexpectedly. The water looks clear, the fish seemed fine yesterday, but this morning you're pulling out dozens of dead Nile tilapia. This heartbreaking scenario plays out on farms across Africa when disease strikes without warning.
Disease prevention is absolutely critical for profitable tilapia farming because sick fish don't grow, don't reproduce, and often die in large numbers. Even hardy species like Blue tilapia can succumb to bacterial infections, parasites, or viral diseases when conditions favour disease development. The difference between successful and failed tilapia operations often comes down to how well farmers prevent disease before it starts.
This comprehensive guide will teach you proven disease prevention strategies that protect your tilapia investment. You'll learn how to recognise early warning signs, maintain conditions that keep fish healthy, and implement biosecurity measures that stop diseases before they devastate your stock.
🎯 What You'll Learn
- How to select the ideal site and prepare your pond for tilapia farming.
- Effective stocking strategies to ensure healthy growth and survival of fingerlings.
- Best practices for maintaining water quality and feeding tilapia for optimal growth.
Site Selection and Pond Preparation
You cannot build a successful tilapia farm on the wrong site, no matter how good your fingerlings or feeding programme might be. The location you choose determines everything from water availability to fish survival rates, and mistakes made during site selection cost thousands of pounds to fix later. Many farmers in Kenya lose entire stocks because they built ponds in areas prone to flooding or chose sites with poor water access.
Proper pond preparation goes far beyond digging a hole and filling it with water. You need to consider soil type, drainage, sunlight exposure, and accessibility for daily management tasks. Nile tilapia (Oreochromis niloticus) are hardy fish, but they still need specific environmental conditions to thrive and reach market size efficiently.
Getting your site selection and pond preparation right from the start saves you money, reduces fish mortality, and sets the foundation for profitable tilapia production. Here's how to choose and prepare the perfect site for your tilapia operation.
Choosing the Right Location for Your Pond
You need reliable water access within 100 metres of your pond site because transporting water daily becomes expensive and time-consuming. Look for locations near rivers, boreholes, or wells that provide consistent water flow throughout the year, especially during dry seasons. In Nigeria, many successful farmers position their ponds within 50 metres of rivers to reduce pumping costs and ensure steady water supply.
Your pond site must receive at least 6 hours of direct sunlight daily to maintain optimal water temperatures for Nile tilapia growth. However, you also want some natural shade from trees or structures during the hottest parts of the day to prevent water temperatures from exceeding 32°C. Position your pond where morning sun hits the water early but afternoon shade provides relief during peak heat hours.
Choose locations that allow easy access for feeding, monitoring, and harvesting activities without requiring long walks or difficult terrain navigation. You'll be visiting your pond multiple times daily, so accessibility directly affects your management efficiency and labour costs. Consider vehicle access for transporting feed, equipment, and harvested fish to markets.
Preparing the Pond Site: Excavation and Design
You should plan pond sizes between 100-500 square metres for small-scale operations, as this range allows effective management while providing sufficient space for profitable fish numbers. Calculate your pond area based on your target production—a 200 square metre pond can comfortably hold 600-1,000 tilapia at recommended stocking densities. Larger ponds become difficult to manage without mechanised equipment, while smaller ponds limit your production potential.
Design your pond banks with a 1:3 slope ratio (1 metre vertical drop for every 3 metres horizontal distance) to prevent erosion and allow safe access for maintenance. Steep banks collapse during heavy rains and make it dangerous to enter the pond for cleaning or repairs. Use a simple A-frame level to ensure your pond bottom maintains consistent depth, with a minimum of 1.2 metres throughout to provide adequate swimming space for adult tilapia.
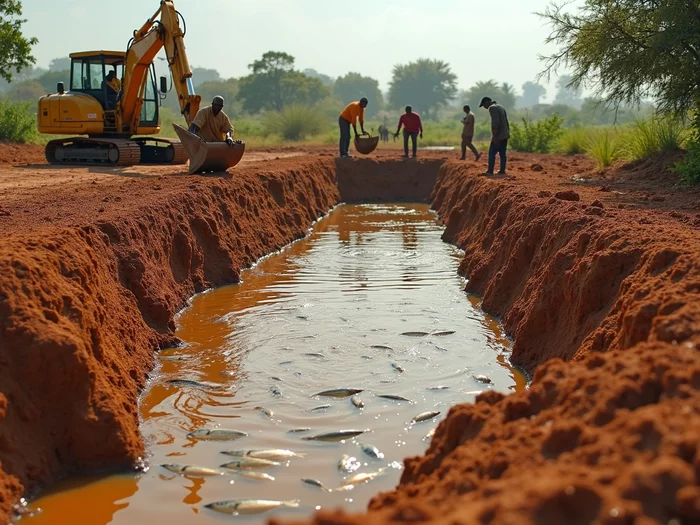
Construct proper embankments using compacted soil to prevent water loss through seepage, and install drainage systems to handle excess water during rainy seasons. Your embankments should rise at least 50 centimetres above maximum water level to prevent overflow during storms. In Uganda, farmers successfully use manual tools for excavation, but ensure you compact soil layers every 20 centimetres during construction to create watertight barriers.
Water Source Options and Management
You can harvest rainwater effectively using gutters and storage tanks, particularly during rainy seasons when natural water sources may become contaminated with runoff. Install simple gutter systems on nearby buildings to collect clean rainwater in covered tanks, then gravity-feed this water to your ponds as needed. This method works especially well in areas with distinct wet seasons, providing free water while reducing dependence on other sources.
Evaluate river, well, and borehole options by testing water quality and assessing seasonal availability before making final site decisions. Rivers may provide abundant water but can carry pollutants or parasites, while boreholes offer cleaner water but may have high mineral content. Test each potential water source for pH, ammonia, and dissolved oxygen levels using simple testing kits available at agricultural supply stores in major cities.
Establish weekly water quality monitoring routines before stocking your pond, testing for ammonia (should be 0 mg/L), pH (6.5-8.5 range), and turbidity levels. In Tanzania, farmers using boreholes must comply with local water usage regulations, so check with district authorities about permits and usage limits. Nile tilapia are sensitive to low dissolved oxygen levels, making consistent water quality monitoring essential for preventing fish kills.
Soil Type and Depth Considerations
You want clay-rich soils that retain water effectively, as sandy soils allow excessive seepage and require expensive pond liners to maintain water levels. Test your soil by digging a 1-metre deep hole and filling it with water—if water levels drop more than 5 centimetres in 24 hours, you'll need to improve water retention through clay addition or liner installation. Clay soils also provide natural nutrients that support beneficial microorganisms and natural food sources for tilapia.
Maintain minimum pond depths of 1.5 metres to support healthy tilapia growth and breeding, with deeper areas reaching 2 metres for temperature regulation during hot weather. Shallow ponds heat up too quickly and lose oxygen faster, while excessively deep ponds become difficult to manage and may develop oxygen-poor bottom layers. Blue tilapia (Oreochromis aureus) prefer deeper areas for spawning, so include some 2-metre deep zones if you plan to breed your own fingerlings.
Conduct soil pH tests using simple testing kits or local agricultural extension services, aiming for pH levels between 6.5-8.5 for optimal tilapia health. Use a soil auger to collect samples from different depths and locations across your proposed pond site to ensure consistent soil quality. In Ghana, many farmers benefit from naturally clay-rich soils that require minimal modification, but you may need to add lime to acidic soils or organic matter to improve soil structure and nutrient content.
Stocking Your Tilapia Pond
You've prepared your pond perfectly, but choosing the wrong fingerlings or stocking incorrectly can destroy months of preparation work. Many African farmers lose their entire investment because they stock poor-quality fingerlings, overcrowd their ponds, or fail to acclimate fish properly to their new environment. The fingerlings you choose and how you introduce them determines whether your tilapia reach market size in 6 months or struggle to survive their first week.
Proper stocking involves more than simply buying fingerlings and dumping them into your pond. You need to select the right tilapia species for your local conditions, calculate optimal stocking densities based on your pond size and management capacity, and carefully acclimate fingerlings to prevent shock-related mortality. Even healthy Nile tilapia can die within hours if you introduce them incorrectly to their new environment.
Getting your stocking strategy right from the beginning sets the foundation for profitable tilapia production. You'll learn how to choose between different tilapia species, calculate exactly how many fingerlings your pond can support, and implement proven acclimation techniques that ensure maximum survival rates from day one.
Selecting the Best Tilapia Species for Your Farm
You should choose Nile tilapia (Oreochromis niloticus) for maximum growth rates and market demand, as this species reaches 1 kilogram market weight in 6-8 months under proper management. Nile tilapia grows 20-30% faster than Blue tilapia and commands higher prices in most African markets due to superior taste and texture. In Egypt, over 90% of commercial tilapia farms stock Nile tilapia because buyers specifically request this species for restaurants and export markets.
Consider Blue tilapia (Oreochromis aureus) if your area experiences temperature fluctuations or water quality challenges, as this species tolerates cooler water and variable conditions better than Nile tilapia. Blue tilapia survives in water temperatures as low as 15°C, while Nile tilapia becomes stressed below 20°C and stops feeding entirely. In cooler regions of Uganda and parts of Kenya, farmers successfully raise Blue tilapia when Nile tilapia would struggle to survive seasonal temperature drops.
Source your fingerlings from reputable local hatcheries that provide health certificates and guarantee disease-free stock, as importing diseased fingerlings can wipe out your entire operation within weeks. Visit potential suppliers personally to inspect their facilities, observe fish behaviour, and verify their breeding records before making purchases. Research hatcheries through agricultural extension services or successful farmers in your area, and always request to see recent health testing results before buying fingerlings.
💡 Pro Tip: Fingerling Quality Check
Healthy fingerlings swim actively near the surface, have bright clear eyes, and show no visible wounds or unusual spots. Avoid fingerlings that float sideways, have cloudy eyes, or display white patches on their skin—these signs indicate disease or stress that will spread to your entire pond.
Determining Stocking Density and Fingerling Requirements
You should stock 2-3 fingerlings per square metre for optimal growth rates and manageable feeding costs, as higher densities lead to stunted fish and increased disease risk. Calculate your fingerling needs by measuring your pond area and multiplying by your chosen density—a 200 square metre pond requires 400-600 fingerlings at recommended stocking rates. In Zambia, farmers consistently achieve better profits with moderate stocking densities of 3 fish per square metre compared to overcrowded ponds with 5-6 fish per square metre.
Stock during warm months when water temperatures consistently exceed 24°C to promote rapid initial growth and reduce fingerling mortality from temperature stress. Nile tilapia fingerlings grow 40% faster when introduced during warm seasons compared to cooler periods, reaching market size 2-3 months earlier. Plan your stocking schedule around local weather patterns—in most African regions, stock between September and February for optimal growth conditions.
Create a simple stocking calculation spreadsheet that accounts for expected mortality rates of 10-15% during the first month, allowing you to order appropriate fingerling quantities. Factor in your target harvest weight, expected growth rates, and market timing when determining final stocking numbers. Many successful farmers in Ghana stock slightly above their calculated needs to account for natural losses, ensuring they reach their production targets even with some mortality.
Acclimating Fingerlings to Their New Environment
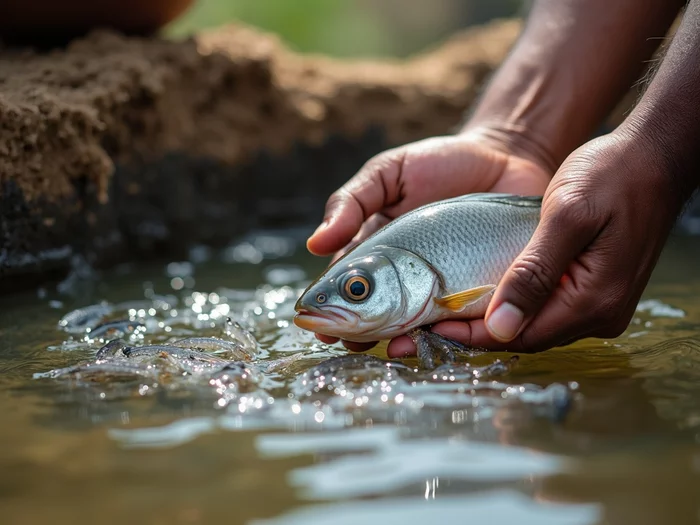
You must gradually acclimate fingerlings over 1-2 hours by floating sealed transport bags in your pond water to equalise temperatures slowly, as rapid temperature changes kill fingerlings within minutes. Float the bags for 30 minutes, then gradually add small amounts of pond water to the bags every 15 minutes until water temperatures match completely. This process prevents thermal shock that causes immediate mortality or weakens fish immune systems, making them susceptible to diseases.
Open transport bags underwater and allow fingerlings to swim out naturally rather than dumping them directly into the pond, as this reduces stress and gives fish time to adjust to their new environment. Monitor fingerlings closely for the first 24 hours after introduction, looking for signs of stress such as erratic swimming, gasping at the surface, or clustering in corners. Normal fingerlings spread throughout the pond and begin exploring their new environment within 2-3 hours of release.
Prepare a separate holding tank or sectioned pond area for large fingerling shipments, allowing you to acclimate batches gradually rather than overwhelming your main pond with stressed fish all at once. In Kenya, farmers successfully use large plastic containers or temporary pond sections to acclimate 500+ fingerlings in smaller groups of 50-100 fish. This method reduces competition for oxygen during acclimation and allows you to monitor each group's adaptation before introducing them to the main pond population.
Water Quality Management
You can have the perfect pond design and healthy fingerlings, but poor water quality will kill your tilapia faster than any disease or predator. Water quality problems develop gradually, often going unnoticed until fish start dying in large numbers or stop growing entirely. Many farmers across Africa lose months of investment because they ignore simple water quality indicators that could have warned them of impending problems.
Managing water quality isn't complicated, but it requires consistent monitoring and quick action when parameters drift outside optimal ranges. Nile tilapia can survive in various water conditions, but they only grow rapidly and remain healthy when dissolved oxygen, pH, ammonia, and temperature stay within specific ranges. Even small deviations from these ranges can stress fish, making them susceptible to diseases and reducing their growth rates significantly.
Effective water quality management involves understanding what to test, when to test it, and how to correct problems before they become disasters. You'll learn practical techniques for monitoring essential parameters, maintaining optimal conditions using locally available materials, and implementing simple systems that keep your water quality stable year-round.
Essential Water Quality Parameters for Tilapia
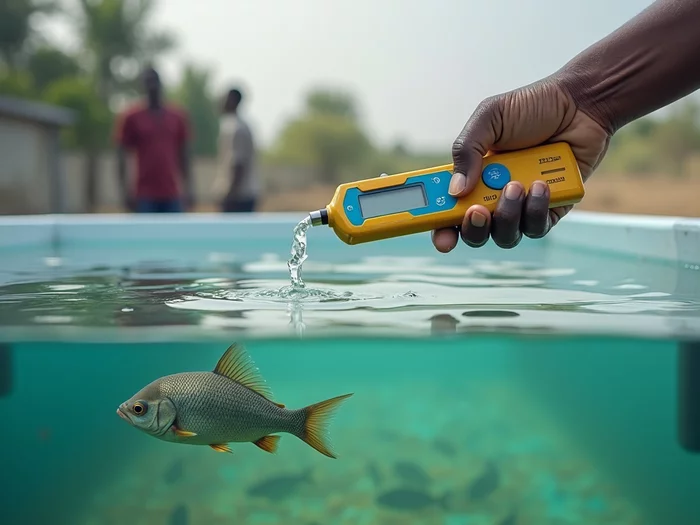
You must monitor dissolved oxygen levels daily, maintaining concentrations above 5 mg/L for healthy tilapia growth, as levels below 3 mg/L cause fish to gasp at the surface and stop feeding entirely. Use simple dissolved oxygen test kits available at agricultural supply stores in major cities, or observe fish behaviour—healthy tilapia swim actively throughout the water column rather than clustering near the surface. In Malawi, farmers successfully use the "fish behaviour method" during early morning hours when oxygen levels are naturally lowest to assess whether additional aeration is needed.
Test pH levels weekly using inexpensive pH strips or digital metres, keeping water between 6.5-8.5 for optimal tilapia health and growth rates. pH levels below 6.0 stress fish and reduce their ability to absorb nutrients from feed, while pH above 9.0 makes ammonia more toxic and can cause gill damage. Create a simple water quality logbook to track pH trends over time, noting any correlation with weather patterns, feeding schedules, or pond management activities.
Monitor ammonia concentrations using test kits that detect both total ammonia and toxic ammonia-nitrogen, maintaining levels at 0 mg/L for healthy fish. Ammonia builds up from fish waste, uneaten feed, and decomposing organic matter, becoming increasingly toxic as water temperature and pH rise. Blue tilapia shows slightly better ammonia tolerance than Nile tilapia, but both species suffer reduced growth and increased disease susceptibility when ammonia exceeds 0.5 mg/L for extended periods.
Techniques for Maintaining Optimal Water Conditions
You can improve water quality naturally by introducing aquatic plants like water hyacinth or duckweed, which absorb excess nutrients and produce oxygen during daylight hours. Plant coverage should occupy 20-30% of your pond surface to provide benefits without blocking too much sunlight from reaching the water. In Egypt, farmers successfully use water hyacinth to control ammonia levels while providing supplementary feed for their tilapia, creating a sustainable system that reduces both feed costs and water quality problems.
Establish weekly partial water changes of 10-20% to remove accumulated waste products and maintain stable water chemistry, using a simple siphon system to remove water from the bottom where debris settles. Replace removed water gradually over 2-3 hours to prevent temperature shock, and always treat new water if it comes from chlorinated municipal sources. Many successful farmers in Ghana use gravity-fed systems that allow continuous slow water exchange, maintaining excellent water quality without requiring daily labour.
Remove uneaten feed and organic debris within 2 hours of feeding using a fine mesh net or pond rake, as decomposing organic matter rapidly depletes oxygen and increases ammonia levels. Create feeding areas using floating rings to concentrate feed and make cleanup easier, preventing waste from spreading throughout the pond. Regular debris removal becomes especially critical during warm weather when decomposition rates increase and oxygen levels naturally decline due to higher water temperatures.
Aeration and Filtration Methods
You can install simple paddle wheel aerators or air stone systems powered by small electric pumps to maintain adequate dissolved oxygen levels, especially during hot weather and at night when plants consume oxygen instead of producing it. Position aerators to create gentle water circulation throughout the pond without creating strong currents that stress fish or stir up bottom sediments. In Uganda, farmers successfully use solar-powered aerators that operate during peak sunlight hours when oxygen demand is highest, reducing electricity costs while maintaining fish health.
Construct basic biofilters using locally available materials like gravel, sand, and plastic containers to remove ammonia and other waste products from pond water. Create a simple three-stage filter system with coarse gravel for mechanical filtration, fine sand for biological filtration, and activated charcoal for chemical filtration if available. Position biofilters where water flows naturally through them, using gravity or small pumps to circulate water continuously through the filtration media.
Consider installing emergency aeration systems using car batteries and small air pumps for power outages or equipment failures, as tilapia can die within hours when oxygen levels drop critically low. Keep backup aeration equipment ready and test it monthly to ensure reliability when needed most. Many farmers in Kenya use manual paddle systems during emergencies, creating water movement by hand until power returns or permanent equipment can be repaired.
⚠️ Warning: Oxygen Depletion
Never ignore fish gasping at the surface, especially during early morning hours. This behaviour indicates dangerously low oxygen levels that can kill your entire stock within 2-3 hours if not corrected immediately through emergency aeration or partial water changes.
Feeding Practices for Healthy Tilapia
You can provide the perfect pond environment, but improper feeding will prevent your tilapia from reaching market size and can actually harm water quality through overfeeding or nutrient imbalances. Feed represents 60-70% of your total production costs, making feeding efficiency critical for profitability. Many African farmers waste money on expensive commercial feeds while ignoring abundant local feed sources that could reduce costs by 40-50% without compromising fish growth.
Successful tilapia feeding requires understanding nutritional needs at different growth stages, creating consistent feeding schedules, and balancing commercial feeds with natural food sources. Nile tilapia are omnivorous fish that can efficiently utilise both plant and animal proteins, making them ideal for integrated farming systems that combine fish production with agriculture or livestock operations. The key is providing adequate nutrition while avoiding overfeeding that pollutes water and increases disease risk.
Effective feeding strategies help you maximise growth rates, minimise feed costs, and maintain excellent water quality throughout the production cycle. You'll learn how to formulate cost-effective feed mixtures using local ingredients, establish feeding schedules that optimise growth, and integrate organic waste materials that provide nutrition while reducing environmental impact.
Types of Feed: Commercial vs. Natural Sources
You should provide commercial feeds containing 28-32% protein for fingerlings and juveniles, reducing to 25-28% protein for adult tilapia approaching market size, as excessive protein in adult diets increases feed costs without improving growth rates. Purchase feeds from reputable suppliers that guarantee freshness and proper storage, checking expiration dates and avoiding feeds with rancid odours or mould growth. In Ghana, farmers achieve excellent results combining high-protein commercial starter feeds for the first 2 months with lower-cost homemade feeds for grow-out phases.
Create homemade feed mixtures using locally available ingredients like maize meal (40%), fishmeal or groundnut cake (25%), rice bran (20%), and vitamin premix (5%) to reduce feed costs while maintaining adequate nutrition. Mix ingredients thoroughly and store in sealed containers to prevent spoilage and pest infestation, preparing only 1-2 weeks' supply at a time to ensure freshness. Many successful farmers in Kenya reduce feed costs by 30-40% using homemade feeds while achieving growth rates comparable to commercial feeds.
Encourage natural food production in your pond by applying organic fertilisers that promote phytoplankton and zooplankton growth, providing free nutrition that supplements commercial feeds. Natural foods like algae, small insects, and aquatic worms can provide 20-30% of your tilapia's nutritional needs when pond conditions support abundant natural food production. Blue tilapia particularly excel at utilising natural foods, often achieving good growth rates with minimal commercial feed supplementation when natural productivity is high.
Creating a Feeding Schedule
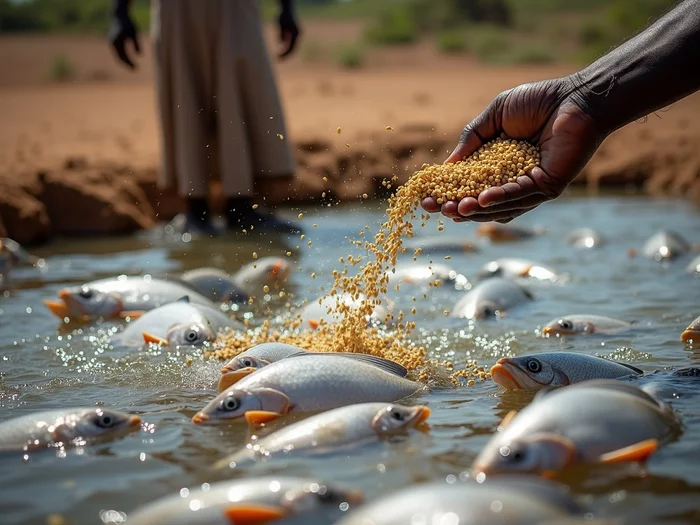
You should feed tilapia 2-3 times daily at consistent intervals, providing small amounts that fish can consume completely within 15-20 minutes to prevent waste and water quality problems. Feed early morning (6-7 AM), midday (12-1 PM), and late afternoon (4-5 PM) when fish are most active and water temperatures support good digestion. Adjust feeding frequency based on water temperature—feed once daily when temperatures drop below 20°C, as tilapia metabolism slows significantly in cooler water.
Calculate daily feed amounts using the 3-5% of body weight rule for growing tilapia, weighing a sample of fish monthly to adjust feed quantities as they grow larger. Use feeding rings or designated feeding areas to concentrate feed and make it easier to observe feeding behaviour and remove any uneaten feed. In Tanzania, farmers successfully use simple feeding schedules based on fish size: fingerlings receive 8-10% of body weight daily, juveniles receive 5-6%, and adults receive 3-4% for optimal growth without waste.
Monitor feeding behaviour closely to identify signs of overfeeding (feed remaining after 30 minutes) or underfeeding (aggressive competition, slow growth rates), adjusting quantities accordingly. Reduce feeding during cloudy weather when dissolved oxygen levels may be lower, and skip feeding entirely if fish show signs of stress or disease. Create a feeding log to track feed amounts, fish behaviour, and growth rates, helping you optimise feeding efficiency over time.
Utilising Organic Fertilisers and Waste for Feeding
You can apply well-composted chicken manure at rates of 100-200 kg per hectare monthly to stimulate natural food production without creating water quality problems from excessive organic loading. Compost manure for at least 30 days before application to eliminate harmful bacteria and parasites, then broadcast it evenly across the pond surface during calm weather. In Zambia, farmers successfully integrate poultry operations with tilapia ponds, using chicken manure to boost natural productivity while reducing commercial feed requirements by 25-30%.
Incorporate kitchen scraps and agricultural waste like vegetable peelings, fruit waste, and crop residues into your feeding programme after proper preparation to remove harmful substances or excessive salt content. Chop organic waste into small pieces that tilapia can consume easily, and introduce new waste materials gradually to allow fish to adapt to different food sources. Many farmers in Nigeria successfully feed tilapia with processed cassava peels, yam waste, and plantain skins, reducing feed costs while utilising materials that would otherwise be discarded.
Establish integrated farming systems that combine tilapia production with vegetable gardens or livestock operations, using nutrient-rich pond water for irrigation while returning organic waste to support fish nutrition. Position vegetable beds to receive pond water through gravity-fed irrigation systems, then compost vegetable waste and return nutrients to the pond through controlled organic fertiliser applications. This integrated approach reduces both feed costs and fertiliser expenses while creating sustainable production systems that benefit both fish and crop yields.
Harvesting Techniques and Best Practices
You've invested months of time, effort, and money raising your tilapia to market size, but poor harvesting techniques can damage fish quality, reduce market prices, and waste your entire investment. Many African farmers lose 20-30% of their potential profits because they harvest at the wrong time, use inappropriate methods, or fail to handle fish properly after harvest. The difference between premium prices and distress sales often comes down to harvesting timing and technique.
Successful harvesting involves more than simply catching fish from your pond—you need to determine optimal harvest timing based on fish size and market conditions, use methods that maintain fish quality, and implement post-harvest handling that preserves freshness for maximum market value. Nile tilapia typically reach market size of 800g-1kg in 6-8 months under good management, but harvesting too early reduces profits while waiting too long increases feed costs without proportional weight gains.
Proper harvesting techniques ensure you receive top prices for your tilapia while maintaining fish welfare and preparing your pond for the next production cycle. You'll learn how to assess harvest readiness, choose appropriate harvesting methods for your operation size, and handle fish post-harvest to maximise quality and market value.
When and How to Harvest Tilapia
You should harvest tilapia when they reach 800g-1kg average weight, as this size commands premium prices in most African markets while providing optimal feed conversion efficiency. Sample 10-15 fish monthly using a cast net to monitor average weights, and begin harvest planning when 70% of your fish exceed 700g. In Egypt, commercial farmers achieve best profits harvesting Nile tilapia at 900g-1kg, as larger fish require disproportionately more feed per gram of weight gain and may become less desirable to consumers.
Time your harvest to coincide with peak market demand periods, typically during religious holidays, school terms, or seasonal celebrations when fish prices increase 20-40% above normal levels. Research local market patterns and plan harvest timing 2-3 months in advance, adjusting feeding schedules if necessary to reach target weights during high-price periods. Many successful farmers in Ghana coordinate harvests with Christmas and Easter seasons when demand peaks and prices reach annual highs.
Use selective harvesting methods that allow you to remove market-size fish while leaving smaller fish to continue growing, maximising overall pond productivity and providing continuous income streams. Employ large-mesh gill nets or fish traps that capture only fish above certain sizes, or use seine nets with careful sorting to return undersized fish immediately to the pond. This approach works particularly well with mixed-age stocking systems where you introduce new fingerlings every 2-3 months for continuous production.
Tools and Equipment for Efficient Harvesting
You need seine nets with 2-3cm mesh size for efficient total pond harvesting, requiring nets long enough to span your pond width plus 20% extra for proper deployment and fish containment. Purchase nets made from durable nylon or polyethylene that resist tearing and UV damage, and choose mesh sizes that retain market-size fish while allowing small fish to escape if using selective harvesting. In Kenya, farmers successfully use locally-made seine nets costing 60-80% less than imported nets while providing equivalent harvesting efficiency.
Invest in cast nets with 4-6 metre diameter for sampling fish weights and selective harvesting of individual fish, choosing nets with appropriate mesh sizes for your target fish sizes. Practise cast net techniques regularly to develop accuracy and efficiency, as proper technique significantly affects catch rates and reduces fish stress during harvesting. Many farmers in Uganda use cast nets for daily sampling and small-scale harvesting while reserving seine nets for major harvest operations.
Maintain harvesting equipment properly by cleaning nets after each use, repairing small tears immediately to prevent enlargement, and storing nets in shaded, dry locations to prevent UV damage and rot. Create a simple equipment maintenance schedule that includes monthly inspections, immediate repair of damage, and annual replacement of heavily worn equipment. Proper equipment maintenance reduces harvesting costs and prevents equipment failures during critical harvest periods when delays can affect fish quality and market prices.

Post-Harvest Handling and Storage
You must kill harvested fish immediately using humane methods like ice slurry immersion or percussive stunning to maintain flesh quality and prevent stress-related deterioration that reduces market value. Prepare ice slurry using 1 part ice to 1 part clean water, immersing fish completely for 10-15 minutes until they show no movement or gill activity. In Tanzania, farmers who implement proper killing techniques receive 15-20% higher prices than those selling fish that died from stress or suffocation during harvesting.
Clean fish immediately after killing by removing scales, guts, and gills using sharp knives and clean cutting boards, working in shaded areas to prevent temperature increases that promote bacterial growth. Rinse cleaned fish thoroughly with clean water to remove blood and debris, then pack in ice or refrigerate immediately to maintain freshness. Establish cleaning stations with running water, proper drainage, and adequate workspace to process fish efficiently while maintaining hygiene standards.
Store cleaned fish at temperatures below 4°C using ice, refrigeration, or evaporative cooling systems to maintain quality for 24-48 hours until sale or processing. Pack fish in insulated containers with adequate ice coverage, using 1kg ice per 2kg fish for effective temperature control during transport to markets. Understanding proper post-harvest handling becomes crucial for positioning your fish farm product for success in local markets, as quality directly affects the prices you can command and your reputation among buyers.
💡 Pro Tip: Market Timing
Contact buyers 2-3 days before harvest to confirm demand and negotiate prices. Having confirmed sales before harvesting prevents distress selling and ensures you receive fair market prices for your quality tilapia.
| Step | Action | Key Details | Common Mistakes |
|---|---|---|---|
| Site Selection | Choose a suitable location | Ensure water access within 100m, sunlight for 6 hours, and easy accessibility | Ignoring water quality and accessibility issues |
| Pond Preparation | Excavate and design the pond | Maintain a depth of at least 1.2m, with a 1:3 slope for banks | Poor drainage and incorrect depth |
| Stocking | Select quality fingerlings | Stock 2-3 fingerlings per square metre | Overcrowding or poor-quality fingerlings |
| Water Quality Monitoring | Test key parameters | Dissolved oxygen >5 mg/L, pH 6.5-8.5, Ammonia 0 mg/L | Neglecting regular testing |
| Feeding | Establish a feeding schedule | Feed 2-3 times daily, 3-5% of body weight | Overfeeding or inconsistent schedules |
| Harvesting | Determine optimal harvest time | Harvest when fish weigh 800g-1kg | Harvesting too early or late |
Conclusion
You now have the complete foundation for establishing and managing a successful tilapia operation from site selection through harvest. The key is implementing each step methodically—choose your site carefully, prepare your pond properly, stock with quality fingerlings, maintain excellent water quality, feed consistently, and harvest at optimal timing. These fundamentals determine whether your tilapia reach market size profitably or struggle to survive.
Start with one well-prepared pond rather than rushing into multiple ponds before mastering the basics. Your skills will develop with each production cycle as you learn to read your fish behaviour, adjust feeding rates, and maintain stable water conditions. Every successful tilapia farmer in Africa started with these same principles and built their expertise through practical experience.

Consider integrating your tilapia production with other farm activities like vegetable growing or poultry keeping to maximise resource efficiency. As your first harvest approaches, begin planning your next stocking cycle and exploring local market opportunities. Consistent application of these proven techniques will establish your reputation for producing quality tilapia that buyers seek.
Frequently Asked Questions
What if my pond site has very sandy soil, but it's the only available location?
If your soil is too sandy, you'll need to improve water retention significantly. Consider compacting a thick layer of clay (at least 15-20 cm) over the pond bottom and sides, or installing a high-quality pond liner. While more expensive, a liner guarantees no seepage and can save you money on water in the long run.
How often should I monitor my tilapia's growth and adjust feed quantities?
You should sample 10-15 fish monthly using a cast net to monitor their average weight. This allows you to accurately adjust your daily feed amounts, typically using the 3-5% of body weight rule, ensuring efficient growth and preventing overfeeding as your fish get larger.
Can I mix Nile tilapia and Blue tilapia in the same pond?
While possible, it's generally not recommended for commercial production as Nile tilapia grow faster and may outcompete Blue tilapia for food. Stick to one species for better management and more uniform harvest sizes. If you do mix them, ensure ample feeding to reduce competition.
Why is it so important to acclimate fingerlings slowly, and what's the minimum time?
Slow acclimation prevents thermal shock, which can kill fingerlings immediately or severely weaken their immune systems. The minimum time is about 1-2 hours, gradually equalising temperatures by floating bags for 30 minutes, then slowly adding pond water to the bags every 15 minutes. Rushing this step leads to high mortality rates.
What's the best way to handle unexpected power outages if I rely on electric aerators?
For emergencies, keep a backup aeration system ready, such as battery-powered air pumps or manual paddle systems. Car batteries can power small air pumps for several hours, providing critical oxygen until power is restored. Test your emergency system monthly to ensure it's reliable when needed most, as tilapia can die quickly from oxygen deprivation.


Yomi Adisa Lead Researcher
Yomi Adisa is the lead researcher at Fish Farming Business, where he studies what makes aquaculture ventures profitable across Africa. His research focuses on market patterns, buyer preferences, and the business decisions that determine success or failure in fish farming.