Building Concrete Ponds for Tilapia: A Practical Construction Guide for Intensive Farming
Posted on: 2025-10-20
By: Yomi Adisa
Building Concrete Ponds for Tilapia: A Practical Construction Guide for Intensive Farming
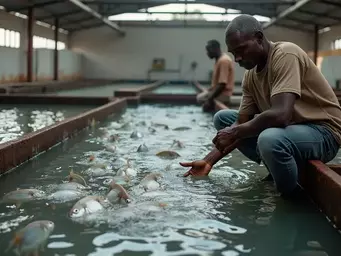
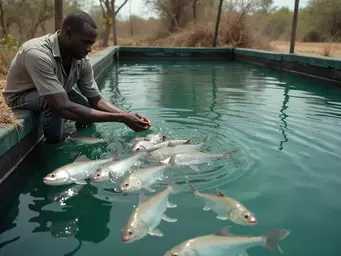
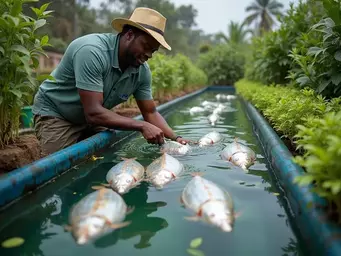
Picture this: You're standing beside your neighbour's earthen tilapia pond after the rains, watching muddy water swirl as fish gasp at the surface. Meanwhile, your concrete pond maintains crystal-clear water, your tilapia are thriving, and you're already planning your second harvest whilst they're still dealing with erosion damage. This scenario plays out across African fish farms every season, highlighting why concrete ponds represent the gold standard for serious tilapia production.
📑 Table of Contents
The difference between earthen and concrete pond systems isn't just about durability—it's about complete control over your production environment. Concrete ponds allow you to maintain stable water quality, support higher stocking densities, and implement intensive management practices that can triple your production per square metre. Whilst the initial investment is higher, properly constructed concrete ponds deliver consistent harvests for 20-30 years, eliminate seepage losses, and give you the foundation needed for commercial-scale tilapia farming.
This comprehensive construction guide provides you with complete technical knowledge for building concrete ponds specifically designed for intensive tilapia production. You'll learn exact specifications for pond dimensions, precise construction techniques from site preparation through concrete curing, integrated water management systems, and the critical engineering details that separate successful concrete pond operations from expensive failures. Every measurement, mixing ratio, and construction sequence has been tested by farmers across Nigeria, Kenya, Uganda, and Ghana.

By following these proven methods, you'll construct a concrete pond system that supports maximum tilapia production whilst eliminating the constant maintenance headaches and unpredictable water quality problems that plague earthen pond operations. Understanding proper concrete pond construction matters because these structures become the foundation of your tilapia farming success for decades. Unlike earthen ponds that require constant maintenance and struggle with water quality, well-built concrete ponds deliver consistent harvests, support higher stocking densities, and give you complete control over your production environment.
🎯 What You'll Learn
- colour: #343A40;">Learn the precise construction techniques and specifications for building durable concrete ponds that enhance tilapia production
- colour: #343A40;">Master effective water management strategies to maintain optimal water quality and ensure healthy growth rates in intensive tilapia farming
- colour: #343A40;">Discover the best aeration technologies to improve oxygen levels and circulation, maximising fish survival and growth in your concrete pond
Understanding Concrete Ponds for Tilapia Farming
Concrete ponds represent a fundamental shift from traditional tilapia farming methods, offering you precise control over every aspect of your fish production environment. Unlike earthen ponds that interact unpredictably with surrounding soil and groundwater, concrete structures create a controlled ecosystem where you determine water quality, stocking density, and management intensity. This level of control becomes essential when you're targeting commercial production volumes and consistent harvest quality.
Benefits of Concrete Ponds
Durability stands as the primary advantage of concrete pond construction. A properly built concrete pond will serve your tilapia operation for 20-30 years with minimal structural maintenance, whilst earthen ponds require annual repairs and constant vigilance against erosion. The smooth concrete surfaces resist algae buildup and allow thorough cleaning between production cycles, something impossible with earthen pond walls that harbour pathogens and parasites.

Water quality management becomes dramatically easier in concrete ponds because you eliminate soil interaction that constantly alters pH, turbidity, and nutrient levels. You can maintain optimal pH levels between 6.5-8.5 consistently, monitor dissolved oxygen precisely, and implement water exchange schedules without losing water to seepage. A farmer in Kisumu built a 60m² concrete pond with 1.2m depth, stocked at 120 fingerlings per square metre, and achieved 90% survival rates by maintaining stable water conditions impossible in earthen ponds.
Intensive farming practices become viable with concrete ponds because they support higher stocking densities and more aggressive feeding programmes. You can stock 100-150 fingerlings per square metre compared to 20-40 in earthen ponds, feed multiple times daily without worrying about uneaten food degrading water quality, and implement aeration systems that would be impractical in earthen structures.
| Feature | Concrete Ponds | Earthen Ponds |
|---|---|---|
| Durability | 20-30 years with minimal maintenance | Requires annual repairs and constant vigilance |
| Water Quality Management | Stable pH and nutrient levels, easy monitoring | Unpredictable due to soil interaction |
| Stocking Density | 100-150 fingerlings/m² | 20-40 fingerlings/m² |
| Maintenance Requirements | Low, mainly cleaning | High, frequent repairs needed |
| Harvest Consistency | Reliable and predictable | Variable due to environmental factors |
Key Design Considerations
Optimal pond dimensions for tilapia depend on your production goals and management capacity. Rectangular ponds measuring 10m x 6m x 1.2m deep provide excellent production volume whilst remaining manageable for daily operations. This 60m² surface area supports 6,000-9,000 fingerlings depending on your feeding and aeration capacity, producing 1,800-2,700kg of market-size tilapia every 6-7 months.
Circular ponds offer superior water circulation and easier cleaning, with 8-10m diameter circles providing similar production capacity to rectangular designs. The curved walls eliminate dead zones where waste accumulates, and central drainage systems facilitate complete water exchange when needed. However, rectangular ponds often fit better into available land spaces and cost less to construct using standard formwork.
Depth requirements balance fish comfort with management practicality. Maintain 1.2-1.5m depth throughout most of the pond, with a deeper section (1.8m) near the drainage outlet for fish collection. Shallower depths reduce oxygen levels and increase temperature fluctuations, whilst excessive depth wastes concrete and complicates feeding and observation.
Drainage systems must allow complete water removal within 2-4 hours for effective pond management. Install the main drain at the deepest point with a 150mm diameter pipe capable of handling full water volume. Include a secondary overflow drain 10cm below maximum water level to prevent flooding during heavy rains, and consider installing a monk board system that allows you to adjust water levels gradually during harvesting.
| Pond Type | Surface Area (m²) | Recommended Stocking Density (fingerlings/m²) |
|---|---|---|
| Rectangular Ponds | 60 | 100-150 |
| Circular Ponds | 60 | 100-150 |
Site Preparation for Concrete Pond Construction
Proper site preparation determines whether your concrete pond will serve reliably for decades or develop expensive problems within the first few seasons. The foundation work you complete before pouring concrete directly impacts structural integrity, drainage performance, and long-term maintenance requirements. Taking shortcuts during site preparation inevitably leads to costly repairs and production losses that far exceed the initial time and material investments.
Selecting the Right Location
Water source accessibility stands as your primary location criterion because transporting water for large pond volumes becomes prohibitively expensive. Position your pond within 50 metres of a reliable water source, whether that's a borehole, river intake, or municipal connection. Calculate that a 60m² pond requires 72,000 litres to fill, and you'll need to exchange 10-20% of this volume weekly during production cycles.

Sunlight exposure affects both water temperature and algae growth patterns in your concrete pond. Choose locations receiving 6-8 hours of direct sunlight daily, as this maintains optimal water temperatures of 26-30°C for tilapia growth whilst supporting beneficial algae that contribute to the pond ecosystem. Avoid completely shaded areas where water temperatures drop below 24°C, reducing feed conversion efficiency and growth rates.
Accessibility for feed delivery, harvesting, and maintenance equipment influences your daily operations significantly. Ensure vehicles can approach within 20 metres of the pond site for feed deliveries and fish transport. Plan pathways that remain usable during rainy seasons, as muddy access routes complicate feeding schedules and emergency interventions when water quality problems arise.
Topography and natural drainage patterns prevent flooding problems that could damage your concrete structure or contaminate your fish stock. Avoid low-lying areas where surface runoff concentrates during heavy rains. A slight slope (2-3%) away from the pond site ensures natural drainage whilst remaining gentle enough for construction equipment access.
Preparing the Site
Begin site clearing by removing all vegetation, roots, and organic matter from an area extending 2 metres beyond your planned pond dimensions. Organic materials left in the soil will decompose over time, creating voids that can cause concrete settling and cracking. Use a mechanical excavator if available, or hand tools for smaller ponds, ensuring you remove roots completely rather than cutting them at ground level.
Excavation depth must account for your concrete thickness plus a compacted base layer. For a 1.2m deep pond, excavate to 1.4m depth to accommodate 15cm of compacted base material and 5cm concrete thickness. Mark your excavation boundaries clearly and check measurements frequently, as correcting excavation errors after concrete work begins becomes extremely expensive.
Soil compaction creates a stable foundation that prevents settling and cracking in your finished pond. Compact the excavated area in 15cm lifts using a mechanical compactor or hand tamping tools. Each layer should achieve 95% compaction density, which you can test by walking across the surface - properly compacted soil will not show footprint depressions.
Level verification ensures your finished pond will drain completely and maintain uniform depth throughout. Use a water level, laser level, or string line to verify the base is level within 2cm across the entire area. Install grade stakes at 2-metre intervals to guide concrete placement and ensure consistent thickness.
Building the Concrete Pond Structure
Constructing the concrete pond structure requires precise attention to mixing ratios, placement techniques, and curing procedures that will determine your pond's performance for decades. The concrete work represents the most critical phase of construction because errors in mixing, placement, or curing cannot be corrected without complete reconstruction. Following proven techniques ensures your investment produces a durable, leak-proof structure capable of supporting intensive tilapia production.
Constructing the Mold
Formwork construction begins with assembling vertical wall forms that will shape your concrete pond walls. Use 18mm marine-grade plywood or steel forms that can withstand concrete pressure without bowing or shifting. For a rectangular pond, construct forms in sections that can be easily positioned and braced, typically 2-3 metres long for manageable handling.
Bracing systems must resist the substantial pressure created by wet concrete during placement. Install diagonal braces every 1.5 metres along the outside of your forms, anchoring them to stakes driven firmly into the ground. Use adjustable metal braces or construct wooden braces from 50mm x 100mm timber.
Form alignment and levelling determines your pond's final dimensions and water-holding capacity. Use string lines and a spirit level to ensure forms are perfectly vertical and positioned accurately. Check that opposite walls are parallel and corners are square using the 3-4-5 triangle method: measure 3 metres along one wall, 4 metres along the adjacent wall, and verify the diagonal measures exactly 5 metres.
Pouring and Curing Concrete
Concrete mixing ratios for pond construction require a balance between strength and water resistance. Use a 1:2:4 mix ratio (1 part cement, 2 parts sand, 4 parts aggregate) with a water-cement ratio of 0.45-0.50 for optimal strength and impermeability. This translates to 50kg cement, 100kg sand, 150kg stone aggregate, and 22-25 litres of clean water per batch.

Placement techniques ensure uniform concrete distribution and eliminate voids that could cause leaks or structural weakness. Pour concrete continuously in horizontal lifts no more than 30cm thick, working systematically around the pond perimeter. Use mechanical vibrators or hand rodding to consolidate concrete and eliminate air bubbles, paying particular attention to corners and areas around reinforcement.
Surface finishing creates smooth walls that resist algae growth and facilitate cleaning. Use wooden floats to level concrete surfaces whilst the material remains workable, typically 30-60 minutes after placement depending on temperature. Follow with steel trowels for final smoothing, creating a dense, impermeable surface.
Curing procedures determine your concrete's final strength and durability characteristics. Keep concrete surfaces continuously moist for at least 7 days using wet hessian, plastic sheeting, or frequent water spraying. Maintain curing temperatures between 10-30°C for optimal strength development.
Reinforcement Techniques
Steel reinforcement prevents cracking and provides structural integrity for your concrete pond walls and floor. Use 12mm diameter rebar for main reinforcement, spaced 200mm centres both horizontally and vertically in wall sections. Place reinforcement 50mm from both inner and outer wall surfaces to provide adequate concrete cover whilst maximising structural effectiveness.
Corner reinforcement requires special attention because these areas experience maximum stress from water pressure and thermal expansion. Install L-shaped corner bars that extend 600mm into each adjoining wall, providing continuity across joints. Add extra horizontal bars around corners to distribute loads and prevent cracking at these critical connections.
Foundation reinforcement connects wall and floor sections to create a monolithic structure resistant to settlement and thermal movement. Extend wall reinforcement 300mm into the floor slab, bending bars at 90-degree angles to create mechanical anchorage. Install floor mesh using 8mm bars at 200mm centres in both directions, supporting the mesh on concrete blocks or plastic chairs to maintain proper positioning during concrete placement.
Water Management and Quality Control
Effective water management forms the backbone of successful concrete pond tilapia production, requiring integrated water management systems for supply, treatment, aeration, and drainage that work together to maintain optimal growing conditions. Your concrete pond's controlled environment allows precise management of water parameters that directly influence fish health, growth rates, and feed conversion efficiency. Understanding and implementing comprehensive water management ensures your investment in concrete infrastructure delivers maximum production returns.
Setting Up Water Sources
Borehole water provides the most reliable and controllable source for concrete pond operations, offering consistent quality and flow rates independent of seasonal variations. Install boreholes with minimum 50mm diameter casings and submersible pumps capable of delivering 2,000-3,000 litres per hour for a 60m² pond. Test borehole water for pH (should be 6.5-8.5), total dissolved solids (below 1,000 ppm), and heavy metals before use.
River or stream sources require more complex treatment but can provide excellent water for tilapia production when properly managed. Install intake structures upstream from pollution sources and use settling ponds to remove suspended solids before entering your concrete pond. Screen intake water through 5mm mesh to exclude wild fish and debris, and consider UV sterilisation or chlorination if bacterial contamination is suspected.
Municipal water supplies offer convenience but often contain chlorine or chloramines that are toxic to fish. Install activated carbon filters or allow municipal water to stand in holding tanks for 24-48 hours before use, allowing chlorine to dissipate naturally. Check municipal water pH and hardness, as treatment processes can create conditions unsuitable for tilapia.
Water storage systems provide security against supply interruptions and allow water treatment before use. Construct overhead tanks holding 2-3 days' water requirements (20,000-30,000 litres for a 60m² pond) positioned 3-4 metres above pond level for gravity-fed distribution. Use food-grade materials for storage tanks and cover them to prevent contamination and algae growth.
Water Treatment Methods
Mechanical filtration removes suspended particles that cloud water and provide surfaces for harmful bacteria growth. Install sand filters using 30-50cm of graded sand (coarse at bottom, fine at top) in concrete or plastic containers. Design filters for flow rates of 100-200 litres per hour per square metre of filter area, ensuring adequate contact time for particle removal.
Biological filtration establishes beneficial bacteria colonies that convert toxic ammonia from fish waste into less harmful nitrates. Create biological filter beds using plastic media, crushed stone, or ceramic rings in separate chambers connected to your pond circulation system. Allow 2-4 weeks for bacterial colonies to establish before introducing fish, and maintain continuous water flow to keep bacteria alive.
Chemical treatment addresses specific water quality problems that mechanical and biological filtration cannot resolve. Use agricultural lime (calcium hydroxide) to raise pH in acidic water, applying 50-100 grams per 1,000 litres to increase pH by 0.5 units. Add sodium bicarbonate to buffer pH fluctuations, particularly important during heavy feeding periods when fish waste can cause rapid pH changes.
Monitoring Water Quality
Temperature monitoring requires daily measurement because tilapia growth rates decrease dramatically outside the 26-30°C optimal range. Use digital thermometers with data logging capability to track daily temperature fluctuations and identify patterns that might require management intervention. Install shade structures or aeration systems if temperatures regularly exceed 32°C, and consider pond covers or deeper construction in areas where temperatures drop below 24°C during cool seasons.

pH measurement should occur twice daily (morning and evening) using digital pH metres calibrated weekly with standard buffer solutions. Record pH readings along with feeding times and weather conditions to identify patterns and predict pH swings. Maintain pH between 6.5-8.5 through lime additions or organic acid (vinegar) applications, making gradual adjustments of 0.2 pH units per day to avoid shocking fish.
Dissolved oxygen levels require continuous attention because tilapia can die within hours when oxygen drops below 3 ppm. Use digital dissolved oxygen metres or test kits to measure oxygen levels at dawn (lowest levels), midday, and evening. Install emergency aeration systems activated when oxygen drops below 5 ppm, and reduce feeding if oxygen levels remain below 6 ppm for extended periods.
Ammonia and nitrite testing prevents toxic buildups that cause stress, disease, and mortality in intensive tilapia production. Test ammonia weekly using colorimetric test kits, maintaining levels below 0.5 ppm through proper feeding management and biological filtration. Monitor nitrite levels monthly, as excessive levels (above 0.1 ppm) indicate problems with biological filtration that require immediate attention.
| Parameter | Ideal Range | Monitoring Frequency |
|---|---|---|
| pH | 6.5 - 8.5 | Twice daily |
| Temperature | 26 - 30°C | Daily |
| Dissolved Oxygen | Above 6 ppm | Continuous |
| Ammonia | Below 0.5 ppm | Weekly |
| Nitrite | Below 0.1 ppm | Monthly |
Aeration Technologies
Surface aerators provide efficient oxygen transfer and water circulation for rectangular concrete ponds. Install 0.5-1.0 horsepower paddle wheel aerators for ponds up to 100m², positioning them to create circular flow patterns that distribute oxygenated water throughout the pond. Operate aerators continuously during hot weather and feeding periods, reducing operation to 12 hours daily during cooler periods to conserve electricity whilst maintaining adequate oxygen levels.
Diffused aeration systems use air blowers and diffuser stones to create fine bubble streams that maximise oxygen transfer efficiency. Install diffusers along pond bottoms at 2-3 metre intervals, using 0.5-1.0 horsepower blowers for 60m² ponds. Diffused aeration provides excellent oxygen transfer whilst creating gentle water movement that doesn't stress fish.
Venturi aerators use water flow to draw air into the system, providing aeration without electricity requirements. Install venturi units in water circulation lines, using gravity flow or small pumps to create the water movement needed for air entrainment. These systems work well for smaller ponds or as backup aeration during power outages, though they provide less oxygen transfer than mechanical aerators.
Solar-powered aeration systems offer sustainable operation in areas with unreliable electricity supply. Install solar panels (100-200 watts) with battery storage systems to operate small aerators continuously. Solar aerators work particularly well for remote pond locations where grid electricity is unavailable or expensive.
| Growth Stage | Age (Weeks) | Feeding Frequency | Feed Type |
|---|---|---|---|
| Fry | 0-2 | 8-10 times daily | Starter feed |
| Fingerling | 3-6 | 4-6 times daily | Grower feed |
Drainage Systems
Primary drainage systems must completely empty your concrete pond within 2-4 hours for effective cleaning and fish harvesting. Install 150-200mm diameter drain pipes at the deepest point of your pond, using gate valves or removable standpipes to control drainage rates. Slope pond floors 1-2% toward drainage points to ensure complete water removal without leaving stagnant areas where pathogens can multiply.
Overflow systems prevent flooding during heavy rains that could damage pond structures or allow fish to escape. Install overflow pipes 10-15cm below maximum water level, connecting to drainage ditches or storm water systems. Size overflow capacity to handle expected rainfall volumes plus any additional water from pumping systems or natural inflow.
Emergency drainage capabilities allow rapid pond emptying during water quality crises or disease outbreaks. Install bypass valves that can drain ponds within 1-2 hours when fully opened, providing emergency response capability when fish health is threatened. Consider installing multiple drainage points for large ponds to ensure complete water removal from all areas.
Conclusion
Building concrete ponds represents a significant investment that will serve your tilapia operation for decades when constructed properly. By following precise excavation procedures, using correct concrete mixing ratios (1:2:4 with proper water-cement ratios), installing adequate reinforcement, and implementing comprehensive water management systems, you create the foundation for intensive production that earthen ponds simply cannot match. Remember the critical details: proper site preparation prevents costly structural problems, continuous concrete curing for seven days ensures maximum strength, and integrated drainage systems allow complete pond management.

You now possess the technical knowledge to construct professional-grade concrete ponds that support high-density tilapia production. Yes, the construction process requires attention to detail and quality materials, but thousands of farmers across Africa have successfully built these systems using the same techniques outlined here. Start with one well-built pond rather than rushing to construct multiple inferior structures—your first pond becomes your learning laboratory and proof of concept.
With your concrete pond infrastructure in place, focus next on developing efficient feeding systems and establishing reliable fingerling supply chains. These three elements—quality infrastructure, proper nutrition, and healthy stock—form the foundation of profitable tilapia farming. Your concrete pond investment pays dividends through higher stocking densities, better survival rates, and the ability to implement intensive management practices that maximise growth and profitability.
colour: #c00; font-weight: 700;">Frequently Asked Questions
colour: #0077B6; font-size: 1.05em;">Why are concrete ponds considered the "gold standard" for serious tilapia production compared to earthen ponds?
colour: #343A40; line-height: 1.6;">Concrete ponds offer significantly better water quality control by eliminating soil interaction, which leads to more stable pH, turbidity, and nutrient levels. They also provide superior durability, lasting 20-30 years with minimal maintenance, and allow for higher stocking densities and intensive farming practices that earthen ponds cannot support. This translates to consistent harvests and reduced mortality.
colour: #0077B6; font-size: 1.05em;">How deep should I make my concrete pond for optimal tilapia growth?
colour: #343A40; line-height: 1.6;">You should maintain a depth of 1.2-1.5 metres throughout most of the pond. It's also beneficial to include a deeper section, around 1.8 metres, near the drainage outlet to facilitate easier fish collection during harvesting. This depth range supports good oxygen levels and stable temperatures, which are crucial for tilapia.
colour: #0077B6; font-size: 1.05em;">What is the recommended concrete mixing ratio for building a durable pond, and how should it be cured?
colour: #343A40; line-height: 1.6;">For optimal strength and water resistance, use a 1:2:4 mix ratio (1 part cement, 2 parts sand, 4 parts aggregate) with a water-cement ratio of 0.45-0.50. After pouring, keep the concrete surfaces continuously moist for at least 7 days using wet hessian or plastic sheeting, and allow 28 days for full strength development before filling the pond.
colour: #0077B6; font-size: 1.05em;">Can I use municipal water for my concrete tilapia pond, and what treatment is needed?
colour: #343A40; line-height: 1.6;">Yes, you can use municipal water, but it often contains chlorine or chloramines which are toxic to fish. You must either install activated carbon filters or allow the water to stand in holding tanks for 24-48 hours to allow the chlorine to dissipate naturally. Always check the pH and hardness as municipal treatment processes can affect these parameters.
colour: #0077B6; font-size: 1.05em;">How can I effectively remove suspended particles from river or stream water before it enters my concrete pond?
colour: #343A40; line-height: 1.6;">When using river or stream sources, you should install intake structures upstream from pollution and use settling ponds to remove larger suspended solids. Additionally, screen the intake water through a 5mm mesh to exclude wild fish and debris. This mechanical filtration is crucial before the water enters your main concrete pond.


Yomi Adisa Lead Researcher
Yomi Adisa is the lead researcher at Fish Farming Business, where he studies what makes aquaculture ventures profitable across Africa. His research focuses on market patterns, buyer preferences, and the business decisions that determine success or failure in fish farming.