Building Earthen Tilapia Ponds: Complete Construction Guide with Specifications
Posted on: 2025-10-17
By: Yomi Adisa
Building Earthen Tilapia Ponds: Complete Construction Guide with Specifications
You've watched your neighbour's tilapia thriving in their beautifully constructed earthen pond whilst your own fish struggle in makeshift concrete tanks that crack every dry season and cost a fortune to repair. The difference isn't luck—it's proper pond construction that creates stable growing conditions, reduces operating costs, and supports optimal fish health year after year.
📑 Table of Contents
Most tilapia farmers across Africa face this exact challenge: knowing that earthen ponds offer superior growing conditions and lower costs, but lacking the technical knowledge to build them correctly. Poor construction leads to constant water loss, uneven fish growth, difficult harvesting, and expensive repairs that drain profits from otherwise successful operations. Meanwhile, properly built earthen ponds maintain stable water temperatures, provide natural food sources through biological productivity, and operate reliably for decades with minimal maintenance costs.
This comprehensive construction guide provides you with complete step-by-step instructions for building professional-quality earthen tilapia ponds, including precise specifications for dimensions, depths, drainage systems, and soil requirements. You'll learn surveying techniques, excavation methods, dike construction standards, and water management systems that commercial farms use successfully throughout Nigeria, Kenya, Uganda, and across Africa. Whether you're planning your first 50-square-metre pond or expanding to multiple production units, you'll gain the technical expertise to build ponds that support optimal tilapia growth rates whilst creating a farming system that serves you profitably for decades.
🎯 What You'll Learn
- Learn precise specifications for pond dimensions, depths, and drainage systems to optimise tilapia growth and health
- Master effective excavation and dike construction techniques to ensure long-lasting and stable earthen ponds
- Discover essential water quality management practices to maintain optimal conditions for tilapia production and prevent costly losses
Understanding Tilapia Farming and Pond Requirements
Before breaking ground on your earthen pond, you need to understand how tilapia biology and behaviour influence construction requirements. Tilapia thrive in specific environmental conditions, and your pond design must accommodate their growth patterns, feeding habits, and reproductive tendencies to maximise production success. Getting these fundamentals right during the planning stage prevents costly reconstruction later and ensures your investment delivers optimal returns.
Overview of Tilapia Farming and Essential Pond Requirements
Tilapia possess unique characteristics that make them excellent candidates for earthen pond culture across Africa's diverse climates. These hardy fish tolerate temperature ranges from 20-35°C but grow fastest at 26-30°C, making them ideal for tropical and subtropical regions. Nile tilapia, the most common species, can reach 300-500 grams in 6-8 months under optimal conditions, whilst Blue tilapia grows slightly slower but tolerates cooler temperatures better.
| Species | Growth Rate | Temperature Tolerance | Feeding Habits |
|---|---|---|---|
| Nile Tilapia | 300-500 grams in 6-8 months | 20-35°C, optimal 26-30°C | Omnivorous |
| Blue Tilapia | Slower than Nile | Better in cooler temperatures | Omnivorous |
Your pond design directly determines farming success because tilapia are highly sensitive to water quality fluctuations and space constraints. Overcrowded conditions trigger stress responses that reduce growth rates, increase disease susceptibility, and can cause mass mortality events during hot weather or oxygen depletion periods. Professional tilapia farmers maintain stocking densities between 2-5 fish per square metre in earthen ponds, depending on management intensity and supplemental feeding levels.
Water quality parameters require constant attention because tilapia produce significant waste loads that can quickly deteriorate pond conditions. Maintain pH levels between 6.5-8.5, dissolved oxygen above 5mg/L, and ammonia concentrations below 0.5ppm for optimal growth. Temperature stability proves crucial - sudden drops below 20°C or spikes above 35°C cause feeding cessation and potential mortality.
| Parameter | Optimal Range | Critical Limits |
|---|---|---|
| pH | 6.5-8.5 | Below 6.0 or above 9.0 |
| Dissolved Oxygen | Above 5 mg/L | Below 3 mg/L |
| Ammonia | Below 0.5 ppm | Above 1.0 ppm |
| Temperature | 26-30°C | Below 20°C or above 35°C |
Planning Your Earthen Tilapia Pond
Successful earthen pond construction begins with thorough planning that considers your specific site conditions, production goals, and available resources. Poor planning leads to construction delays, cost overruns, and ponds that fail to meet your tilapia production needs. Take time during this phase to analyse your site thoroughly and make informed decisions about pond specifications that will serve your farming operation for years to come.
Site Selection Criteria
Soil composition determines whether your earthen pond will hold water effectively or require expensive sealing treatments. Clay soils with 20-30% clay content provide excellent water retention, whilst sandy soils allow rapid seepage that makes pond management difficult and expensive. Test your soil by taking samples from multiple locations across your proposed pond site, digging to 1.5-metre depth to check consistency throughout the profile.
Topography influences construction costs and long-term pond management significantly. Gentle slopes of 1-3% provide ideal drainage whilst minimising excavation requirements, but avoid steep slopes that increase erosion risks and construction complexity. Your site should have natural drainage away from the pond to prevent flooding during heavy rains, yet remain accessible to water sources for filling and routine management.
Water source reliability and quality affect both construction planning and ongoing operations. Position your pond within 100 metres of a reliable water source to minimise filling costs and enable rapid water changes when needed. Test source water for pH (should be 6.5-8.5), dissolved minerals, and potential contamination from agricultural runoff or industrial sources.
Determining Pond Size and Depth
Pond dimensions depend on your production goals, available land, and management capacity. Small-scale farmers typically start with 50-100 square metre ponds that produce 150-300 kilograms of tilapia per cycle, whilst commercial operations build 500-2000 square metre units for higher production volumes. Rectangular shapes prove most efficient for management, with length-to-width ratios between 2:1 and 3:1 providing good water circulation patterns. For more information on pond designs for tropical tilapia farming, refer to our detailed guide.
| Pond Type | Advantages | Disadvantages | Cost |
|---|---|---|---|
| Earthen Pond | Stable water conditions, natural food sources | Construction complexity | Lower than concrete |
| Concrete Pond | Durability | Higher maintenance costs, potential for cracks | Higher than earthen |
Depth specifications critically influence tilapia growth rates and pond management efficiency. Maintain depths between 1.0-1.5 metres throughout most of the pond area, with deeper sections (1.8-2.0 metres) comprising no more than 20% of total area. Shallow areas (0.5-0.8 metres) around pond edges provide warming zones during cool periods and facilitate harvesting operations.
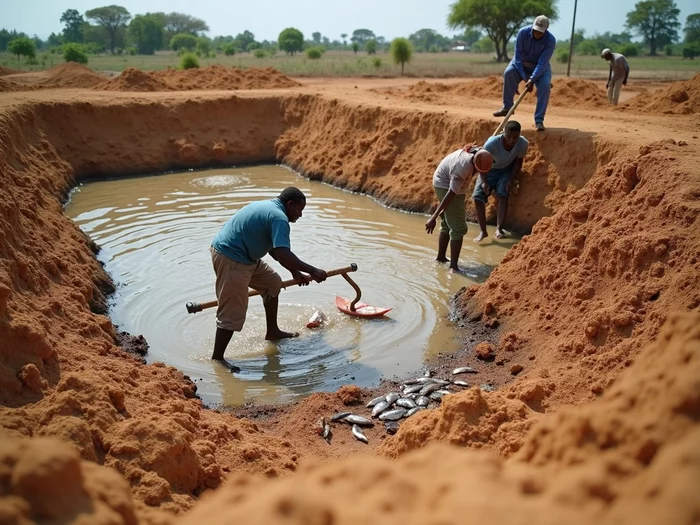
Calculate your pond volume accurately to determine stocking rates and feeding requirements. A 100-square-metre pond with 1.2-metre average depth holds approximately 120,000 litres of water and can support 200-500 tilapia depending on your management intensity. Factor in 10-15% volume reduction from bank slopes and shallow edge areas when making these calculations.
| Management Type | Stocking Density (fish/m²) | Expected Growth Rate |
|---|---|---|
| Extensive Management | 2 fish/m² | Lower |
| Semi-Intensive Management | 3-4 fish/m² | Moderate |
| Intensive Management | 5 fish/m² | Higher |
Step-by-Step Pond Construction Process
Converting your carefully planned pond design into a functional tilapia production system requires systematic execution of construction phases, each building upon the previous work. Professional pond construction follows established sequences that ensure structural integrity, proper drainage, and long-term durability. Rushing through construction phases or skipping critical steps leads to expensive repairs and potential pond failure during your first production cycle.
Phase 1: Land Surveying
Accurate surveying establishes the foundation for all subsequent construction work by identifying exact pond boundaries, calculating cut-and-fill requirements, and locating critical infrastructure elements. Professional surveying prevents costly mistakes like inadequate drainage, uneven pond bottoms, or insufficient freeboard that become apparent only after construction completion. Invest time and resources in proper surveying because corrections after excavation prove extremely expensive and time-consuming.
Begin surveying with a detailed site map that identifies existing features like trees, buildings, utilities, and natural drainage patterns. Use GPS coordinates to establish permanent reference points that guide excavation teams and enable future expansion planning. Mark utilities clearly - striking water pipes or electrical lines during excavation creates dangerous conditions and expensive repairs.
Establish pond elevations using water levels, surveying instruments, or smartphone applications with levelling capabilities. Your pond bottom should maintain consistent slopes of 1-2% towards the drainage outlet to enable complete water removal during harvesting and cleaning operations. Mark these elevations with stakes and spray paint so excavation operators can maintain proper grades throughout the digging process.
Phase 2: Excavation Techniques
Excavation transforms your surveyed site into the basic pond structure whilst preserving soil quality for dike construction. Proper excavation techniques minimise soil compaction, preserve topsoil for later use, and create the precise dimensions your tilapia production system requires. Poor excavation practices result in weak dikes, uneven pond bottoms, and drainage problems that plague your operation for years.
Remove and stockpile topsoil separately from subsoil because topsoil contains organic matter that weakens dike construction but proves valuable for final landscaping around your completed pond. Strip topsoil to 20-30 centimetre depth across the entire pond area and store it away from heavy equipment traffic. This preserved topsoil later provides excellent growing medium for grass or other vegetation that stabilises your completed dike surfaces.
Excavate pond areas systematically, beginning from the deep end and working towards the shallow drainage outlet. Maintain side slopes between 2:1 and 3:1 (horizontal to vertical) to prevent bank collapse and enable safe pond access for management activities. A 3:1 slope means for every metre of vertical depth, the bank extends 3 metres horizontally.
Phase 3: Dike Construction
Dike construction creates the structural walls that contain your pond water whilst providing stable platforms for pond management activities. Well-built dikes withstand seasonal weather extremes, support equipment loads, and maintain their integrity throughout decades of use. Poorly constructed dikes fail catastrophically, destroying your fish stock and potentially damaging neighbouring properties through flooding.
Build dikes using the core-and-shell method that places clay-rich soil in the centre core with more permeable soil forming outer shells. The impermeable core prevents water seepage whilst outer shells provide stability and erosion resistance. Construct cores with soil containing at least 20% clay content, compacting each 20-centimetre lift thoroughly before adding the next layer.
Maintain proper dike dimensions throughout construction to ensure adequate strength and stability. Build dike bases 3-4 times wider than their final height - a 1.5-metre high dike requires a 4.5-6.0 metre base width. Taper dike sides at 2:1 or 3:1 slopes on both water and land sides, creating stable profiles that resist erosion and bank failure.
Phase 4: Installing Drainage Systems
Effective drainage systems enable complete pond draining for harvesting, cleaning, and maintenance operations whilst preventing uncontrolled water loss during normal operations. Professional drainage installation requires precise elevation control and durable materials that function reliably under pond conditions. Poor drainage systems force farmers to use pumps or nets for harvesting, increasing labour costs and fish stress levels significantly.
Install monk board drainage systems that allow precise water level control through removable boards. Construct drainage structures using concrete blocks or poured concrete, positioning the outlet at the deepest point of your pond bottom. Size drainage pipes to empty your pond within 4-6 hours - typically 15-20 centimetre diameter pipes for ponds up to 500 square metres.
Create proper drainage channels leading away from your pond to prevent erosion and flooding around pond structures. Line drainage channels with stones or concrete where water velocities exceed 1 metre per second to prevent erosion. Ensure drainage outlets discharge at least 50 metres from your pond to prevent recycling of nutrient-rich water that could cause algae blooms or water quality problems.
Phase 5: Finishing Touches
Completing your earthen pond construction involves final grading, surface treatments, and infrastructure installation that transform your excavated site into a functional tilapia production system. These finishing touches often determine long-term pond performance and management efficiency. Attention to detail during finishing work prevents future problems and creates professional-quality facilities that support optimal fish production.
Grade pond bottoms to precise specifications that ensure complete drainage whilst eliminating dead zones where waste accumulates. Final bottom grades should slope consistently at 1-2% towards drainage outlets, with no depressions or high spots that interfere with water flow patterns. Use string lines and water levels to verify bottom elevations before filling your pond because corrections after flooding prove extremely difficult and expensive.
Apply bentonite clay or other sealing agents if soil tests reveal excessive permeability that could cause water loss problems. Spread bentonite at 2-3 kilograms per square metre over pond bottoms and sides, then compact thoroughly before filling. Install pond accessories like feeding platforms, aeration systems, and monitoring equipment before initial flooding.
Environmental Considerations During Construction
Construction activities impact local environments through soil disturbance, water runoff, and vegetation removal that can affect neighbouring properties and natural ecosystems. Responsible construction practices minimise these impacts whilst creating ponds that integrate successfully with surrounding landscapes. Environmental considerations also influence long-term pond productivity through their effects on natural food webs and water quality stability.
Implement erosion control measures throughout construction to prevent soil loss and downstream sedimentation. Install silt fences or hay bales around construction sites to trap sediment before it reaches streams, roads, or neighbouring properties. Schedule major earthmoving activities during dry seasons when erosion risks remain minimal, and cover exposed soil surfaces with mulch or temporary vegetation if construction extends through rainy periods.
Preserve existing vegetation where possible because established plants provide erosion control, wildlife habitat, and aesthetic benefits that enhance your pond environment. Plan construction access routes to minimise vegetation disturbance and restore damaged areas immediately after construction completion. Consider local wildlife patterns and migration routes when positioning ponds and associated infrastructure.
Post-Construction Management and Maintenance
Your newly constructed earthen pond requires systematic management and maintenance to achieve optimal tilapia production whilst preserving the structural integrity of your investment. Proper post-construction care during the first months establishes pond biological systems and identifies potential problems before they become serious issues. Neglecting early management often leads to poor fish performance and expensive repairs that could have been prevented through proactive maintenance.
Water Quality Monitoring
Establishing effective water quality monitoring systems immediately after pond completion enables you to track critical parameters that determine tilapia health and growth rates. Regular monitoring identifies problems early when corrective actions remain simple and inexpensive, preventing fish losses and production delays. Professional tilapia farmers monitor water quality daily during critical periods and weekly during stable production phases.
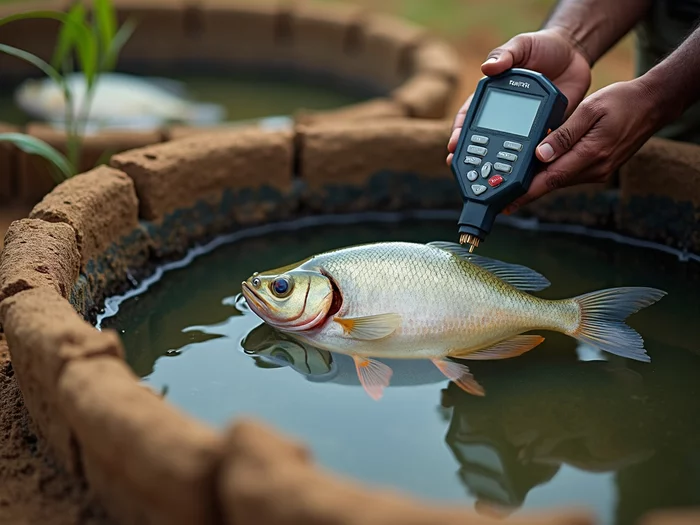
Monitor temperature, pH, dissolved oxygen, ammonia, and nitrite levels using reliable test kits or digital metres designed for aquaculture applications. Record readings at consistent times - early morning before feeding provides the most accurate baseline measurements because overnight respiration reduces oxygen levels to daily minimums. Establish acceptable parameter ranges for your specific conditions and develop response protocols when readings exceed safe limits.
Track water quality trends over time to identify seasonal patterns and management needs. New earthen ponds often experience unstable water chemistry during the first 3-6 months as biological systems establish equilibrium. Document these changes to develop effective management strategies for future production cycles and to recognise normal variations versus problem conditions requiring intervention.
Seasonal Maintenance Guidelines
Develop comprehensive maintenance schedules that address seasonal challenges and preserve pond infrastructure throughout varying weather conditions. Regular maintenance prevents small problems from developing into major repairs whilst ensuring optimal growing conditions for your tilapia throughout production cycles. Seasonal maintenance requirements vary significantly across Africa's diverse climates, from managing dry season water levels to controlling wet season erosion.
| Season | Maintenance Task | Purpose |
|---|---|---|
| Dry Season | Monitor water levels, repair dikes | Prevent water loss, maintain structure |
| Wet Season | Check drainage systems, control erosion | Prevent flooding, maintain water quality |
| Monthly | Inspect pond perimeter, clean drainage | Early problem detection, system maintenance |
Conduct thorough pond inspections monthly, checking dike integrity, drainage system function, and bank stability around the entire pond perimeter. Look for signs of seepage, erosion, rodent damage, or vegetation overgrowth that could compromise pond structure or water quality. Maintain vegetation around pond banks through regular mowing or grazing to prevent overgrowth that harbours pests whilst preserving erosion control benefits.
Clean drainage systems seasonally to ensure proper function during emergencies or routine pond management. Remove accumulated debris from intake screens, monk boards, and outlet channels that could block water flow when you need drainage capacity most. Test drainage systems by partially draining and refilling ponds during maintenance periods to verify proper operation before critical harvest periods.
Pest and Predator Management
Implement comprehensive pest and predator control strategies that protect your tilapia investment whilst maintaining ecological balance around your pond environment. Effective pest management combines preventive measures with targeted control methods that address specific threats common to your region. Uncontrolled pest populations can devastate tilapia stocks through direct predation, disease transmission, or competition for food resources.
Install predator barriers like nets, fencing, or scare devices to protect tilapia from birds, mammals, and reptiles that commonly prey on pond fish. Bird netting proves most effective when installed 2-3 metres above water surface to prevent diving birds from reaching fish whilst allowing pond access for management activities. Control aquatic weeds through mechanical removal, biological agents, or targeted herbicide applications that don't harm tilapia or beneficial pond organisms.

Monitor for disease vectors like mosquitoes, snails, or parasitic worms that can transmit pathogens to your tilapia stock. Maintain proper water circulation and eliminate stagnant areas where disease vectors breed most successfully. Stock predatory fish species in polyculture systems to control pest populations naturally whilst providing additional income streams from your pond investment. For more information on disease management techniques, please refer to our comprehensive guide.
Building your own earthen tilapia pond may seem daunting, but you now have the complete technical roadmap to construct a professional-quality system that will serve your farming operation for decades. Focus on the fundamentals: proper site selection with good clay content soils, systematic excavation maintaining 2:1 to 3:1 bank slopes, methodical dike construction using the core-and-shell technique, and reliable drainage systems with monk board controls. These core elements determine whether your pond succeeds or struggles from day one.
Remember that pond construction is a skill that improves with experience. Your first pond teaches you lessons that make subsequent projects faster, cheaper, and more efficient. Many successful commercial tilapia farmers across Africa started with single 100-square-metre ponds and expanded their operations as their construction expertise grew.
With your pond construction knowledge secured, turn your attention to developing comprehensive water quality management and feeding systems that maximise your infrastructure investment. The best-built pond in Africa won't produce profitable tilapia without proper biological management. Start planning your stocking strategy, source quality fingerlings, and establish monitoring routines that keep your new pond operating at peak efficiency.
Frequently Asked Questions
How do I know if my soil is suitable for building an earthen tilapia pond?
You can test your soil by taking samples from 1.5-metre depths across your proposed site. Good pond soil should have 20-30% clay content, which you can roughly check by mixing soil with water in a jar; clay settles at the bottom. Sandy soils that allow rapid seepage are not ideal.
Why is it better to build multiple smaller ponds instead of one large one?
Building multiple smaller ponds offers better management control over your tilapia production. It makes harvesting easier, reduces risks from disease outbreaks, and prevents widespread water quality problems that can occur in a single large unit. This approach provides more flexibility for your farming operation.
What are the ideal dimensions and depth for a small-scale earthen tilapia pond?
For small-scale farmers, 50-100 square metre ponds are typical, producing 150-300 kilograms of tilapia per cycle. Aim for a rectangular shape with a 2:1 or 3:1 length-to-width ratio for good water circulation. The pond depth should be maintained between 1.0-1.5 metres throughout most of the area.
How can I prevent erosion on my pond dikes, especially during heavy rains?
To prevent dike erosion, ensure you maintain proper dike dimensions with 2:1 or 3:1 side slopes on both water and land sides. Establish grass or other suitable ground cover on dike surfaces within 30 days of construction to stabilise the soil. Additionally, line drainage channels with stones or concrete where water velocities are high.
Should I install an overflow system in my earthen tilapia pond?
Yes, you absolutely should install an overflow system in your earthen pond. This prevents dike damage during heavy rains or equipment failures by ensuring excess water can safely exit the pond. Position these pipes or spillways 10-15 centimetres below the dike crest and ensure they discharge away from pond structures.


Yomi Adisa Lead Researcher
Yomi Adisa is the lead researcher at Fish Farming Business, where he studies what makes aquaculture ventures profitable across Africa. His research focuses on market patterns, buyer preferences, and the business decisions that determine success or failure in fish farming.