Breeding Tank Design and Setup for Commercial Tilapia Farming: Practical Guide for Producers
Posted on: 2025-10-30
By: Yomi Adisa
Breeding Tank Design and Setup for Commercial Tilapia Farming: Practical Guide for Producers
Picture this: You've invested in quality broodstock, your market demand is growing, but your fry production remains inconsistent. One month you harvest 500 healthy fry, the next barely 200 survive. The difference often lies not in your fish or feeding programme, but in your breeding tank design and setup.
📑 Table of Contents
Many African tilapia farmers struggle with low fry survival rates, poor breeding performance, and unpredictable production cycles because their breeding systems weren't properly planned from the start. This inconsistency creates serious problems for your business. When you can't predict fry production, you can't plan grow-out cycles, meet customer commitments, or budget accurately for expansion.
Poor breeding tank design leads to stressed broodstock, high mortality rates, and wasted investment in quality breeding fish. Meanwhile, farmers with well-designed breeding systems consistently achieve 70-85% fry survival rates and predictable monthly production that supports steady business growth. Effective breeding tank design matters because it directly impacts your farm's profitability and sustainability.
Properly designed breeding systems can increase fry survival rates from 30-40% to 70-85%, reduce disease outbreaks by up to 60%, and provide predictable production schedules for planning your grow-out operations. When you understand the technical principles behind successful breeding tank management, you transform from hoping for good results to consistently achieving them. This guide provides you with complete technical knowledge for designing, setting up, and managing breeding tanks that consistently produce healthy tilapia fry.
🎯 What You'll Learn
- Master the essential design specifications for breeding tanks to maximise fry survival rates and reproductive success
- Discover effective broodstock management techniques to enhance genetic diversity and improve overall production performance
- Learn how to implement advanced water quality management systems to maintain optimal conditions for breeding and reduce disease outbreaks
Understanding Breeding Tanks for Tilapia Farming
Breeding tanks form the foundation of any successful tilapia operation, serving as controlled environments where your carefully selected broodstock reproduce and nurture the next generation of fish. Unlike grow-out systems focused on rapid weight gain, breeding tanks require specific design features that support natural spawning behaviour, protect vulnerable fry, and maintain optimal conditions for reproductive success. Understanding these unique requirements helps you make informed decisions about tank design, equipment selection, and management practices.
Role and Importance of Breeding Tanks
Breeding tanks serve as the reproductive heart of your tilapia operation, providing controlled environments where broodstock can spawn naturally whilst protecting eggs and fry from environmental stresses and predation. In these specialised systems, mature female tilapia construct nests in prepared substrates, males fertilise eggs through natural courtship behaviour, and females provide mouth-brooding care for developing fry. The controlled environment allows you to monitor breeding activity, collect fry at optimal times, and maintain genetic records for your breeding programme.
The importance of well-designed breeding tanks extends far beyond simple fry production. These systems enable you to control breeding timing, manage genetic diversity, and ensure consistent fry quality for your grow-out operations. A farmer in Kisumu operates six 4m x 2m breeding tanks, each producing 800-1,200 fry monthly from carefully selected Nile tilapia broodstock.
By maintaining separate tanks for different genetic lines, he's improved growth rates in his grow-out systems by 15% whilst reducing disease susceptibility. Breeding tanks also provide biosecurity advantages by isolating reproductive activities from grow-out operations. This separation reduces disease transmission risks, allows targeted treatments when necessary, and enables precise monitoring of broodstock health and performance.
Types of Breeding Tanks
Circular breeding tanks offer excellent water circulation patterns that prevent dead zones and ensure uniform water quality throughout the system. The curved walls eliminate corners where waste can accumulate, whilst the continuous flow pattern helps distribute oxygen evenly and removes metabolic waste efficiently. These tanks work particularly well for tilapia because the circular flow mimics natural water movement patterns that stimulate breeding behaviour.
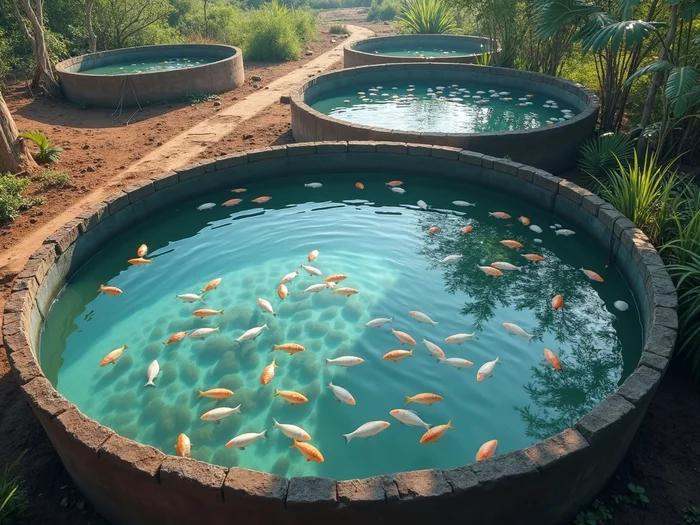
A tilapia farmer in Accra uses 3-metre diameter circular fibreglass tanks for breeding, with water entering tangentially to create gentle circulation. Each tank houses 40 broodstock (30 females, 10 males) and produces 1,500-2,000 fry monthly. The circular design allows easy observation of spawning activity and simplifies fry collection using central drain systems.
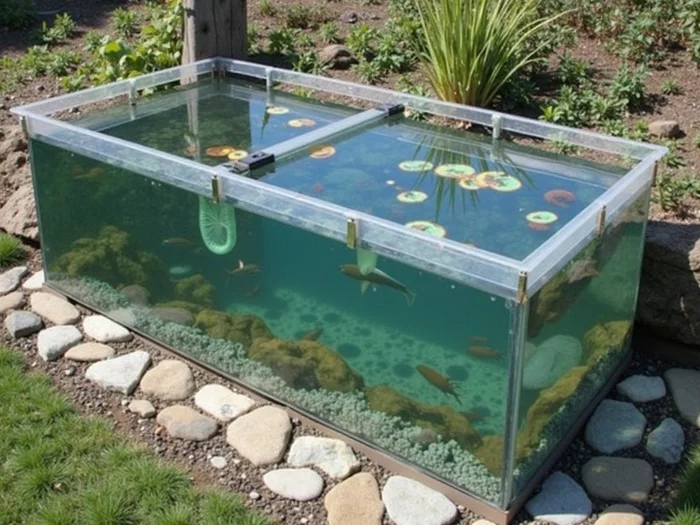
Rectangular breeding tanks provide maximum space efficiency and easier construction using standard materials like concrete blocks or prefabricated panels. These tanks offer better substrate placement options for nest construction and allow efficient use of spawning hapas when required. The straight walls facilitate cleaning and maintenance, whilst the rectangular shape maximises water volume within available space constraints.
However, rectangular tanks require careful attention to water flow patterns to prevent dead zones in corners. Installing multiple inlet and outlet points helps create adequate circulation, whilst proper substrate placement can guide water flow and create natural circulation patterns. Many African farmers prefer rectangular concrete tanks because local materials and construction skills make them cost-effective for medium to large-scale operations.
Raceway-style breeding tanks work well for continuous flow systems with abundant water supplies. These long, narrow tanks provide excellent water exchange rates and can accommodate larger numbers of broodstock in organised breeding groups. The flowing water maintains high oxygen levels and removes waste efficiently, creating conditions similar to river environments where tilapia naturally spawn.
| Tank Type | Advantages | Disadvantages |
|---|---|---|
| Circular Tanks | Excellent water circulation and natural breeding stimulation | Less optimal substrate arrangement |
| Rectangular Tanks | Maximum space efficiency and easier construction | Potential dead zones if not designed properly |
| Raceway Tanks | Higher initial setup costs and space requirements | Higher initial setup costs and space requirements |
Key Design Considerations for Breeding Tanks
Successful breeding tank design requires balancing multiple factors including fish biology, water management, construction costs, and operational efficiency. Each design decision affects water quality, fish behaviour, maintenance requirements, and ultimately your fry production success. Understanding these interconnected factors helps you create breeding systems that perform reliably whilst fitting your budget and management capabilities.
Tank Size and Shape
Tank dimensions directly influence broodstock behaviour, water quality management, and fry survival rates. For optimal breeding performance, plan 0.5-1.0 square metres of tank bottom area per female broodstock, with water depths between 0.8-1.2 metres. This provides adequate territory for nest construction whilst maintaining manageable water volumes for quality control.
Shallow areas (0.3-0.5 metres) along tank edges create preferred spawning sites, whilst deeper central areas provide refuge and circulation space. A successful breeding operation in Mombasa uses rectangular tanks measuring 4m x 3m x 1m deep, housing 12 female and 4 male Nile tilapia broodstock. The 12 square metre bottom area provides each female with one square metre of territory, reducing territorial conflicts whilst maintaining breeding activity.
Tank shape affects water circulation patterns and fish behaviour significantly. Circular tanks create natural circulation that prevents dead zones and distributes nutrients evenly, but may not provide optimal spawning substrate arrangements. Rectangular tanks offer better space utilisation and easier hapa placement but require careful inlet and outlet positioning to maintain adequate circulation.
Materials for Tank Construction
Concrete remains the most popular breeding tank material across Africa due to local availability, durability, and construction familiarity. Properly constructed concrete tanks last 15-20 years with minimal maintenance, resist damage from fish activity, and provide stable thermal mass that moderates temperature fluctuations. Use concrete mix ratios of 1:2:3 (cement:sand:aggregate) with waterproofing additives for optimal results.
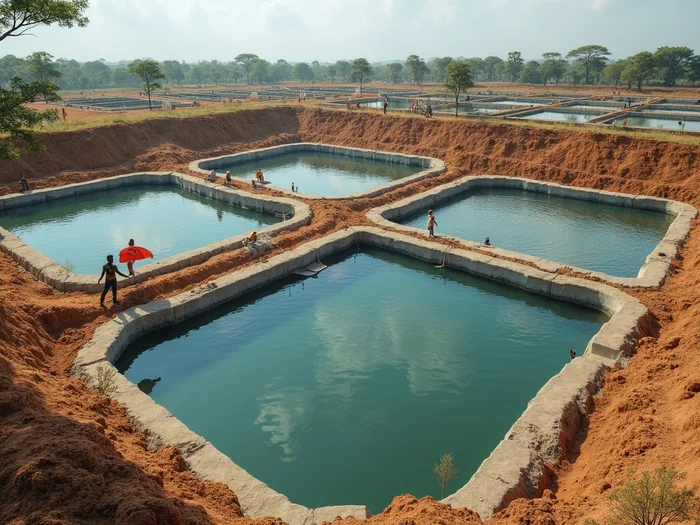
Construction costs for concrete tanks vary by location but typically range from 15,000-25,000 naira per square metre in Nigeria, 1,200-2,000 shillings per square metre in Kenya, and 800-1,500 kwacha per square metre in Zambia. These costs include excavation, concrete materials, reinforcement steel, and basic finishing. A farmer in Kumasi built six 3m x 2m concrete breeding tanks for 180,000 cedis total, achieving consistent fry production that recovered construction costs within 18 months.
Fibreglass tanks offer lighter weight, smooth surfaces, and faster installation compared to concrete construction. The non-porous surface resists algae growth and simplifies cleaning, whilst the smooth finish prevents injury to broodstock during spawning activities. Prefabricated fibreglass tanks arrive ready for installation, reducing construction time and labour costs significantly.
However, fibreglass tanks cost 2-3 times more than concrete initially and may require replacement after 8-12 years depending on UV exposure and handling. Transport costs can be substantial for remote locations, and repairs require specialised materials and skills not always available locally. Consider fibreglass for smaller operations or locations where concrete construction is impractical.
Filtration and Aeration Systems
Breeding tanks require more intensive water quality management than grow-out systems because broodstock produce concentrated waste loads whilst fry remain highly sensitive to water quality fluctuations. Plan for complete water volume turnover every 2-4 hours through mechanical and biological filtration systems. Mechanical filtration removes solid waste, uneaten feed, and debris, whilst biological filtration processes dissolved nutrients and maintains stable water chemistry.
Mechanical filtration systems for breeding tanks should include settling chambers, screen filters, and regular waste removal schedules. Install 100-200 micron screen filters at water inlets to prevent debris entry, and use gravity-fed settling chambers to remove suspended solids before water reaches biological filters. A tilapia breeding facility in Nairobi uses simple gravel filters with 20-30cm gravel beds that remove particles whilst supporting beneficial bacteria growth.
Biological filtration becomes critical in breeding tanks because broodstock feeding and waste production create high nutrient loads in relatively small water volumes. Establish biological filters using plastic media, gravel beds, or purpose-built bio-filter towers that provide surface area for beneficial bacteria colonisation. Size biological filters at 10-15% of total tank volume for adequate processing capacity.
Aeration systems must maintain dissolved oxygen levels above 5mg/L throughout the tank volume, with particular attention to bottom areas where waste accumulates. Install air stones or venturi aerators at multiple points to create circulation patterns that prevent stratification. Calculate 0.5-1.0 watts of aeration power per cubic metre of tank volume for adequate oxygenation under normal conditions.
Economic Considerations in Design
Initial construction costs represent only 30-40% of total breeding tank investment when you include equipment, setup, and first-year operating expenses. Budget 60,000-120,000 naira for a complete 12 square metre concrete breeding tank system in Nigeria, including construction, aeration, filtration, and initial broodstock. Similar systems cost 50,000-90,000 shillings in Kenya or 35,000-65,000 kwacha in Zambia, depending on local material prices and labour costs.
Return on investment calculations should consider fry production capacity, market prices, and operational costs over 5-7 year periods. A well-managed breeding tank producing 1,000 fry monthly can generate 15,000-30,000 naira monthly revenue in Lagos markets, 12,000-24,000 shillings in Nairobi, or 8,000-16,000 kwacha in Lusaka, depending on fry size and quality. Operating costs typically consume 40-60% of gross revenue, leaving substantial profits for equipment amortisation and expansion.
Design decisions significantly impact long-term profitability through maintenance costs, energy consumption, and production efficiency. Invest in quality construction and equipment initially to reduce ongoing maintenance expenses and improve production reliability. A farmer in Cape Coast spent 40% more on initial construction for better concrete work and equipment but reduced maintenance costs by 60% over five years whilst achieving 20% higher fry survival rates.
Setting Up Breeding Tanks
Proper breeding tank setup requires systematic attention to construction details, equipment installation, and environmental preparation that creates optimal conditions for tilapia reproduction. The setup phase determines whether your breeding system performs reliably or struggles with ongoing problems that reduce fry production and increase management stress. Taking time to complete each setup step properly prevents many common breeding problems and establishes the foundation for consistent success.
Step-by-Step Setup Process
Begin tank setup by ensuring level installation and proper drainage connections that prevent water accumulation around tank foundations. For concrete tanks, cure the concrete for 7-10 days before adding water, then fill and drain three times to remove residual lime and chemicals that could harm fish. Test pH levels after each drain cycle until readings stabilise between 6.5-8.0, indicating the concrete has properly cured and neutralised.
Install inlet and outlet plumbing systems with shut-off valves that allow complete water control during maintenance and emergencies. Position inlet pipes to create gentle circulation patterns that distribute fresh water throughout the tank without creating strong currents that stress broodstock. A breeding facility in Ibadan uses 75mm PVC inlet pipes positioned 30cm below water surface, creating horizontal flow patterns that maintain circulation without disturbing spawning areas.
Electrical systems require waterproof connections and ground fault protection to ensure safe operation in wet environments. Install electrical panels at least 2 metres from tank edges and use marine-grade wiring for all connections near water. Plan adequate electrical capacity for aeration systems, water pumps, and lighting equipment, typically requiring 5-10 amp circuits for each breeding tank system.
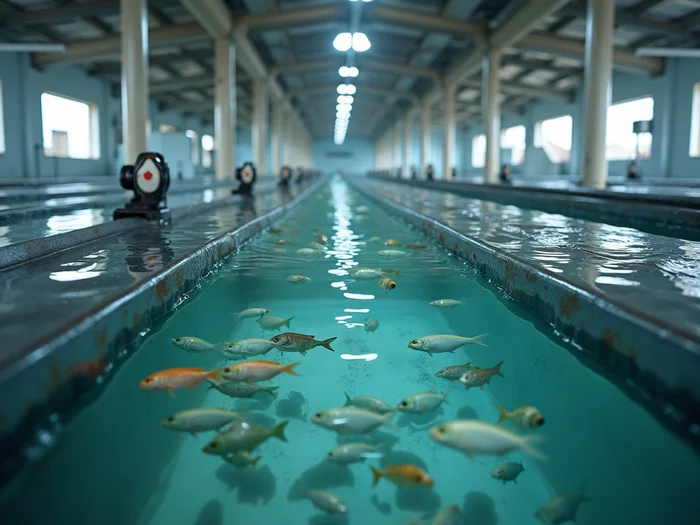
Substrate preparation involves placing spawning materials that encourage natural nesting behaviour whilst allowing easy fry collection. Use clean gravel (10-20mm diameter) in designated spawning areas, creating gentle slopes that females can excavate for nest construction. Avoid fine sand that clouds water or large rocks that create hiding places for predators and complicate cleaning.
Water Quality Preparation
Water conditioning begins with source water testing to identify treatment requirements before tank filling. Test pH, hardness, chlorine levels, and dissolved nutrients to determine conditioning needs. Municipal water supplies often contain chlorine or chloramines that require neutralisation using sodium thiosulphate (1mg per litre of chlorine) or commercial dechlorination products.
Temperature conditioning involves gradually adjusting water temperature to optimal breeding ranges of 26-30°C before introducing broodstock. Use immersion heaters, heat pumps, or passive solar heating to achieve target temperatures, allowing 24-48 hours for temperature stabilisation. Monitor temperature variations throughout day and night cycles to ensure stability within 2-3°C ranges that won't stress fish.
pH adjustment may be necessary if source water falls outside optimal ranges of 6.5-8.5 for tilapia breeding. Use agricultural lime to raise pH gradually (0.2-0.3 units daily) or organic acids to lower pH slowly over several days. Rapid pH changes stress fish and disrupt beneficial bacteria in biological filters, so patience during conditioning prevents future problems.
Biological conditioning establishes beneficial bacteria populations in filter systems before fish introduction. Add commercial bacterial cultures or seed material from established systems, then provide ammonia sources (fish food or pure ammonia) to feed developing bacteria colonies. This cycling process takes 2-4 weeks but prevents ammonia and nitrite spikes that kill fish during initial stocking.
| Parameter | Optimal Range | Monitoring Frequency |
|---|---|---|
| pH | 6.5-8.0 | Test weekly |
| Temperature | 26-30°C | Test daily |
| Dissolved Oxygen | Above 5 mg/L | Test daily |
| Ammonia | Below 0.5 mg/L | Test weekly |
Lighting and Temperature Control
Lighting systems for breeding tanks should provide 12-14 hours of illumination daily to stimulate natural breeding cycles and maintain consistent reproductive activity. Use LED fixtures rated at 20-30 watts per square metre of tank surface, positioned 1-2 metres above water level to provide even coverage without creating heat stress. Timer controls ensure consistent photoperiods that synchronise breeding behaviour across your broodstock population.
Natural sunlight provides excellent breeding stimulation but requires shade structures during peak intensity periods to prevent overheating and excessive algae growth. Install adjustable shade cloth (30-50% density) over outdoor tanks, allowing morning and evening sun exposure whilst blocking intense midday radiation. A breeding operation in Tamale uses bamboo shade structures with removable panels that provide flexibility for seasonal light management.
Temperature control systems must maintain stable water temperatures within 26-30°C ranges for optimal breeding performance. Install redundant heating systems to prevent temperature drops during power outages or equipment failures. Use thermostat controllers with 0.5°C accuracy and alarm systems that alert you to temperature deviations requiring immediate attention.
Broodstock Management Techniques
Effective broodstock management determines the genetic quality, reproductive performance, and overall success of your breeding programme. Your broodstock represent the genetic foundation for all future production, making their selection, care, and management critical factors in long-term profitability. Understanding tilapia reproductive biology, genetic principles, and practical broodstock management techniques helps you maintain productive breeding populations that consistently produce high-quality fry for your grow-out operations.
Selecting Broodstock
Broodstock selection begins with identifying fish that demonstrate superior growth rates, disease resistance, and reproductive performance from your existing production or reliable suppliers. Choose breeding females weighing 200-400 grams and males weighing 300-500 grams, ensuring all fish show normal body proportions, bright colours, and active swimming behaviour. Avoid fish with deformities, injuries, or signs of disease that could pass genetic problems to offspring.
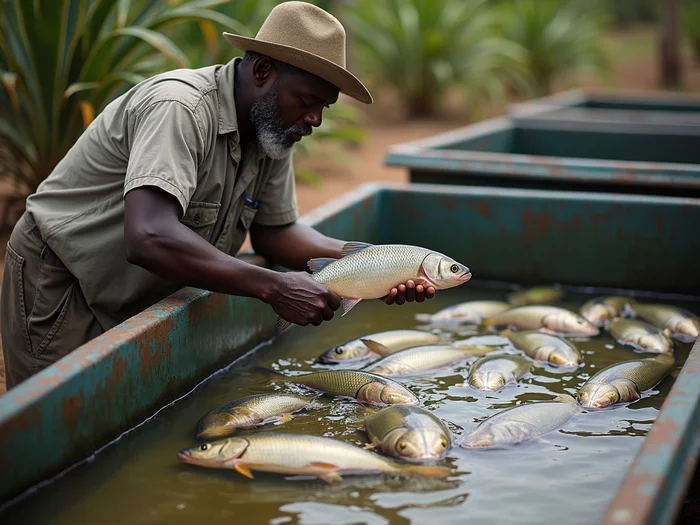
Genetic diversity requires sourcing broodstock from multiple origins to prevent inbreeding depression that reduces growth rates, disease resistance, and reproductive success over successive generations. Maintain detailed records of broodstock origins and breeding performance to guide future selection decisions. A successful breeding programme in Mwanza maintains four separate genetic lines of Nile tilapia, rotating breeding groups every 18 months to maintain genetic diversity whilst selecting for improved performance traits.
Age considerations favour broodstock between 8-18 months old for optimal reproductive performance and longevity. Younger fish may not have reached full reproductive maturity, whilst older fish show declining egg quality and spawning frequency. Replace broodstock every 2-3 years to maintain peak reproductive performance and introduce new genetic material for continued improvement.
Managing Sex Ratios and Density
Optimal sex ratios for tilapia breeding typically range from 3:1 to 4:1 females to males, providing adequate breeding opportunities whilst preventing excessive male aggression that disrupts spawning activity. Higher female ratios maximise fry production from available tank space, whilst sufficient males ensure all females receive adequate breeding attention. Monitor breeding activity and adjust ratios if you observe unfertilised spawns or excessive territorial fighting.
Stocking density calculations should provide 0.5-1.0 square metres of tank bottom area per breeding female, allowing adequate territory for nest construction and reducing stress-related breeding problems. Higher densities increase waste production and territorial conflicts, whilst lower densities underutilise tank capacity and increase production costs per fry. A breeding facility in Lagos stocks 12 females and 3 males in 4m x 3m tanks, achieving consistent production with minimal territorial problems.
Male management requires careful attention because dominant males can suppress subordinate males and monopolise breeding opportunities. Provide adequate territory and visual barriers using substrate arrangements or tank dividers that allow subordinate males to establish territories and participate in breeding. Remove excessively aggressive males that prevent normal breeding activity or cause injury to other broodstock.
| Tank Size (m²) | Recommended Density (Females) | Recommended Density (Males) |
|---|---|---|
| 4m x 2m | 8-10 females | 2-3 males |
| 3m x 3m | 7-9 females | 2-3 males |
| 5m x 3m | 12-15 females | 3-4 males |
Spawning Hapa and Tank Setup
Spawning hapas provide controlled breeding environments within larger tank systems, allowing individual pair management and improved fry collection efficiency. Construct hapas using 2-3mm mesh netting supported by PVC or bamboo frames, creating enclosures measuring 2m x 1m x 0.8m deep for single breeding pairs. Position hapas in areas with gentle water circulation and adequate substrate for nest construction.
Tank setup for hapa systems requires careful planning to maintain water quality whilst providing easy access for monitoring and fry collection. Install hapas in rectangular tanks with adequate spacing between units to prevent territorial conflicts and ensure proper water circulation. A breeding facility in Kampala uses 6m x 4m concrete tanks housing six hapas each, achieving 85% fry survival rates through careful monitoring and timely fry collection.
Monitoring breeding activity becomes easier with hapa systems because you can observe individual pairs and track spawning cycles precisely. Record spawning dates, fry numbers, and survival rates for each breeding pair to identify superior performers and optimise breeding schedules. Remove fry at 10-14 days post-spawning when they become free-swimming but before they compete with parents for food resources.
| Disease | Symptoms | Recommended Treatment |
|---|---|---|
| Ich (Ichthyophthirius multifiliis) | White spots on skin and gills, Increased respiratory rate | Salt bath or formalin treatment |
| Fin Rot | Frayed fins, Red or inflamed edges | Improve water quality, antibiotic treatment |
| Swim Bladder Disorder | Difficulty swimming, Floating upside down | Adjust feeding practices, improve water quality |
Conclusion
Successful breeding tank design and setup forms the foundation of profitable tilapia production, directly impacting your fry survival rates, production consistency, and long-term farm profitability. Focus on getting the fundamentals right: proper tank dimensions providing 0.5-1.0 square metres per female, reliable water circulation systems, and stable temperature control between 26-30°C. Remember that concrete tanks offer the best value for most African farmers, whilst proper broodstock selection and sex ratios of 3-4 females per male maximise your breeding success.

You now have the technical knowledge to design and manage breeding systems that consistently produce healthy fry. Start with conservative stocking densities and basic equipment, then refine your approach as you gain practical experience. Every successful tilapia farmer began with their first breeding tank—the key is implementing what you've learnt systematically rather than trying to perfect everything immediately.
With reliable fry production established, your next priority should be developing efficient nursery systems to grow those fry to fingerling size. The principles you've mastered for breeding tank water quality management apply directly to nursery operations, whilst your understanding of fish behaviour helps you design grow-out systems that maximise growth rates. Strong breeding systems create the foundation for scaling your entire tilapia operation—from consistent fry supply to predictable production planning and market timing.
Frequently Asked Questions
How do I choose the best type of breeding tank for my farm?
Your choice depends on your budget, available space, and construction skills. Circular tanks offer superior water circulation, while rectangular tanks are more space-efficient and easier to build with local materials like concrete. If you need a temporary or expandable solution, PVC or HDPE liner systems are cost-effective.
Why is consistent water temperature so crucial in tilapia breeding tanks?
Maintaining a stable water temperature between 26-30°C is vital for optimal breeding performance and fry survival. Fluctuations outside this range can stress broodstock, disrupt spawning cycles, and reduce egg and fry viability. The article advises monitoring variations to within 2-3°C.
What are the key steps for preparing a new concrete breeding tank before adding fish?
After construction, you must cure the concrete for 7-10 days, then fill and drain the tank three times to remove residual lime and chemicals. Test the pH after each drain cycle until it stabilises between 6.5-8.0, indicating the tank is safe for your broodstock.
How often should I replace my tilapia broodstock?
You should plan to replace your broodstock every 2-3 years to maintain peak reproductive performance and introduce new genetic material. This helps prevent declining egg quality and spawning frequency that often occurs in older fish.
Can I use natural sunlight for my outdoor breeding tanks, and what precautions should I take?
Yes, natural sunlight can stimulate breeding, but you must install adjustable shade cloth (30-50% density) over outdoor tanks. This prevents overheating and excessive algae growth during peak intensity periods, allowing morning and evening sun exposure while blocking intense midday radiation.


Yomi Adisa Lead Researcher
Yomi Adisa is the lead researcher at Fish Farming Business, where he studies what makes aquaculture ventures profitable across Africa. His research focuses on market patterns, buyer preferences, and the business decisions that determine success or failure in fish farming.