Tilapia Hatchery Management: Step-by-Step Guide from Egg Collection to Fingerling Production
Posted on: 2025-11-11
By: Yomi Adisa
Tilapia Hatchery Management: Step-by-Step Guide from Egg Collection to Fingerling Production
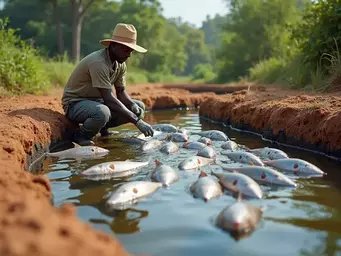
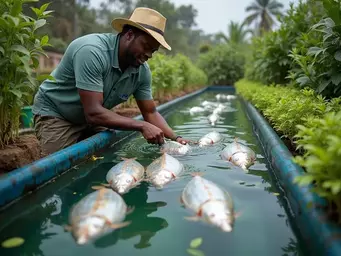
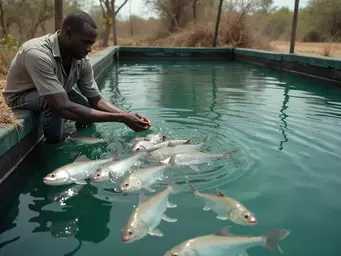
Picture this: You're standing beside your tilapia ponds in Kisumu, watching healthy adult fish swimming in clear water, and you realise you're spending 15-20 shillings per fingerling from external suppliers every stocking cycle. Meanwhile, your neighbour in Nakuru has mastered hatchery management and produces her own fingerlings at just 3-5 shillings each whilst maintaining superior genetic quality. The difference isn't luck or expensive equipment—it's systematic hatchery management that transforms breeding fish into a steady stream of quality fingerlings.
📑 Table of Contents
Mastering hatchery management represents the foundation of profitable tilapia farming. Instead of depending on external fingerling suppliers—who may deliver inconsistent quality, unknown genetic backgrounds, or disease-stressed stock—you'll control every aspect of your production chain. This knowledge empowers you to reduce fingerling costs by 60-75%, ensure consistent stocking schedules, select for desirable traits like fast growth and disease resistance, and even generate additional income by selling surplus fingerlings to other farmers in your region.
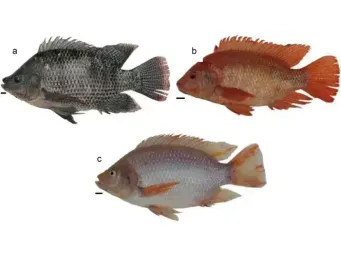
This comprehensive guide provides you with complete technical knowledge for establishing and managing your own tilapia hatchery, from selecting breeding stock through producing market-ready fingerlings. You'll learn exact specifications for water quality parameters, precise feeding schedules, optimal stocking densities, and proven techniques for maximising survival rates at every stage. Whether you're working with Nile tilapia in East Africa, managing Blue tilapia in Ghana, or exploring hybrid varieties across the continent, these methodologies adapt to your local conditions and available resources.
🎯 What You'll Learn
- Master the techniques for selecting and conditioning high-quality broodstock to enhance fingerling production and genetic quality
- Learn effective spawning methods and egg collection strategies to maximise viable egg harvest and ensure successful incubation
- Discover essential water quality management practices tailored for each stage of tilapia hatchery operations to optimise growth and survival rates
Step 1: Broodstock Management
Successful fingerling production begins with selecting and maintaining high-quality breeding stock, as your broodstock determines the genetic potential, growth rates, and disease resistance of every fingerling you'll produce. Your breeding fish require different management compared to grow-out stock, with specific attention to nutrition, health monitoring, and environmental conditions that promote consistent spawning. The investment you make in quality broodstock management pays dividends through higher fertility rates, stronger fry survival, and faster fingerling growth.
Selecting and Conditioning Broodstock
Choose your breeding stock from fish demonstrating superior growth rates, disease resistance, and good body conformation. Select females weighing 200-350g and males weighing 250-400g, as fish in this size range show optimal reproductive performance whilst remaining manageable for handling and spawning procedures. Avoid using fish younger than 6 months or older than 3 years, as younger fish produce fewer eggs whilst older fish show declining fertility and egg quality.
Maintain a sex ratio of 1 male to 2-3 females in your breeding groups, though some farmers achieve better results with 1:1 ratios when space allows for individual pair management. You can identify mature males by their darker colouration, more pronounced head shape, and territorial behaviour during breeding season. Females ready for breeding develop a swollen abdomen and show increased activity around nesting areas.
Establish separate conditioning tanks or pond sections for your broodstock, providing 2-3 square metres per breeding pair with depths of 1-1.2 metres. This space allocation allows for natural territorial behaviour whilst preventing overcrowding stress that reduces spawning frequency. Install simple shelters using clay pots, concrete blocks, or woven baskets to create spawning sites where pairs can establish territories and build nests.
| Criteria | Recommended Practices for Nile Tilapia | Recommended Practices for Blue Tilapia |
|---|---|---|
| Breeding stock selection criteria | Superior growth rates, disease resistance, good body conformation | Similar criteria; focus on local adaptation and growth traits |
| Optimal size ranges for males and females | Males: 250-400g, Females: 200-350g | Males: 200-350g, Females: 150-300g |
| Recommended sex ratios | 1 male to 2-3 females | 1 male to 2-3 females; better results with 1:1 in some cases |
| Conditioning tank specifications | 2-3 m² per pair, depth 1-1.2 m, with natural shelter | 2-3 m² per pair, depth 1-1.5 m, with similar shelter |
Preparing Broodstock for Spawning
Feed your breeding stock a high-protein diet containing 32-36% crude protein, compared to the 28-30% protein content suitable for grow-out fish. Commercial broodstock feeds work well, but you can also prepare nutritious feeds using fishmeal (30%), soybean meal (25%), maize meal (20%), rice bran (15%), and vitamin-mineral premix (2%). Feed breeding fish 3-4% of their body weight daily, divided into two meals given at 8:00 AM and 4:00 PM.
Condition your broodstock for 2-3 weeks before expecting regular spawning, gradually increasing protein levels and ensuring optimal water quality parameters. During conditioning, monitor fish for signs of readiness including increased activity, nest-building behaviour in males, and abdominal swelling in females. Males become more territorial and develop brighter colouration, whilst females show increased appetite and restlessness.
Maintain water temperatures between 26-28°C during conditioning, as temperatures below 24°C or above 32°C significantly reduce spawning activity. If you're working in cooler highland areas like parts of Kenya or Ethiopia, consider simple greenhouse structures or black plastic covers to maintain optimal temperatures. In very hot regions, provide shade structures and ensure adequate water circulation to prevent overheating.
Managing Breeder Health
Implement weekly health inspections of your breeding stock, checking for external parasites, fin damage, abnormal swimming behaviour, or changes in appetite. Healthy breeding fish show bright colours, clear eyes, intact fins, and active feeding behaviour. Remove any fish showing signs of disease immediately to prevent spreading infections throughout your breeding group.
Quarantine new broodstock for 2-3 weeks before introducing them to your established breeding groups. During quarantine, treat fish with salt baths (3-5g per litre for 10-15 minutes) to eliminate external parasites and reduce stress-related infections. This simple treatment costs just a few shillings per fish but prevents disease outbreaks that could destroy months of breeding programme development.
Maintain detailed records of each breeding fish including age, weight, spawning frequency, and offspring survival rates. Mark individual fish using coloured tags or fin clips to track performance over time. Replace poor-performing breeders after 6 months of monitoring, and introduce new genetic material annually to prevent inbreeding depression that reduces growth rates and disease resistance in offspring.

Step 2: Spawning and Egg Collection
The spawning process requires careful timing and systematic collection procedures to maximise the number of viable eggs you can harvest from your breeding stock. Tilapia typically spawn every 2-3 weeks under optimal conditions, with each female producing 100-300 eggs per spawning depending on her size and condition. Understanding natural spawning behaviour and implementing proper collection techniques ensures you capture eggs at the optimal stage for artificial incubation whilst maintaining breeding stock health and productivity.
Spawning Methods
Natural spawning in breeding tanks or hapas provides the most reliable method for consistent egg production without requiring hormonal treatments or complex equipment. Set up spawning hapas measuring 2m × 1m × 1m using fine mesh (2-3mm) suspended in your main pond or placed in dedicated spawning tanks. Each hapa accommodates one breeding pair, allowing you to monitor spawning activity and collect eggs from individual females.
Install clay pots, concrete rings, or shallow depressions in sand at the bottom of each spawning unit to provide nesting sites where males can establish territories. Males clean these nesting sites and court females through circular swimming patterns and colour displays. After successful mating, females collect fertilised eggs in their mouths for incubation—this is your collection opportunity.
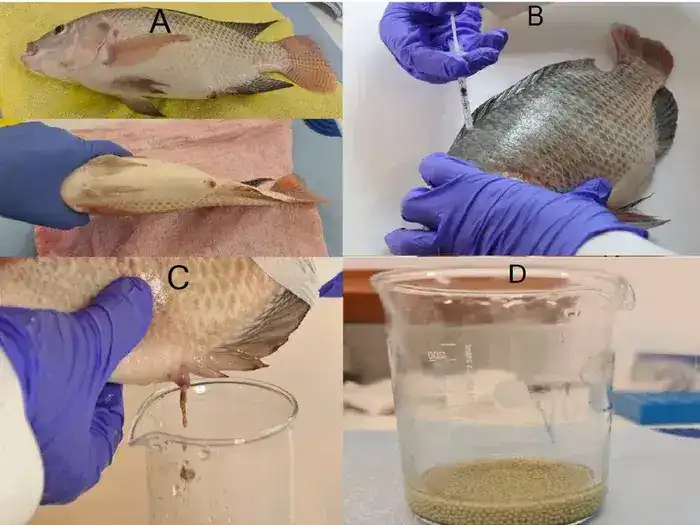
Induced spawning using hormonal treatments offers an alternative when natural spawning rates prove insufficient for your production targets. Inject females with human chorionic gonadotropin (HCG) at 500-1000 IU per kilogram body weight, or use synthetic hormones like Ovaprim at 0.5ml per kilogram. Administer injections 12-24 hours before expected spawning, though this method requires experience and adds medication costs of 50-100 shillings per treatment.
Egg Collection Intervals
Check your breeding females every 3-4 days for eggs, as tilapia females typically hold eggs in their mouths for 10-14 days before releasing free-swimming fry. Look for females with swollen throats, reduced feeding activity, and tendency to stay in secluded areas of the spawning unit. These behavioural changes indicate a female is incubating eggs and ready for collection.
Gently capture brooding females using a soft mesh net, taking care not to stress the fish or cause her to release eggs prematurely. Hold the female firmly but gently, supporting her body weight whilst opening her mouth to examine egg development. Eggs ready for artificial incubation appear orange to amber in colour with visible eye spots, indicating embryonic development has progressed sufficiently for successful hatching.
Strip eggs by gently massaging the female's throat whilst holding her head downward over a collection container. Healthy eggs flow out easily—never force the process, as damaged eggs will not develop properly. Collect 50-200 eggs per female depending on her size and condition. After egg collection, return the female to a recovery tank with clean, well-aerated water and monitor her for 24-48 hours before returning her to the breeding group.
Stages of Egg Development
Understand the three critical stages of tilapia egg development to optimise your collection timing and incubation success. Stage 1 occurs during the first 3-4 days after fertilisation, when eggs appear clear to slightly yellow and embryonic development begins. Eggs collected at this stage require careful handling and optimal incubation conditions for successful development.
Stage 2 spans days 4-8, characterised by visible eye development and orange to amber egg colouration. This represents the optimal collection window, as eggs have developed sufficiently to survive artificial incubation whilst retaining enough yolk reserves to support continued development. Eggs collected during Stage 2 show survival rates of 70-85% under proper incubation conditions.
Stage 3 occurs from day 9 until hatching around day 12-14, when eggs appear dark with fully formed fry visible inside. Whilst you can collect eggs at this stage, survival rates decrease to 50-60% as fry may be too developed for successful transition to artificial incubation systems. Focus your collection efforts on Stage 2 eggs for optimal results and efficient use of your incubation capacity.
| Stage | Days Post-Fertilisation | Appearance | Collection Timing | Survival Rate |
|---|---|---|---|---|
| Stage 1 | 0-3 days | Clear to slightly yellow | Not recommended | N/A |
| Stage 2 | 4-8 days | Visible eye development, orange to amber | Optimal collection window | 70-85% |
| Stage 3 | 9-14 days | Dark with fry visible inside | Possible collection | 50-60% |
Step 3: Hatchery Setup and Infrastructure
Creating an efficient hatchery requires strategic planning of your physical layout, water management systems, and essential equipment to support egg incubation and fry development. Your hatchery infrastructure directly impacts survival rates, labour efficiency, and production costs, making thoughtful design crucial for long-term success. Whether you're establishing a small-scale operation producing 5,000 fingerlings monthly or a larger facility targeting 20,000+ fingerlings, the same fundamental principles apply with scaling adjustments for your specific production goals.
Designing the Hatchery Layout
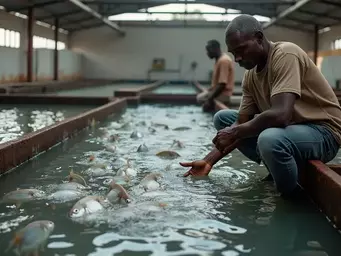
Plan your hatchery layout to facilitate smooth workflow from egg collection through fingerling production, minimising handling stress and reducing labour requirements. Allocate approximately 15-20 square metres of covered space for a hatchery producing 10,000 fingerlings monthly, with additional outdoor space for nursery tanks and fingerling grow-out areas. Position incubation systems near your water source and electrical supply whilst ensuring easy access for daily monitoring and maintenance activities.
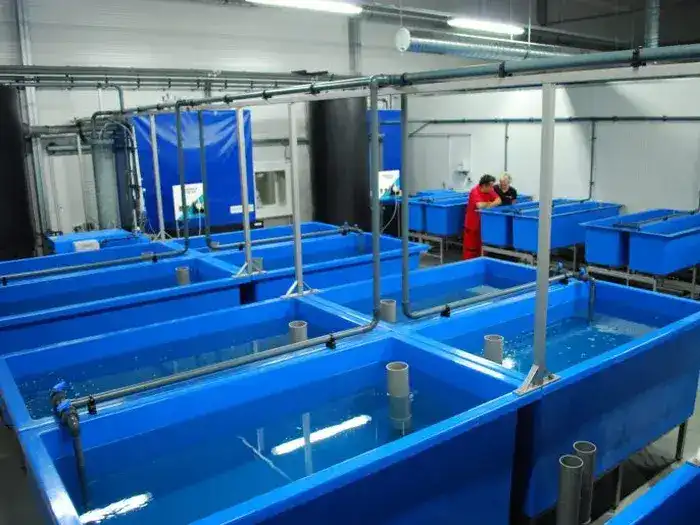
Establish three distinct zones within your hatchery: incubation area for eggs and newly hatched fry, nursery section for fry development, and fingerling holding area for final conditioning before sale or stocking. Maintain separation between these zones to prevent disease transmission and allow for different water quality management in each area. Install concrete or plastic tanks ranging from 200-500 litres for incubation, 1,000-2,000 litres for nursery operations, and 3,000-5,000 litres for fingerling holding.
Provide adequate ventilation and lighting in your hatchery building, as poor air circulation promotes fungal growth on eggs whilst insufficient lighting makes monitoring difficult. Install simple roof vents or wall openings with screens to maintain air movement whilst excluding insects and debris. Natural lighting works well for most operations, supplemented with electric lighting for early morning or evening work when necessary.
Water Quality Management
General Water Quality Management
Monitor and maintain critical water parameters throughout your hatchery system, as water quality directly affects egg development, fry survival, and fingerling growth rates. Test pH daily using simple test kits, maintaining levels between 6.5-8.5 with optimal range of 7.0-8.0 for tilapia reproduction and early development. pH levels outside this range reduce hatching success and increase fry mortality during the critical first weeks of life.
Maintain dissolved oxygen levels above 5mg/L throughout all hatchery systems, with optimal levels of 6-8mg/L for maximum survival and growth. Install simple air stones connected to electric or solar-powered blowers to provide continuous aeration, particularly important during hot weather when oxygen levels naturally decrease. Budget 200-500 watts of aeration capacity per 1,000 litres of water volume, adjusting based on stocking density and ambient temperature.
Control water temperature between 26-30°C for optimal egg development and fry growth, with 28°C representing the ideal target temperature. In cooler regions, use simple heating methods like black plastic covers, greenhouse structures, or immersion heaters powered by solar systems. In hot climates, provide shade structures and ensure adequate water circulation to prevent overheating that reduces oxygen levels and increases mortality.
| Parameter | Optimal Range | Effects of Deviation |
|---|---|---|
| pH | 6.5 - 8.5 (optimal 7.0 - 8.0) | Reduced hatching success, increased fry mortality |
| Dissolved Oxygen | Above 5 mg/L (optimal 6-8 mg/L) | Stress, reduced growth, increased mortality |
| Temperature | 26 - 30°C (optimal 28°C) | Reduced spawning, increased mortality |
| Ammonia | Below 0.5 ppm | Gill damage, reduced growth |
| Nitrite | Below 0.1 ppm | Interferes with oxygen transport, brown blood disease |
| Alkalinity | Above 50 ppm | pH swings, stress, reduced feeding efficiency |
Nursery-Specific Water Quality Considerations
Implement more stringent water quality management in nursery systems where fry densities create higher waste loads and increased disease risk. Monitor ammonia levels daily using test kits, maintaining concentrations below 0.5ppm as higher levels cause gill damage and reduced growth in developing fry. Install biological filtration using simple gravel beds or commercial bio-media to convert toxic ammonia into less harmful nitrates.
Maintain nitrite levels below 0.1ppm through adequate biological filtration and regular water changes, as nitrite interferes with oxygen transport in fish blood and causes brown blood disease. Perform 20-30% water changes every 2-3 days in nursery systems, replacing old water with fresh, well-aerated water of similar temperature. This practice removes accumulated waste products whilst providing fresh oxygen and nutrients for growing fry.
Test alkalinity weekly to ensure buffering capacity remains adequate for stable pH levels, particularly important when using groundwater or rainwater with low mineral content. Add agricultural lime at 10-20g per 1,000 litres if alkalinity falls below 50ppm, dissolving the lime in a separate container before adding to avoid pH shock. Proper alkalinity management prevents pH swings that stress fry and reduce feeding efficiency.
Equipment and Tools
Invest in essential equipment that supports efficient hatchery operations whilst remaining cost-effective for your production scale. Purchase quality aeration equipment including electric or solar-powered blowers, airline tubing, air stones, and backup power options like battery systems or generators. A reliable aeration system represents your most critical equipment investment, as oxygen depletion can destroy an entire hatchery production within hours.
Acquire proper netting equipment including fine-mesh nets (1-2mm) for handling eggs and fry, medium-mesh nets (5-10mm) for fingerlings, and coarse-mesh nets (15-20mm) for adult fish. Purchase nets in various sizes from 15cm diameter for individual fish handling to 50cm diameter for bulk transfers. Quality nets last 2-3 years with proper care and prevent the injury and stress associated with poor-quality equipment.
Obtain water testing equipment appropriate for your technical skill level and budget, ranging from simple test strips costing 20-50 shillings each to electronic metres costing 5,000-15,000 shillings. At minimum, acquire pH test kits, dissolved oxygen test kits, and ammonia test strips. More advanced operations benefit from digital pH metres, dissolved oxygen metres, and comprehensive test kits covering nitrite, nitrate, and alkalinity measurements.
Step 4: Incubation and Fry Rearing
The incubation period represents the most critical phase in your hatchery operation, where proper techniques determine whether collected eggs develop into healthy fry or result in total loss. During the 10-14 day incubation period, eggs require specific environmental conditions, gentle water movement, and careful monitoring to achieve hatching rates of 70-85%. Following successful hatching, fry management during the first 3-4 weeks determines survival rates and growth performance that affects your entire production cycle.
Incubation Techniques
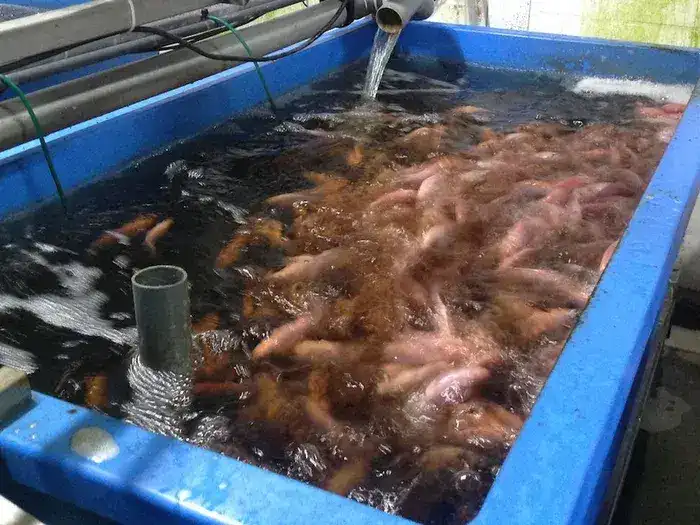
Set up incubation systems using shallow trays or small tanks with gentle water circulation to mimic the natural mouth-brooding environment whilst providing better control over water quality. Construct simple incubation trays from plastic containers measuring 30cm × 20cm × 10cm deep, with fine mesh bottoms allowing water flow whilst retaining eggs. Position these trays in larger tanks with slow water circulation, maintaining water depth of 5-8cm over the eggs.
Create water circulation using air stones positioned to generate gentle upward flow through the egg mass, preventing fungal growth whilst avoiding turbulence that damages developing embryos. Maintain water flow rates of 0.5-1.0 litres per minute through each incubation tray, sufficient to provide fresh oxygen and remove waste products without disturbing egg development. Excessive water movement causes egg mortality, whilst insufficient flow leads to fungal infections and poor hatching rates.
Monitor egg development daily, removing dead or fungal-infected eggs using fine forceps or turkey basters to prevent contamination of healthy eggs. Healthy eggs appear clear to amber-coloured with visible eye spots, whilst dead eggs turn white or develop fuzzy fungal growth. Remove dead eggs immediately, as decomposing organic matter deteriorates water quality and promotes bacterial infections that can destroy entire batches.
Transitioning to Fry Rearing
Transfer newly hatched fry to nursery systems within 24-48 hours after hatching, when yolk sacs are nearly absorbed and fry begin actively swimming and seeking food. Fry at this stage measure 8-12mm in length and require different management compared to eggs, including higher stocking densities and initial feeding programmes. Handle fry transfers during cooler parts of the day to reduce stress and maintain water temperature consistency between incubation and nursery systems.
Stock fry at densities of 1,000-2,000 per square metre in nursery tanks, depending on your aeration capacity and water exchange rates. Higher densities require more intensive management including increased feeding frequency, enhanced aeration, and more frequent water changes. Lower densities produce faster growth but reduce overall production efficiency per unit of space and infrastructure investment.
Acclimatise fry gradually to nursery conditions by mixing small amounts of nursery water with incubation water over 30-60 minutes before complete transfer. Temperature differences greater than 2°C cause shock that increases mortality, whilst pH differences greater than 0.5 units stress fry during this vulnerable development stage. Use simple thermometers and pH test strips to ensure compatible conditions before transfers.
Feeding Strategies for Fry
Begin feeding fry 2-3 days after hatching when yolk sacs are absorbed and fry show active swimming behaviour seeking food. Start with finely powdered commercial fry feed containing 45-50% protein, or prepare your own starter feed by grinding quality fingerling feed through fine sieves or coffee grinders. Feed particles must be small enough for fry to consume—generally less than 0.5mm diameter for newly hatched fry.
Feed fry 8-12 times daily during the first week, reducing to 6-8 times daily during weeks 2-3 as fry grow and develop more efficient digestive systems. Distribute small amounts of feed frequently rather than large amounts less often, as fry have limited stomach capacity and uneaten feed deteriorates water quality rapidly. Each feeding should be consumed within 10-15 minutes—adjust quantities based on feeding response and water quality conditions.
Calculate feeding rates starting at 15-20% of estimated fry biomass daily during the first week, gradually reducing to 10-12% by week 3 as individual fry weights increase. Weigh sample groups of 50-100 fry weekly to estimate total biomass and adjust feeding rates accordingly. A farmer in Mwanza successfully feeds 10,000 fry using 200g of starter feed daily during week 1, increasing to 400g daily by week 3 as fry grow from 0.02g to 0.15g average weight.

Step 5: Nursery Management for Fingerlings
Nursery management bridges the critical gap between fragile fry and robust fingerlings ready for grow-out ponds, requiring intensive care during the 4-8 week period when fish develop from 0.2g to 2-5g. This phase determines the quality and survival rates of your final fingerling production whilst establishing growth patterns that influence performance throughout the production cycle. Successful nursery management combines optimal stocking densities, precise feeding programmes, and proactive health management to produce uniform, healthy fingerlings that command premium prices in the market.
Stocking Density and Management
Stock fingerlings at 200-500 fish per square metre in nursery systems, adjusting density based on your aeration capacity, water exchange rates, and target fingerling size at harvest. Higher densities of 400-500 per square metre work well when you have excellent water quality control and intensive feeding programmes, producing smaller fingerlings (2-3g) suitable for further nursery or direct pond stocking. Lower densities of 200-300 per square metre produce larger fingerlings (4-5g) that command higher prices and show better survival rates when transferred to grow-out systems.
Provide nursery tanks with depths of 0.8-1.2 metres to allow adequate swimming space whilst maintaining manageable volumes for water quality control. Deeper tanks provide more stable temperatures and better space utilisation, whilst shallower systems offer easier management and harvest procedures. A successful farmer in Nakuru uses 2,000-litre concrete tanks measuring 2m × 1m × 1m, stocking 500 fingerlings per tank and achieving 85-90% survival rates with proper management.
Install adequate aeration systems providing 2-3 watts per kilogram of fish biomass, increasing aeration during hot weather or when feeding rates are high. Position air stones to create gentle circulation throughout the tank whilst avoiding dead zones where waste accumulates and oxygen levels drop. Monitor fish behaviour daily—gasping at the surface indicates insufficient oxygen, whilst lethargic behaviour may suggest poor water quality or disease problems requiring immediate attention.
| Stocking Density (fish/m²) | Target Size (g) | Management Intensity | Expected Survival Rate |
|---|---|---|---|
| 200-300 | 4-5g | Moderate | 85-95% |
| 300-400 | 3-4g | High | 80-90% |
| 400-500 | 2-3g | Very High | 75-85% |
Mastering hatchery management gives you complete control over your tilapia production chain, from selecting quality broodstock through producing healthy fingerlings ready for grow-out. Focus on the fundamentals: maintain your breeding stock in optimal condition, collect eggs at the right development stage, provide proper incubation conditions with gentle water flow, and feed fry frequently with appropriately sized feed. These core practices, combined with consistent water quality monitoring, will deliver survival rates of 70-85% from egg to fingerling.
Start with small batches to develop your skills—even producing 1,000 fingerlings monthly represents significant cost savings compared to purchasing stock. Your first attempts may not achieve perfect results, but each cycle teaches valuable lessons about timing, water management, and fish behaviour. Within 3-6 months of consistent tilapia breeding techniques, you'll develop the confidence and expertise to expand your operation and achieve professional-level results.
Remember that successful hatchery management reduces your fingerling costs by 60-75% whilst ensuring consistent quality and stocking schedules. This knowledge positions you to explore advanced breeding techniques like selective breeding for faster growth, or developing additional income streams by selling surplus fingerlings to neighbouring farmers. Your next step should be optimising grow-out pond management to maximise the potential of the quality fingerlings you're now producing. With controlled breeding and efficient grow-out systems working together, you'll have built a truly integrated and profitable tilapia farming operation.
Frequently Asked Questions
How can I identify the best broodstock for my tilapia hatchery?
You should select breeding stock that exhibit superior growth rates, disease resistance, and good body conformation. Specifically, choose females weighing 200-350g and males weighing 250-400g, and avoid fish younger than 6 months or older than 3 years for optimal reproductive performance.
Why is it important to collect tilapia eggs during Stage 2 of their development?
Collecting eggs during Stage 2 (days 4-8 after fertilisation) is optimal because they have developed sufficiently to survive artificial incubation whilst still retaining enough yolk reserves for continued development. This timing results in survival rates of 70-85% under proper incubation conditions, compared to lower rates for eggs collected earlier or later.
What are the most critical water quality parameters I need to monitor in my hatchery?
You must consistently monitor pH, dissolved oxygen, and temperature. Maintain pH between 6.5-8.5 (optimally 7.0-8.0), dissolved oxygen above 5mg/L (optimally 6-8mg/L), and water temperature between 26-30°C (ideally 28°C) to ensure egg development and fry survival.
How often should I feed newly hatched tilapia fry, and what type of feed should I use?
You should begin feeding fry 2-3 days after hatching, starting with a finely powdered commercial fry feed containing 45-50% protein. Feed them 8-12 times daily during the first week, reducing to 6-8 times daily in weeks 2-3, ensuring the feed is consumed within 10-15 minutes.
Can I use the same tanks for both fry rearing and fingerling production?
It's best to establish distinct zones for incubation, nursery (fry development), and fingerling holding to prevent disease transmission and manage different water quality requirements. Nursery tanks for fry are typically 1,000-2,000 litres, while fingerling holding requires larger tanks of 3,000-5,000 litres.


Yomi Adisa Lead Researcher
Yomi Adisa is the lead researcher at Fish Farming Business, where he studies what makes aquaculture ventures profitable across Africa. His research focuses on market patterns, buyer preferences, and the business decisions that determine success or failure in fish farming.