Tilapia Breeding Schedules: Practical Guide for Small-Scale Farmers
Posted on: 2025-11-11
By: Yomi Adisa
Table of Contents
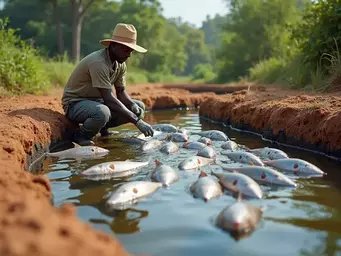
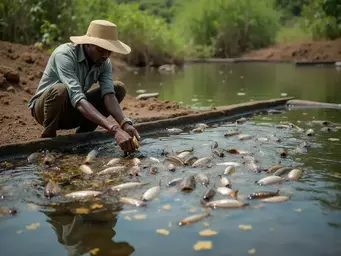
You've built your tilapia pond, stocked it with healthy fingerlings, and started feeding regularly—yet your fish keep dying unexpectedly. The losses seem random: healthy fish one day, floating belly-up the next. This heartbreaking scenario plays out on farms across Africa, often leaving farmers questioning whether tilapia farming is worth the investment.
Disease outbreaks are one of the biggest threats to profitable tilapia production, affecting both Nile and Blue tilapia operations. What makes this challenge particularly frustrating is that many diseases are preventable with proper management. Understanding how to recognise early warning signs and implement prevention strategies can mean the difference between profit and devastating losses.
This comprehensive guide will teach you how to prevent common tilapia diseases before they destroy your stock. You'll learn to identify the environmental conditions that trigger outbreaks, implement biosecurity measures that protect your farm, and recognise early symptoms that require immediate action. By the end, you'll have a practical disease prevention plan that keeps your tilapia healthy and your business profitable.
🎯 What You'll Learn
- How to develop a breeding schedule that aligns with market demand.
- Best practices for selecting and managing broodstock for optimal fry production.
- Effective techniques for rearing fry and preparing for market readiness.
Understanding Tilapia Breeding Schedules
You cannot run a profitable tilapia operation without understanding when your fish will breed and how to plan around their reproductive cycles. Most small-scale farmers in Africa lose money because they stock fingerlings randomly, harvest inconsistently, and miss peak market periods when prices are highest. A proper breeding schedule eliminates this guesswork and transforms your farm from a hobby into a predictable business.
Nile tilapia (Oreochromis niloticus) spawn every 4-6 weeks under optimal conditions, which means you can produce multiple batches of fingerlings throughout the year. However, without planning these cycles, you'll find yourself with too many fish during low-demand periods and empty ponds when customers are willing to pay premium prices. Successful farmers in Uganda and Kenya use breeding schedules to align their production with festive seasons, school holidays, and religious celebrations when fish consumption peaks.
Your breeding schedule becomes the foundation for every other farm decision—from feed purchasing to pond preparation to marketing strategies. Here's how to develop a practical breeding timeline that maximises your profits whilst ensuring consistent fish production year-round.
Importance of Breeding Schedules
You need a breeding schedule because it establishes a predictable timeline for fry production, allowing you to plan feeding regimes, pond management, and harvest dates months in advance. Without this planning, you'll constantly react to problems instead of preventing them. A farmer in Kisumu who started using breeding schedules increased his annual profit by 40% simply because he could predict when to stock, feed, and harvest his tilapia.
Your breeding schedule helps you align production with market demand cycles, ensuring you harvest table-size fish when prices are highest. In Nigeria, tilapia prices can increase by 30-50% during Christmas and Eid celebrations, but only farmers who planned their breeding 6 months earlier can capitalise on these opportunities. You want your 300-400g market-size fish ready during these peak periods, not during the low-demand months when prices drop.
Key Stages in the Breeding Process
You must understand the four critical stages of tilapia breeding to create an effective schedule. First, you select and condition your broodstock for 2-3 weeks with high-protein feed (35-40% protein content) to ensure they're in peak reproductive condition. Healthy Nile tilapia broodstock should weigh 200-300g for females and 300-500g for males, with bright colours and active swimming behaviour.
The mating and spawning stage follows, where female tilapia carry fertilised eggs in their mouths for 10-14 days before releasing free-swimming fry. You need to provide suitable spawning substrates like clay pots or shallow depressions in pond bottoms where males can establish territories. After spawning, you collect the fry and transfer them to nursery ponds or hapas for initial rearing, which takes another 4-6 weeks to reach fingerling size (2-3cm).
Typical Timelines for Each Stage
Your complete breeding cycle from broodstock conditioning to fingerling production takes approximately 8-10 weeks under optimal conditions. Broodstock conditioning requires 2-3 weeks, spawning and egg incubation takes 10-14 days, and fry rearing to fingerling size needs another 4-6 weeks. In East African climates with temperatures between 26-30°C, you can expect consistent timing, but cooler periods may extend each stage by 1-2 weeks.
Seasonal variations significantly impact your breeding timeline, particularly during cooler months when water temperatures drop below 24°C. During Kenya's cooler season (June-August), spawning intervals may extend to 6-8 weeks instead of the typical 4-6 weeks. You should plan for these variations by adjusting your stocking schedules and potentially using greenhouse covers or deeper ponds that maintain more stable temperatures.
Factors Affecting Breeding Timelines
Water temperature is the most critical factor affecting your breeding schedule, with optimal spawning occurring between 26-30°C. When temperatures drop below 24°C, Nile tilapia reduce spawning frequency and egg development slows significantly. You can monitor temperature using simple digital thermometers available at agricultural stores in Nairobi or Lagos for KES 500-800, checking twice daily during seasonal transitions.
Water quality parameters directly influence breeding success and timeline consistency. You need to maintain pH between 6.5-8.5, dissolved oxygen above 5 mg/L, and ammonia levels below 0.5 mg/L for optimal reproductive performance. Poor water quality can delay spawning by 2-3 weeks or cause complete breeding failure. Blue tilapia (Oreochromis aureus) are slightly more tolerant of pH variations than Nile tilapia, but both species require stable, clean water for consistent breeding cycles.
Broodstock Management for Successful Breeding
Your breeding success depends entirely on the quality of your broodstock—the parent fish that produce your fingerlings. Poor broodstock selection is the primary reason why 60% of small-scale tilapia farmers in Africa struggle with inconsistent fry production and low survival rates. You cannot expect healthy, fast-growing offspring from weak, malnourished, or genetically inferior parent fish.
Proper broodstock management involves more than just selecting the biggest fish in your pond. You need to understand the specific characteristics that indicate breeding potential, implement feeding programmes that optimise reproductive performance, and maintain genetic diversity to prevent inbreeding depression. A farmer in Mwanza, Tanzania increased his fry production by 200% simply by upgrading his broodstock selection criteria and feeding regime.
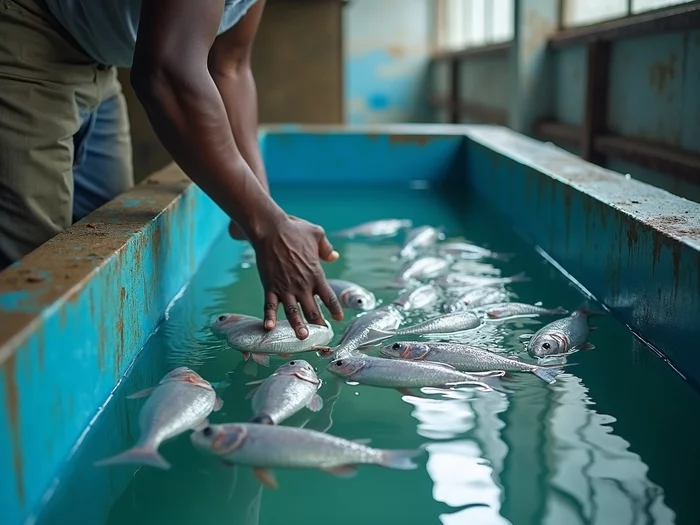
This section will teach you how to identify superior breeding fish, provide the nutrition they need for consistent spawning, and manage their health to ensure long-term productivity. You'll learn practical techniques that successful farmers across East and West Africa use to maintain productive broodstock that generate profitable fingerling crops year after year.
Selecting Quality Brood Fish (Nile vs. Blue Tilapia)
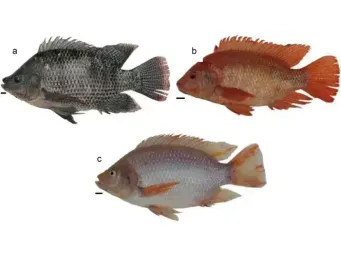
You must select broodstock based on specific physical and behavioural characteristics that indicate superior breeding potential. For Nile tilapia (Oreochromis niloticus), choose females weighing 200-300g and males weighing 300-500g with bright silver-blue colouration and active swimming behaviour. Avoid fish with deformities, damaged fins, or dull colours, as these traits often indicate poor genetics or health problems that will affect offspring quality.
Blue tilapia (Oreochromis aureus) broodstock should display the characteristic blue-grey colouration with distinct vertical bars, particularly visible in males during breeding season. You want fish that demonstrate territorial behaviour and nest-building activity, as these indicate strong reproductive instincts. Source your initial broodstock from reputable suppliers like Victory Farms in Kenya or Songhai Farms in Nigeria, where genetic quality is maintained through selective breeding programmes.
Feeding Regimes and Nutritional Needs
Your broodstock require high-protein feeds containing 35-40% protein content to maintain optimal reproductive condition and consistent spawning cycles. Feed them twice daily at 3-4% of their body weight, using quality commercial feeds like Raanan or Aller Aqua brands available through agricultural suppliers in Lagos, Nairobi, or Accra. During conditioning periods before spawning, increase feeding frequency to three times daily and supplement with vitamin-enriched feeds.
You can reduce feed costs by incorporating locally available protein sources like termite meal, fish meal, or groundnut cake into homemade feeds, but ensure the total protein content remains above 35%. A successful farmer in Kumasi, Ghana reduced his broodstock feeding costs by 40% using a mixture of commercial pellets (60%) and locally sourced fish meal (40%), whilst maintaining excellent spawning performance.
💡 Pro Tip: Broodstock Conditioning
Separate your broodstock into conditioning tanks 2-3 weeks before planned spawning. Feed them high-protein feeds (40% protein) three times daily during this period. This conditioning process increases spawning success rates by 30-50% and produces larger, healthier fry batches.
Managing Resting Periods Post-Spawning
You must provide resting periods of 3-4 weeks between spawning cycles to allow female broodstock to recover body condition and replenish energy reserves. During these resting periods, separate spent females from males and reduce feeding to maintenance levels (2% of body weight daily) using standard grow-out feeds with 28-32% protein content. Monitor their weight recovery and only return them to breeding groups when they've regained at least 90% of their pre-spawning weight.
Male broodstock also benefit from periodic resting, though they can typically spawn more frequently than females. Rotate your male broodstock every 6-8 weeks, giving each group a 2-week rest period in separate ponds with reduced feeding and minimal handling stress. This rotation system, used successfully by farmers in Kisumu, Kenya, maintains consistent spawning performance throughout the breeding season.
Monitoring Broodstock Health and Genetic Diversity
You need to conduct weekly health checks of your broodstock, examining them for external parasites, fin rot, or unusual behaviour that might indicate disease problems. Look for signs of stress such as loss of appetite, abnormal swimming patterns, or changes in colouration. Maintain detailed records of each breeding group's performance, including spawning frequency, fry numbers, and survival rates to identify declining productivity early.
Prevent inbreeding by introducing new bloodlines every 12-18 months and maintaining at least three separate breeding groups with different genetic origins. Replace 25-30% of your broodstock annually with younger, vigorous fish to maintain reproductive performance. Farmers in Malawi who follow this replacement schedule report 40% higher fry production compared to those using the same broodstock for multiple years without genetic refreshing.
Practical Techniques for Pond and Hatchery Setup
You cannot achieve consistent breeding success without proper pond and hatchery infrastructure designed specifically for tilapia reproduction. Many farmers across Africa lose money because they attempt breeding in unsuitable ponds that lack the basic requirements for spawning, fry protection, and broodstock management. Your breeding facility is the foundation of your entire operation—get this wrong, and even the best broodstock will fail to produce viable offspring.
The difference between profitable and struggling tilapia farmers often comes down to infrastructure quality and design. A well-designed breeding setup allows you to control water quality, protect vulnerable fry from predators, and manage different life stages separately. Farmers in Kisumu, Kenya who invested in proper breeding pond construction report 70% higher fry survival rates compared to those using makeshift facilities.
This section provides practical, cost-effective solutions for building breeding infrastructure that works in African conditions. You'll learn how to construct ponds using locally available materials, set up effective hapa systems, and create hatchery facilities that produce healthy fingerlings consistently. These techniques have been proven successful by small-scale farmers from Nigeria to Malawi.
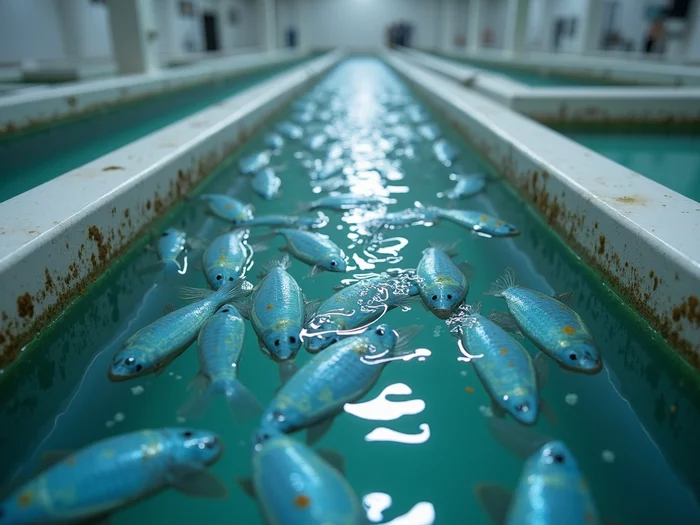
Constructing Cost-Effective Breeding Ponds
You need dedicated breeding ponds that are separate from your grow-out facilities, with dimensions of 10m x 10m x 1.2m deep for optimal Nile tilapia spawning. The shallow areas (0.6-0.8m deep) provide ideal nesting sites for males, whilst deeper sections offer refuge for brooding females. Use clay-lined ponds where possible, as the natural substrate allows males to excavate proper nests, which is essential for successful spawning behaviour.
Your breeding pond construction can cost as little as KES 15,000-25,000 using local materials and labour. Excavate during dry seasons when soil is easier to work, and line with locally sourced clay or purchase 0.5mm HDPE liners from suppliers in Nairobi or Lagos. Install simple inlet and outlet pipes using 4-inch PVC, positioning the inlet at the shallow end and outlet at the deep end to create gentle water circulation that mimics natural stream conditions.
Managing Water Quality and Temperature
You must maintain water temperature between 26-30°C for optimal Nile tilapia breeding, using simple monitoring techniques that don't require expensive equipment. Check temperature twice daily using digital thermometers, and install shade cloth (70% shade) over 30-40% of the pond surface to prevent overheating during hot seasons. In cooler regions like highland areas of Kenya or Ethiopia, consider deeper ponds (1.5-2m) that retain heat better and maintain more stable temperatures.
Your water quality management requires weekly testing of pH (6.5-8.5), dissolved oxygen (above 5 mg/L), and ammonia levels (below 0.5 mg/L) using test kits available from aquaculture suppliers. Install simple paddle wheel aerators or venturi systems during periods of high fish density, and maintain 20-30% weekly water exchanges using clean borehole or treated surface water. Poor water quality delays spawning by 2-3 weeks and reduces fry survival rates significantly.
Using Hapas for Controlled Breeding
You can dramatically improve breeding success by using hapas (fine mesh enclosures) that allow controlled mating whilst protecting eggs and fry from predators. Construct hapas using 1mm mesh netting with dimensions of 2m x 2m x 1m deep, suspended in your breeding pond using bamboo or PVC frames. This system allows you to monitor individual breeding pairs and collect fry more efficiently than pond breeding.
Your hapa breeding system should include separate compartments for different breeding stages—spawning hapas for broodstock pairs, nursery hapas for mouth-brooding females, and fry rearing hapas for newly released offspring. A successful farmer in Mwanza, Tanzania increased his fry collection efficiency by 80% using this multi-stage hapa system, collecting an average of 200-300 fry per female compared to 50-80 fry using pond breeding methods.
💡 Pro Tip: Hapa Positioning
Position your breeding hapas in the shallow areas of ponds where water temperature is most stable and males can establish territories easily. Anchor hapas securely but allow slight movement with water currents to maintain good water circulation and oxygen levels.
Essential Equipment and Materials for Hatchery Setup
Your basic hatchery setup requires concrete or fibreglass tanks (1000-2000 litres), simple aeration systems, and water heating elements for temperature control during cooler months. Source 1000-litre fibreglass tanks from suppliers in Kampala or Accra for USD 200-300, and install basic air pumps with air stones for continuous aeration. Include backup power systems using solar panels or small generators to maintain aeration during power outages.
You need additional equipment including fine mesh nets for fry collection, grading sieves with different mesh sizes (1mm, 2mm, 3mm), and water quality testing kits for monitoring critical parameters. Budget approximately USD 800-1200 for a complete small-scale hatchery setup including tanks, aeration, heating, and monitoring equipment. Local suppliers in Nigeria, Kenya, and Ghana often provide package deals that include installation and basic training for new hatchery operators.
Efficient Fry Production and Rearing
You lose more money during the fry rearing stage than any other phase of tilapia production, yet this is also where proper management can generate the highest profits. Fry mortality rates of 60-80% are common among inexperienced farmers, but with correct techniques, you can achieve survival rates above 70% and produce high-quality fingerlings that command premium prices in local markets.
The critical period for fry survival is the first 2-3 weeks after they become free-swimming, when they're most vulnerable to predation, disease, and nutritional deficiencies. During this stage, your management decisions directly impact not only survival rates but also the growth rates and health of surviving fingerlings. A farmer in Tamale, Ghana increased his fry survival from 40% to 75% simply by improving his feeding schedule and water quality monitoring during this critical period.
This section teaches you proven techniques for maximising fry production and survival rates using practical methods that work in African farming conditions. You'll learn how to collect fry efficiently, provide appropriate nutrition for rapid growth, and prevent common problems that cause massive losses during the vulnerable early stages of development.
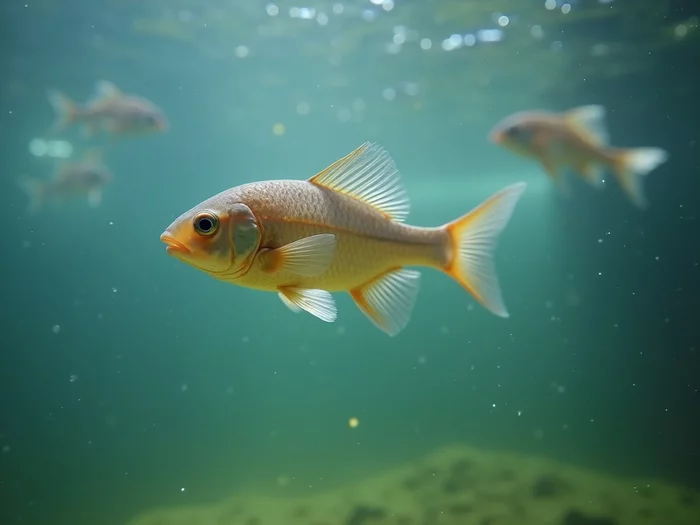
Techniques for Fry Collection and Grading
You must collect fry from mouth-brooding females at the right time—typically 10-14 days after spawning when fry are free-swimming but still small enough to be vulnerable to predation. Gently net brooding females and carefully open their mouths using your thumb and forefinger to release the fry into a collection container filled with pond water. Handle females gently to avoid injury, as stressed or injured broodstock may refuse to spawn again for several weeks.
Your fry grading process should begin immediately after collection, separating fry by size using grading sieves with 2mm, 3mm, and 4mm mesh sizes. Uniform-sized groups grow more consistently and compete less for food, resulting in better overall survival rates. Grade fry weekly during the first month, as size differences become more pronounced with growth. Farmers in Kisumu who implement regular grading report 30% better growth uniformity compared to those who rear mixed-size groups together.
Nutritional Requirements During Fry Rearing
Your fry require high-protein feeds containing 45-50% protein during the first 4 weeks of life to support rapid growth and development. Use finely ground commercial fry feeds or create your own by grinding quality fingerling pellets through a 0.5mm sieve. Feed fry 6-8 times daily during daylight hours, providing small amounts they can consume within 10-15 minutes to prevent water quality deterioration from uneaten feed.
You can supplement commercial feeds with locally available protein sources like finely ground fish meal, termite meal, or boiled egg yolk during the first week when fry are transitioning from yolk sac nutrition to external feeding. A successful farmer in Kumasi, Ghana reduces his fry feed costs by 25% using a mixture of commercial fry feed (70%) and locally processed fish meal (30%), whilst maintaining excellent growth rates and survival.
Health Monitoring and Disease Prevention
You need to monitor fry health daily, looking for signs of stress such as erratic swimming behaviour, loss of appetite, or abnormal colouration that might indicate disease problems. Maintain water temperature between 28-30°C and dissolved oxygen levels above 6 mg/L, as fry are more sensitive to environmental fluctuations than adult fish. Check for common problems like bacterial infections (white patches on skin), fungal infections (cotton-like growths), or parasites (excessive mucus production).
Your disease prevention strategy should focus on maintaining excellent water quality through regular water changes (20-30% daily), proper feeding practices that prevent overfeeding, and quarantine procedures for new fry batches. Use simple treatments like salt baths (3-5g/L for 10-15 minutes) for minor fungal infections, but consult local aquaculture extension officers for serious disease outbreaks that might require antibiotic treatments.
Common Challenges in Fry Rearing and Solutions
Your biggest challenge will be maintaining stable water quality in small rearing tanks where waste accumulates quickly and oxygen levels can drop rapidly. Install continuous aeration systems and perform daily water changes of 20-30%, siphoning waste from tank bottoms whilst being careful not to remove fry with the waste water. Use fine mesh screens on outlet pipes to prevent accidental fry loss during water changes.
Cannibalism becomes a serious problem when fry reach 2-3 weeks old and size differences become pronounced, with larger fry eating smaller siblings. Prevent this by grading fry weekly and providing adequate feeding frequency (6-8 times daily) so that well-fed fry are less likely to prey on smaller individuals. A farmer in Mombasa eliminated cannibalism losses by implementing strict size grading and increasing feeding frequency from 4 to 7 times daily, improving overall survival rates by 40%.
Harvesting and Market Readiness
You can have the healthiest, fastest-growing tilapia in your region, but without proper timing and market preparation, you'll still struggle to make consistent profits. Most small-scale farmers in Africa harvest randomly based on immediate cash needs rather than optimal fish size or market conditions, often selling undersized fish at low prices during oversupply periods when everyone else is also harvesting.
Strategic harvesting requires understanding your local market cycles, customer preferences, and seasonal price fluctuations that can mean the difference between profit and loss. In Lagos, Nigeria, tilapia prices can vary by 40-60% between peak and low-demand periods, but only farmers who plan their breeding schedules 6 months in advance can capitalise on these price premiums. Your harvesting strategy should align production with market demand, not just pond capacity or cash flow needs.
This section teaches you how to time your harvests for maximum profitability, prepare fish to meet market quality standards, and develop relationships with buyers who pay premium prices for consistently sized, healthy tilapia. You'll learn practical techniques that successful farmers across East and West Africa use to command higher prices and build loyal customer bases.
Timing Your Harvest for Optimal Growth
You should harvest Nile tilapia when they reach 300-400g (approximately 25-30cm length), which typically occurs 6-8 months after stocking fingerlings in well-managed ponds. Monitor fish growth monthly by sampling 10-15 fish from different areas of your pond, weighing and measuring them to track growth rates and predict harvest timing. Fish that reach market size during peak demand periods can sell for 20-30% higher prices than those harvested during low-demand months.
Your harvest timing should consider seasonal market patterns in your region—in Kenya, demand peaks during school holidays (April, August, December) and religious celebrations when families increase fish consumption. Plan your breeding schedules so that fish reach optimal size during these high-demand periods. A farmer in Nakuru increased his annual income by 35% simply by timing harvests to coincide with local festival seasons when restaurants and hotels pay premium prices for quality tilapia.
Preparing for Market: Size and Quality Considerations
Your market preparation begins 2-3 weeks before harvest by reducing feeding rates to 1-2% of body weight daily, which helps fish empty their digestive systems and improves flesh quality. Grade your fish by size before harvest, separating them into market categories: small (250-350g), medium (350-450g), and large (450g+). Different market segments prefer different sizes—restaurants often want uniform medium-sized fish, whilst households may prefer smaller, more affordable options.
You need to maintain fish quality through proper handling techniques that prevent stress and physical damage. Use seine nets with fine mesh to avoid scale loss and bruising, and handle fish gently during grading and transport. Fresh fish should have bright, clear eyes, red gills, firm flesh, and no off-odours. Farmers in Tamale, Ghana who focus on quality preparation consistently receive 15-20% higher prices than those who neglect proper handling procedures.
Aligning Breeding with Market Demand Cycles
You must understand your local market demand patterns and plan breeding schedules accordingly, working backwards from desired harvest dates to determine optimal spawning times. In Nigeria, tilapia demand increases significantly during Ramadan, Christmas, and New Year celebrations, requiring you to initiate breeding 8-9 months earlier to have market-size fish ready. Keep detailed records of local price fluctuations throughout the year to identify the most profitable harvest windows.
Your breeding schedule should also consider competition from other local farmers and seasonal fish availability from capture fisheries. During rainy seasons when wild fish are abundant, farmed tilapia prices often drop, so plan your harvests for dry seasons when wild fish supplies are limited. A cooperative group in Mwanza, Tanzania coordinates breeding schedules among members to avoid oversupplying local markets, maintaining stable prices throughout the year.
Understanding market dynamics and timing your production cycles correctly is crucial for managing fish growth cycles to improve your fish farm cash flow, as proper planning ensures you have market-ready fish when demand and prices are highest.
⚠️ Warning: Market Oversupply
Never harvest all your ponds simultaneously unless you have confirmed buyers. Oversupplying your local market forces you to accept low prices or risk fish mortality from overcrowded holding facilities. Stagger your harvests over 2-3 weeks to maintain steady supply and better prices.
Post-Harvest Handling and Storage Techniques
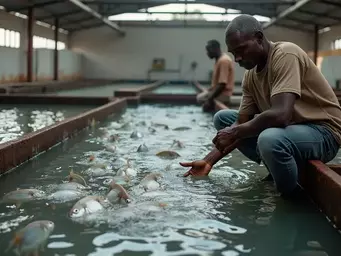
Your post-harvest handling begins immediately after netting, with fish placed in clean, aerated holding tanks or live wells to maintain freshness until sale or processing. Keep fish alive as long as possible, as live fish command 20-30% higher prices than fresh dead fish in most African markets. Use insulated containers with ice for transportation to distant markets, maintaining fish temperature between 0-4°C to preserve quality and extend shelf life.
You can extend your market reach by developing simple processing capabilities like gutting, scaling, and filleting services that add value and command higher prices. Invest in basic processing equipment including sharp knives, cutting boards, and packaging materials available from suppliers in major cities. Farmers near Accra, Ghana who offer cleaned, packaged fish earn 25-40% more per kilogram than those selling whole, unprocessed fish, whilst also accessing higher-value restaurant and hotel markets.
Troubleshooting Common Breeding Issues
You will encounter breeding problems regardless of how carefully you plan and manage your operation—this is normal and expected in tilapia farming. The difference between successful and failing farmers lies not in avoiding problems entirely, but in quickly identifying issues and implementing effective solutions before small problems become catastrophic losses. Most breeding failures result from a combination of factors rather than single causes, making diagnosis and correction more challenging for inexperienced farmers.
Common breeding issues like spawning failures, high fry mortality, and disease outbreaks often share similar underlying causes: poor water quality, inadequate nutrition, or environmental stress. Learning to recognise early warning signs allows you to intervene before problems escalate. A farmer in Kisii, Kenya prevented a complete breeding failure by recognising subtle changes in broodstock behaviour and adjusting water quality parameters before spawning completely stopped.
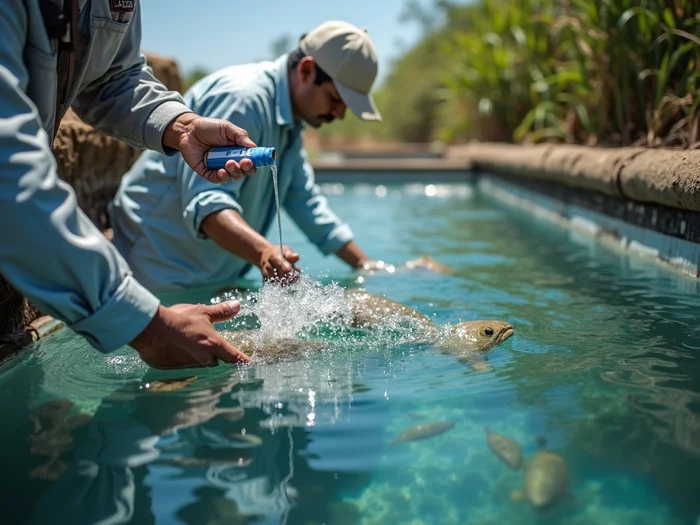
This section provides practical troubleshooting guides for the most common breeding problems faced by small-scale tilapia farmers across Africa. You'll learn systematic approaches to problem diagnosis, immediate corrective actions, and long-term prevention strategies that protect your investment and maintain consistent production throughout the breeding season.
Identifying and Addressing Breeding Failures
You can identify breeding failures through several warning signs: broodstock showing no territorial or nesting behaviour after 2-3 weeks in breeding ponds, females not carrying eggs or fry in their mouths, or consistently low fry numbers from previously productive breeding pairs. Check water temperature first, as temperatures below 24°C or above 32°C significantly reduce Nile tilapia spawning activity. Use digital thermometers to monitor daily temperature fluctuations and install shade covers or deeper water areas to maintain optimal ranges.
Your immediate response to breeding failures should include comprehensive water quality testing for pH, dissolved oxygen, ammonia, and nitrite levels, followed by corrective actions based on test results. Replace 30-50% of pond water if ammonia exceeds 0.5 mg/L or pH falls outside the 6.5-8.5 range. Examine broodstock for external parasites, injuries, or signs of disease that might affect reproductive behaviour. A farmer in Eldoret, Kenya restored breeding activity by addressing high ammonia levels (2.1 mg/L) through increased water exchange and reduced feeding rates.
Dealing with Environmental Stressors
You must recognise environmental stressors that affect breeding performance, including sudden temperature changes, poor water quality, overcrowding, and inadequate shelter or nesting sites. Nile tilapia are particularly sensitive to rapid temperature fluctuations greater than 3-4°C per day, which can cause spawning delays or complete reproductive shutdown. Install simple wind barriers using shade cloth or plant natural windbreaks around ponds to reduce temperature fluctuations caused by wind and evaporation.
Your stress reduction strategies should include providing adequate hiding places using clay pots, concrete blocks, or natural vegetation where broodstock can establish territories and feel secure. Maintain proper stocking densities of 1-2 breeding pairs per 10 square metres to prevent overcrowding stress. Monitor fish behaviour daily, looking for signs of stress such as rapid gill movement, loss of appetite, or abnormal swimming patterns that indicate environmental problems requiring immediate attention.
Solutions for Disease Outbreaks in Breeding Stock
You need to recognise common disease symptoms in breeding stock including white spots or patches on skin (bacterial infections), cotton-like growths (fungal infections), red or inflamed gills (gill disease), or unusual swimming behaviour such as spinning or surface gasping. Isolate affected fish immediately in separate treatment tanks to prevent disease spread to healthy broodstock. Most bacterial infections respond well to salt treatments (5-10g/L for 10-15 minutes daily) or antibiotic treatments available from veterinary suppliers in major cities.
Your disease prevention programme should emphasise biosecurity measures including quarantine periods for new broodstock, regular health monitoring, and maintaining optimal water quality to boost fish immune systems. Disinfect nets, containers, and equipment between ponds using diluted bleach solutions (1:10 ratio), and avoid introducing water or fish from unknown sources. Farmers in the Lake Victoria region who implement strict biosecurity protocols report 60% fewer disease outbreaks compared to those with casual disease prevention practices.
Implementing comprehensive water management systems is essential for preventing disease outbreaks and maintaining healthy breeding stock, as poor water quality is the underlying cause of most breeding failures and health problems in tilapia operations.
| Stage | Duration | Key Activities | Important Notes |
|---|---|---|---|
| Broodstock Conditioning | 2-3 weeks | Feed high-protein (35-40%) twice daily | Select healthy fish (200-300g females, 300-500g males) |
| Mating and Spawning | 10-14 days | Provide suitable substrates for spawning | Monitor water temperature (26-30°C) |
| Fry Rearing | 4-6 weeks | Feed high-protein (45-50%) 6-8 times daily | Grade fry weekly to prevent cannibalism |
| Harvesting | 6-8 months | Harvest at 300-400g (25-30cm) | Time harvests for peak market demand |
Conclusion
You now have a complete framework for implementing successful tilapia breeding schedules that align with market demand and maximise your profits. The key is starting with quality broodstock, maintaining proper breeding conditions, and timing your production cycles to meet peak demand periods. Remember that consistent water quality, adequate nutrition, and proper fry management determine your success more than expensive equipment.
Your breeding programme will improve with experience as you learn to read your fish behaviour and adjust management practices to local conditions. Start with one breeding cycle, document everything, and refine your approach based on results. The techniques covered here work for farmers across Africa—you have the knowledge to make them work on your farm.
Focus next on developing reliable market relationships and improving your post-harvest handling techniques. Strong breeding schedules mean nothing without buyers who value quality fish and pay fair prices. Build these connections whilst perfecting your production system, and you'll have a profitable tilapia operation that generates consistent income year-round.
Frequently Asked Questions
What if my female broodstock aren't releasing fry from their mouths?
If your female Nile or Blue tilapia broodstock are holding eggs but not releasing fry, it could be due to stress or extremely low water temperatures. Gently net the female and carefully open her mouth to manually release the fry into a separate container with clean, aerated water. Ensure your pond temperature is consistently between 26-30°C and check for signs of stress or poor water quality.
How often should I replace my broodstock to maintain good breeding performance?
You should aim to replace 25-30% of your broodstock annually with younger, vigorous fish to maintain high reproductive performance and prevent inbreeding. This means introducing new bloodlines every 12-18 months. Regularly monitor their spawning frequency and fry survival rates to identify when individual fish are becoming less productive.
Can I breed different types of tilapia, like Nile and Blue tilapia, together in the same pond?
While interbreeding between different tilapia species can occur, it's generally not recommended for commercial breeding as it often results in hybrid offspring with unpredictable growth rates and reduced fertility. For consistent and predictable fry production, it is best to keep Nile tilapia and Blue tilapia broodstock in separate breeding ponds or hapa systems. This ensures the genetic integrity of your desired species.
Why is it so important to grade my fry by size, especially in the first few weeks?
Grading your fry by size, especially weekly during the first month, is crucial to prevent cannibalism and ensure uniform growth. Larger fry will prey on smaller siblings if they are mixed, leading to significant losses. Uniform-sized groups also compete less for food, allowing all fish to grow consistently and leading to better overall survival rates and healthier fingerlings.
What's the best way to handle newly collected fry to minimise stress and mortality?
When collecting fry, always use fine mesh nets to avoid injury and transfer them immediately to a collection container filled with clean pond water. Minimise handling time and ensure the water in the collection container is at the same temperature and quality as the pond water. Gentle handling and rapid transfer to a well-prepared nursery system are key to reducing stress and improving survival rates.


Yomi Adisa Lead Researcher
Yomi Adisa is the lead researcher at Fish Farming Business, where he studies what makes aquaculture ventures profitable across Africa. His research focuses on market patterns, buyer preferences, and the business decisions that determine success or failure in fish farming.